<?xml version="1.0" encoding="utf-8"?><feed xmlns="http://www.w3.org/2005/Atom" ><generator uri="https://jekyllrb.com/" version="4.3.1">Jekyll</generator><link href="https://cookncode.com/feed/cooking.xml" rel="self" type="application/atom+xml" /><link href="https://cookncode.com/" rel="alternate" type="text/html" /><updated>2026-04-14T18:47:25+00:00</updated><id>https://cookncode.com/feed/cooking.xml</id><title type="html">Cook &amp;amp; Code | Cooking</title><subtitle>Personal projects and ideas.</subtitle><entry><title type="html">Up your falafel game with this easy hack</title><link href="https://cookncode.com/cooking/2023/03/05/falafel.html" rel="alternate" type="text/html" title="Up your falafel game with this easy hack" /><published>2023-03-05T00:00:00+00:00</published><updated>2026-04-14T18:42:22+00:00</updated><id>https://cookncode.com/cooking/2023/03/05/falafel</id><content type="html" xml:base="https://cookncode.com/cooking/2023/03/05/falafel.html"><![CDATA[<p>Falafel is delicious if you make it from scratch, but it can be quite time-consuming. The ready-made falafel or the dried mix you can buy is mediocre and doesn’t hold a candle to the real deal. But, I found an easy trick to improve the texture of the dry mix falafel by adding baking soda. The improved texture does wonders for the taste as well. Here’s how you can make it.</p>

<h1 id="ingredients">Ingredients</h1>

<p><strong>Serves 4. 30 minutes.</strong></p>

<ul>
  <li>200 g dry falafel mix (for example from <a href="https://www.coop.ch/en/food/inventories/staples/flour-sugar/flour/karma-bio-falafel-fertig-mischung-186g/p/4919878">coop</a>)</li>
  <li>2 teaspoons fresh lemon juice. You can also substitute it with vinegar or lime juice.</li>
  <li>0.5 teaspoon of baking soda or sodium bicarbonate (<a href="https://www.coop.ch/en/food/inventories/baking-ingredients/classic-baking-ingredients/baking-staples/betty-bossi-sodium-bicarbonate/p/4927507?context=search&amp;trackingtoken=searchrelevanz%7Carea1%7CA%7CSearchrelevanz%7CSearchrelevanz_ST2P%7CST2P">coop</a>)</li>
  <li>1.75 dl boiling water</li>
</ul>

<h1 id="recipe">Recipe</h1>

<p>This recipe makes the dry-mix falafel airier on the inside and gives it a nice crust.</p>

<ol>
  <li>Start by following the package instructions. In my case, I add to a bowl and mix
    <ul>
      <li>1.75 dl boiling water</li>
      <li>200 g dry falafel mix</li>
    </ul>
  </li>
  <li>Let it rest for 15 minutes.</li>
  <li>
    <p>Add to the bowl and mix</p>

    <ul>
      <li>2 teaspoons fresh lemon juice</li>
      <li>0.5 teaspoon of baking soda</li>
    </ul>

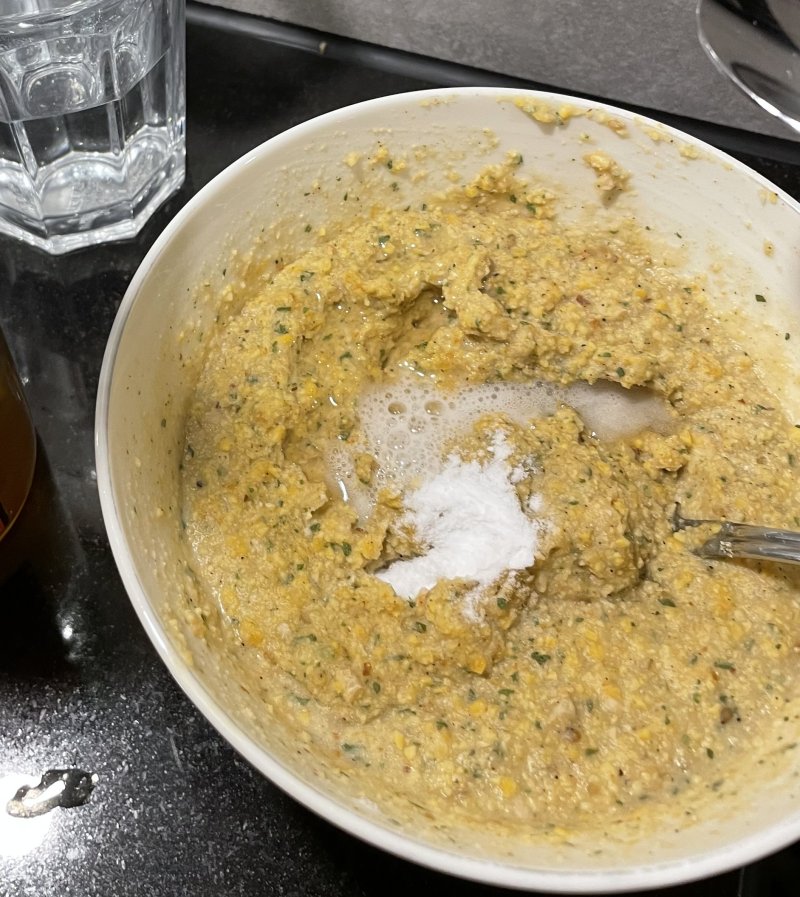
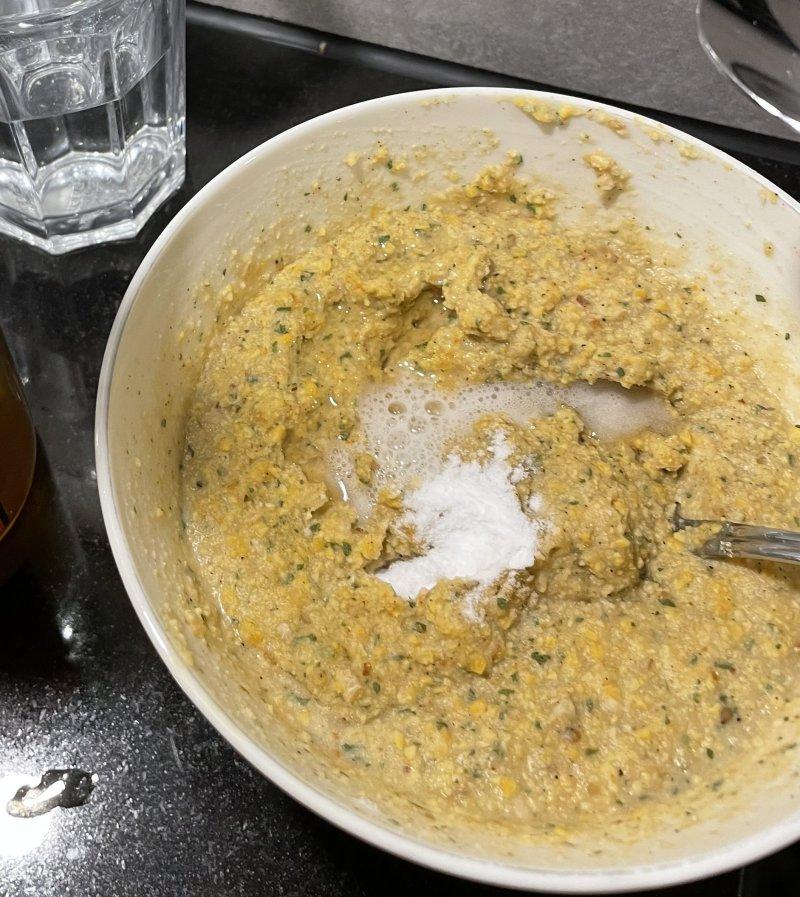
    <p>As soon as you add both, they start to bubble and form CO₂ and water.
<a href="/assets/2023-falafel/fizzing.jpg"><picture><source srcset="/generated/2023-falafel/fizzing-300-1ada9439a.webp 300w, /generated/2023-falafel/fizzing-500-1ada9439a.webp 500w, /generated/2023-falafel/fizzing-720-1ada9439a.webp 720w" type="image/webp"><source srcset="/generated/2023-falafel/fizzing-300-547a8ae4c.jpg 300w, /generated/2023-falafel/fizzing-500-547a8ae4c.jpg 500w, /generated/2023-falafel/fizzing-720-547a8ae4c.jpg 720w" type="image/jpeg"><img src="/generated/2023-falafel/fizzing-800-547a8ae4c.jpg" width="800" height="897"></picture></a></p>
  </li>
  <li>Heat a large skillet, once it’s hot add about 0.5 cm of olive oil or sunflower oil.</li>
  <li>With a spoon add some falafel mixture to the skillet. Usually, my mixture has a consistency that it forms a ~ 2 cm thick disc.</li>
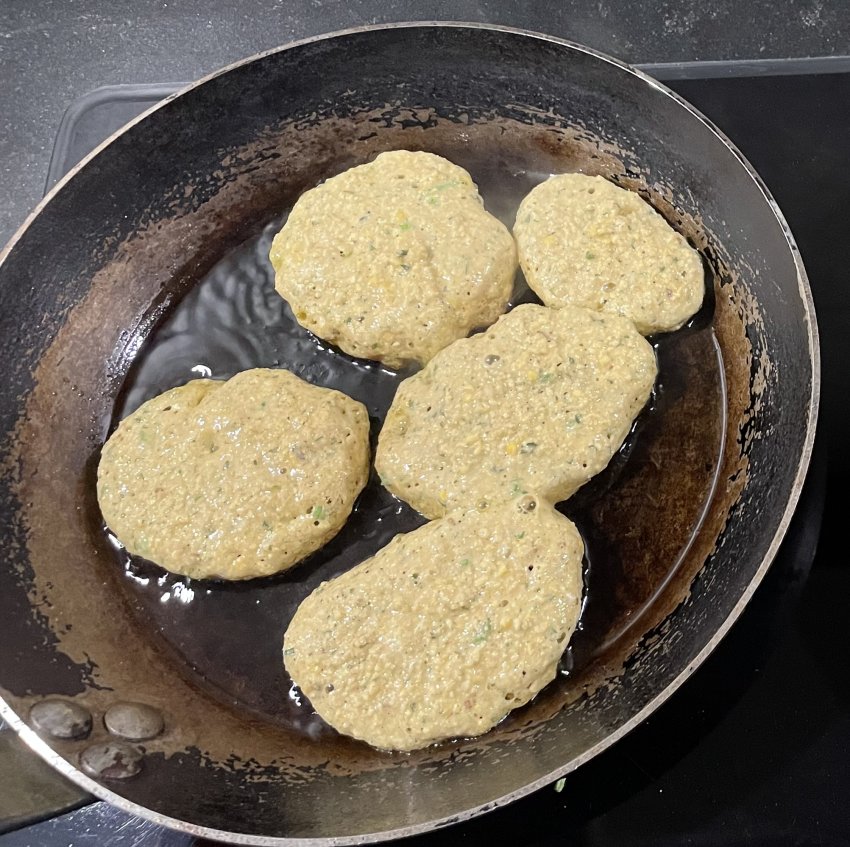
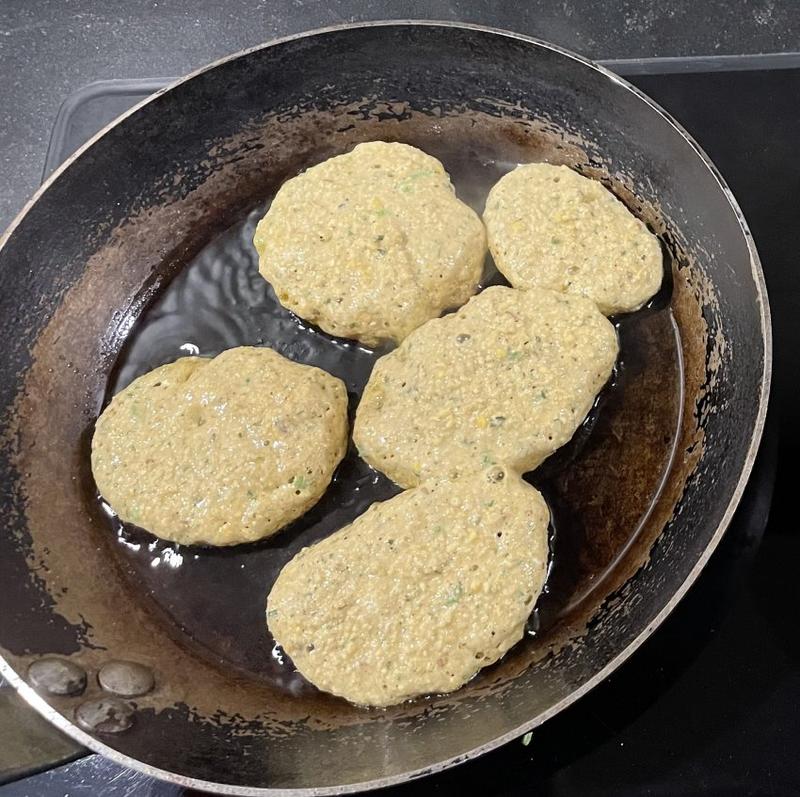
  <li>After a minute or so, you start to see bubbles which drift to the surface. That’s the CO₂ making your falafel nice and airy.
<a href="/assets/2023-falafel/baking.jpg"><picture><source srcset="/generated/2023-falafel/baking-300-c95bb13eb.webp 300w, /generated/2023-falafel/baking-500-c95bb13eb.webp 500w, /generated/2023-falafel/baking-720-c95bb13eb.webp 720w" type="image/webp"><source srcset="/generated/2023-falafel/baking-300-b5ca52a6e.jpg 300w, /generated/2023-falafel/baking-500-b5ca52a6e.jpg 500w, /generated/2023-falafel/baking-720-b5ca52a6e.jpg 720w" type="image/jpeg"><img src="/generated/2023-falafel/baking-800-b5ca52a6e.jpg" width="850" height="847"></picture></a></li>
  <li>Turn the falafel after a few minutes when it’s browned on one side. Turning can be tricky since the top is still liquid.</li>
  <li>When the second side is done, put the falafel patties on a double layer of kitchen paper to drain some of the excess fat.</li>
</ol>

<p>Enjoy in some pita bread or dürüm with some fried aubergine, pickled onions, tzatziki, hummus, pickled peppers or whatever strikes your mood.</p>

<h1 id="why-i-think-it-works">Why I think it works</h1>

<p>The baking soda makes the mixture slightly more alkaline, <a href="https://en.wikipedia.org/wiki/Maillard_reaction">speeding up the browning reaction</a>, which creates the crunchy exterior. I added the lemon juice to prevent the mixture from becoming too alkaline which can result in a soapy taste. In the end, the airy center due to the CO₂ was a positive by-product that I did not expect.</p>

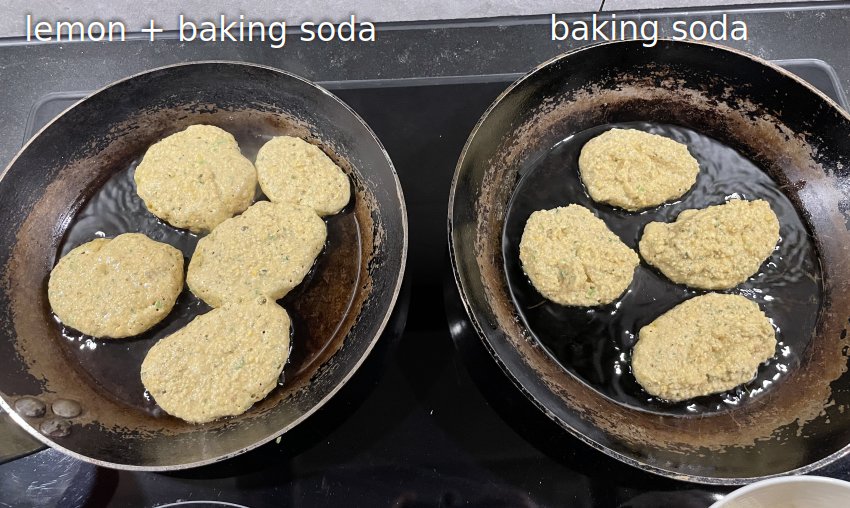
<p>I also tested a batch with only baking soda. This batch produced a browner exterior due to the alkalinity of the mixture. However, it also produced some CO₂, although not as much as the lemon + baking soda combination. Perhaps the falafel mixture is already slightly acidic by itself?</p>

<p><a href="/assets/2023-falafel/fizz_vs_no_fizz.jpg"><picture><source srcset="/generated/2023-falafel/fizz_vs_no_fizz-300-034771e09.webp 300w, /generated/2023-falafel/fizz_vs_no_fizz-500-034771e09.webp 500w, /generated/2023-falafel/fizz_vs_no_fizz-720-034771e09.webp 720w" type="image/webp"><source srcset="/generated/2023-falafel/fizz_vs_no_fizz-300-dd2a33c8d.jpg 300w, /generated/2023-falafel/fizz_vs_no_fizz-500-dd2a33c8d.jpg 500w, /generated/2023-falafel/fizz_vs_no_fizz-720-dd2a33c8d.jpg 720w" type="image/jpeg"><img src="/generated/2023-falafel/fizz_vs_no_fizz-800-dd2a33c8d.jpg" width="850" height="508"></picture></a>
<em>The lemon + baking soda combination puffs up the falafel, whereas baking soda alone doesn’t seem to have much effect during baking.</em></p>

<p><a href="/assets/2023-falafel/result.jpg"><picture><source srcset="/generated/2023-falafel/result-300-555d3e3b6.webp 300w, /generated/2023-falafel/result-500-555d3e3b6.webp 500w, /generated/2023-falafel/result-720-555d3e3b6.webp 720w" type="image/webp"><source srcset="/generated/2023-falafel/result-300-85cfac1c4.jpg 300w, /generated/2023-falafel/result-500-85cfac1c4.jpg 500w, /generated/2023-falafel/result-720-85cfac1c4.jpg 720w" type="image/jpeg"><img src="/generated/2023-falafel/result-800-85cfac1c4.jpg" width="850" height="296"></picture></a>
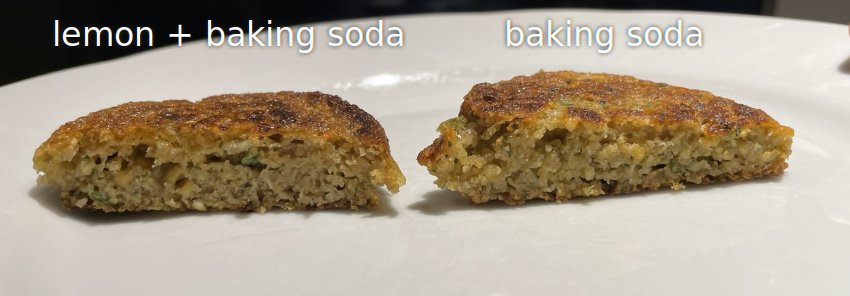
<em>But in the final result the baking soda alone has some air pockets.</em></p>

<p>Since the CO₂ made the falafel nice and airy, I also tried making a batch with baking powder. Using baking powder would make the recipe slightly easier because you only have to add one extra ingredient. <a href="https://en.wikipedia.org/wiki/Baking_powder">Baking powder</a> is a mixture of baking soda combined with some form of acid. Once baking powder dissolves in water, it starts to produce carbon dioxide. And once it’s heated, there is a second reaction that also produces CO₂.</p>

<p>I did one experiment where I added 2/3 of a teaspoon to the mixture at step 3. This falafel turned out the same as the one where I didn’t add anything. It didn’t become airy and also it browned the same as the standard recipe without additions. The fact that it didn’t brown like the baking soda batches is expected, because I assume that the base and the acid amounts are matched to not alter the pH of the mixture. However, I did expect to see some airiness, but that didn’t happen, or at least not noticeably.</p>

<h1 id="methods-and-results">Methods and results</h1>

<p>Below is an overview of the methods I tried and their results. The method refers to whether something is added in step 3 of the recipe.</p>

<table>
  <thead>
    <tr>
      <th>Method</th>
      <th>Result</th>
      <th>Grade</th>
    </tr>
  </thead>
  <tbody>
    <tr>
      <td>Baking soda + lemon juice</td>
      <td>Crunchy brown exterior, airy interior.</td>
      <td>8</td>
    </tr>
    <tr>
      <td>Only followed package instructions</td>
      <td>Soft crust, dense sticky interior</td>
      <td>6.5</td>
    </tr>
    <tr>
      <td>Baking powder</td>
      <td>Crunchy brown exterior, airy interior.</td>
      <td>6.5</td>
    </tr>
    <tr>
      <td>Baking soda</td>
      <td>Soft crust, dense sticky interior</td>
      <td>7.5</td>
    </tr>
  </tbody>
</table>

<p>Other than that, all preparation was kept the same as far as I remember. Most batches were made on separate days, with weeks between attempts. The only simultaneous batches were made where I added baking soda + lemon juice to one batch and only baking soda to a second one.</p>

<p>The amount of baking soda (or powder) and lemon juice did not vary. It was an initial guess/try. It could be that there is a better outcome with other ratios/amounts.</p>]]></content><author><name></name></author><category term="cooking" /><summary type="html"><![CDATA[Falafel is delicious if you make it from scratch, but it can be quite time-consuming. The ready-made falafel or the dried mix you can buy is mediocre and doesn’t hold a candle to the real deal. But, I found an easy trick to improve the texture of the dry mix falafel by adding baking soda. The improved texture does wonders for the taste as well. Here’s how you can make it.]]></summary></entry><entry><title type="html">The Best Vegan Chili</title><link href="https://cookncode.com/cooking/2021/08/08/vegan-chili.html" rel="alternate" type="text/html" title="The Best Vegan Chili" /><published>2021-08-08T00:00:00+00:00</published><updated>2026-04-14T18:42:22+00:00</updated><id>https://cookncode.com/cooking/2021/08/08/vegan-chili</id><content type="html" xml:base="https://cookncode.com/cooking/2021/08/08/vegan-chili.html"><![CDATA[<p>Easy, tasty, vegan, cheap, leftovers. A simplified and <em>Europeanized</em> version of <a href="https://www.seriouseats.com/best-vegetarian-bean-chili">The Best Vegetarian Chili</a> from <a href="https://www.goodreads.com/book/show/24861842-the-food-lab">The Food Lab</a> by J. Kenji López-Alt.</p>

<p>We left out the home made chili paste, because these chili’s are hard to find in Europe. If you can find them, go ahead and use them, but the taste is already great with the marmite/soysause + chipotle chilis!</p>

<h2 id="ingredients">Ingredients</h2>

<p><strong>6 servings, 0.5 hour active time + 1.5 hour semi active</strong></p>

<ul>
  <li>1 onion</li>
  <li>3 cloves garlic</li>
  <li>2x 400g cans chickpeas</li>
  <li>2x 400g cans brown beans</li>
  <li>2x 400g cans tomatoes (not diced)</li>
  <li>1.5 tablespoons ground cumin</li>
  <li>2 teaspoons oregano</li>
  <li>1 table spoon soy sauce</li>
  <li>1 teaspoon marmite or cenovis</li>
  <li>2 tablespoons chipotle chilis in adobo sauce (Buy at <a href="https://www.ah.nl/producten/product/wi414999/la-morena-chipotle-peper-in-adobo-saus">Albert Heijn 🇳🇱</a> or <a href="https://www.elmaiz.ch/">El Maiz Zürich 🇨🇭</a>)</li>
  <li>Optional base: rice, nachos, tortillas, bread, …</li>
  <li>Optional toppings: coriander, spring onions, jalapeños, lime, creme fraîche, cheese, avocado, …</li>
</ul>

<h2 id="recipe">Recipe</h2>

<ol>
  <li>
    <p>Drain the</p>

    <ul>
      <li>2 cans of chickpeas</li>
    </ul>

    <p>but reserve the liquid in a separate bowl. Put the chickpeas in a big bowl or pot with a flat base and mash with a potato masher until almost all of the chickpeas are broken. Add the</p>

    <ul>
      <li>2 cans of tomatoes</li>
    </ul>

    <p>and mash until the tomatoes are broken. Drain the</p>

    <ul>
      <li>2 cans of beans</li>
    </ul>

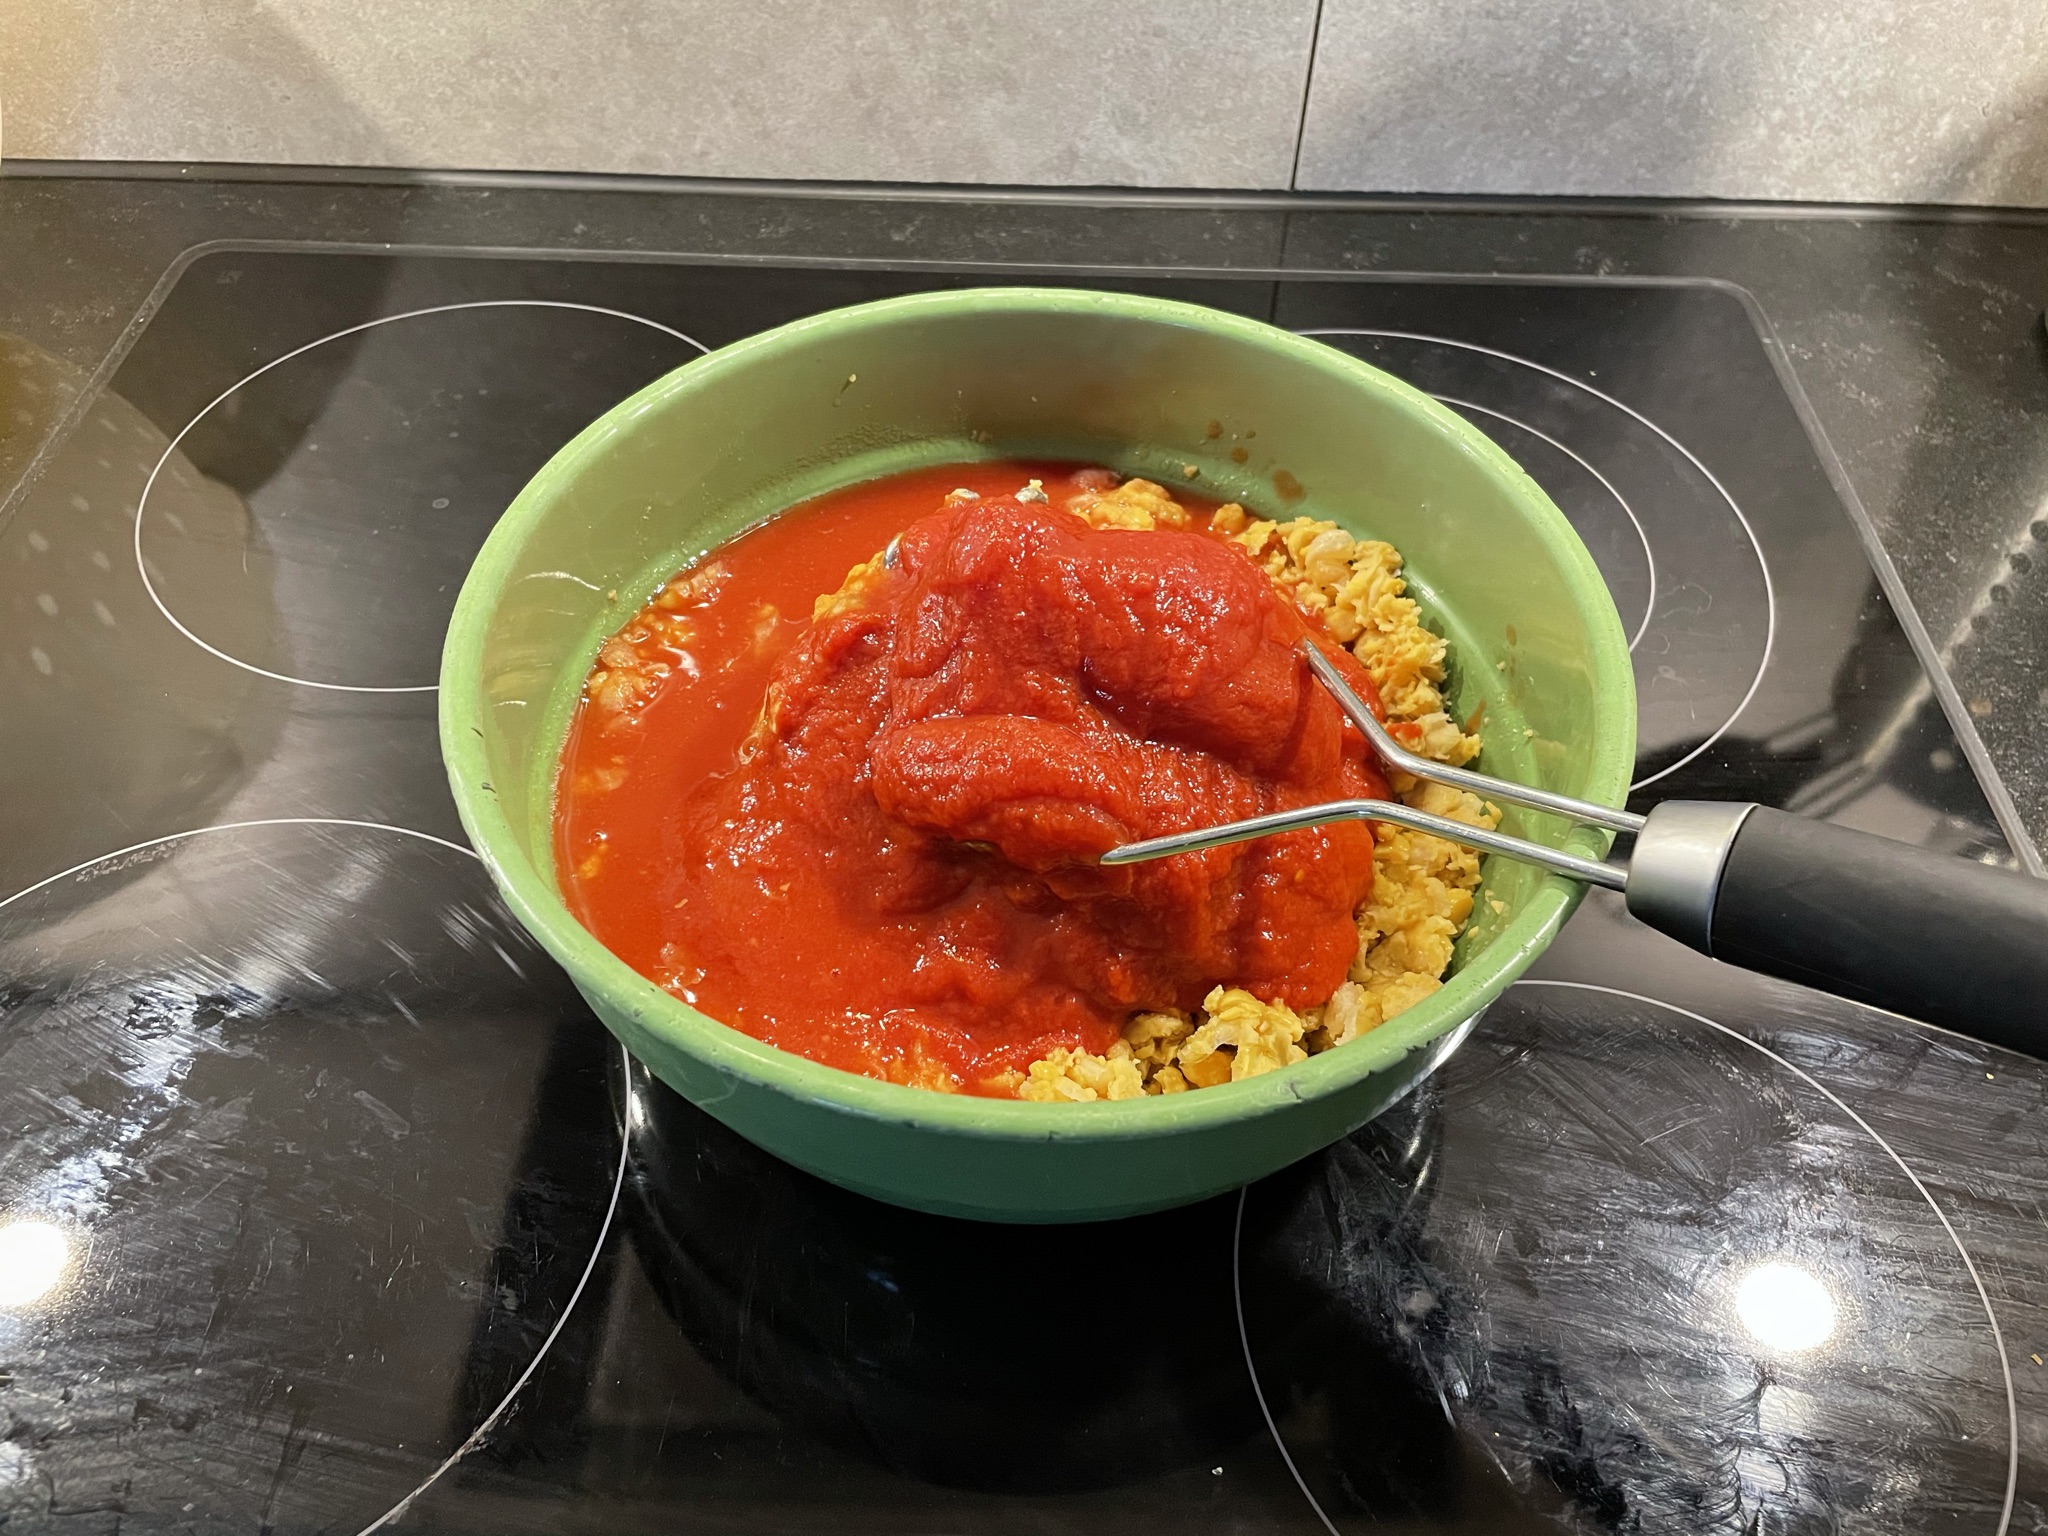
    <p>reserving the liquid. Add beans to the chickpea/tomato bowl. Add the</p>

    <ul>
      <li>2 tablespoons of chipotle chilis to the bowl.</li>
    </ul>

    <p><a href="/assets/cooking-kenji-vegan-chili/IMG_0298.JPEG"><picture><source srcset="/generated/cooking-kenji-vegan-chili/IMG_0298-300-fbe4c3852.webp 300w, /generated/cooking-kenji-vegan-chili/IMG_0298-500-fbe4c3852.webp 500w, /generated/cooking-kenji-vegan-chili/IMG_0298-720-fbe4c3852.webp 720w" type="image/webp"><source srcset="/generated/cooking-kenji-vegan-chili/IMG_0298-300-dd2d84dc6.jpeg 300w, /generated/cooking-kenji-vegan-chili/IMG_0298-500-dd2d84dc6.jpeg 500w, /generated/cooking-kenji-vegan-chili/IMG_0298-720-dd2d84dc6.jpeg 720w" type="image/jpeg"><img src="/generated/cooking-kenji-vegan-chili/IMG_0298-800-dd2d84dc6.jpeg" width="2048" height="1536"></picture></a></p>
  </li>
  <li>
    <p>Dice the</p>

    <ul>
      <li>onion</li>
    </ul>

    <p>and mince or press the</p>

    <ul>
      <li>3 garlic cloves.</li>
    </ul>

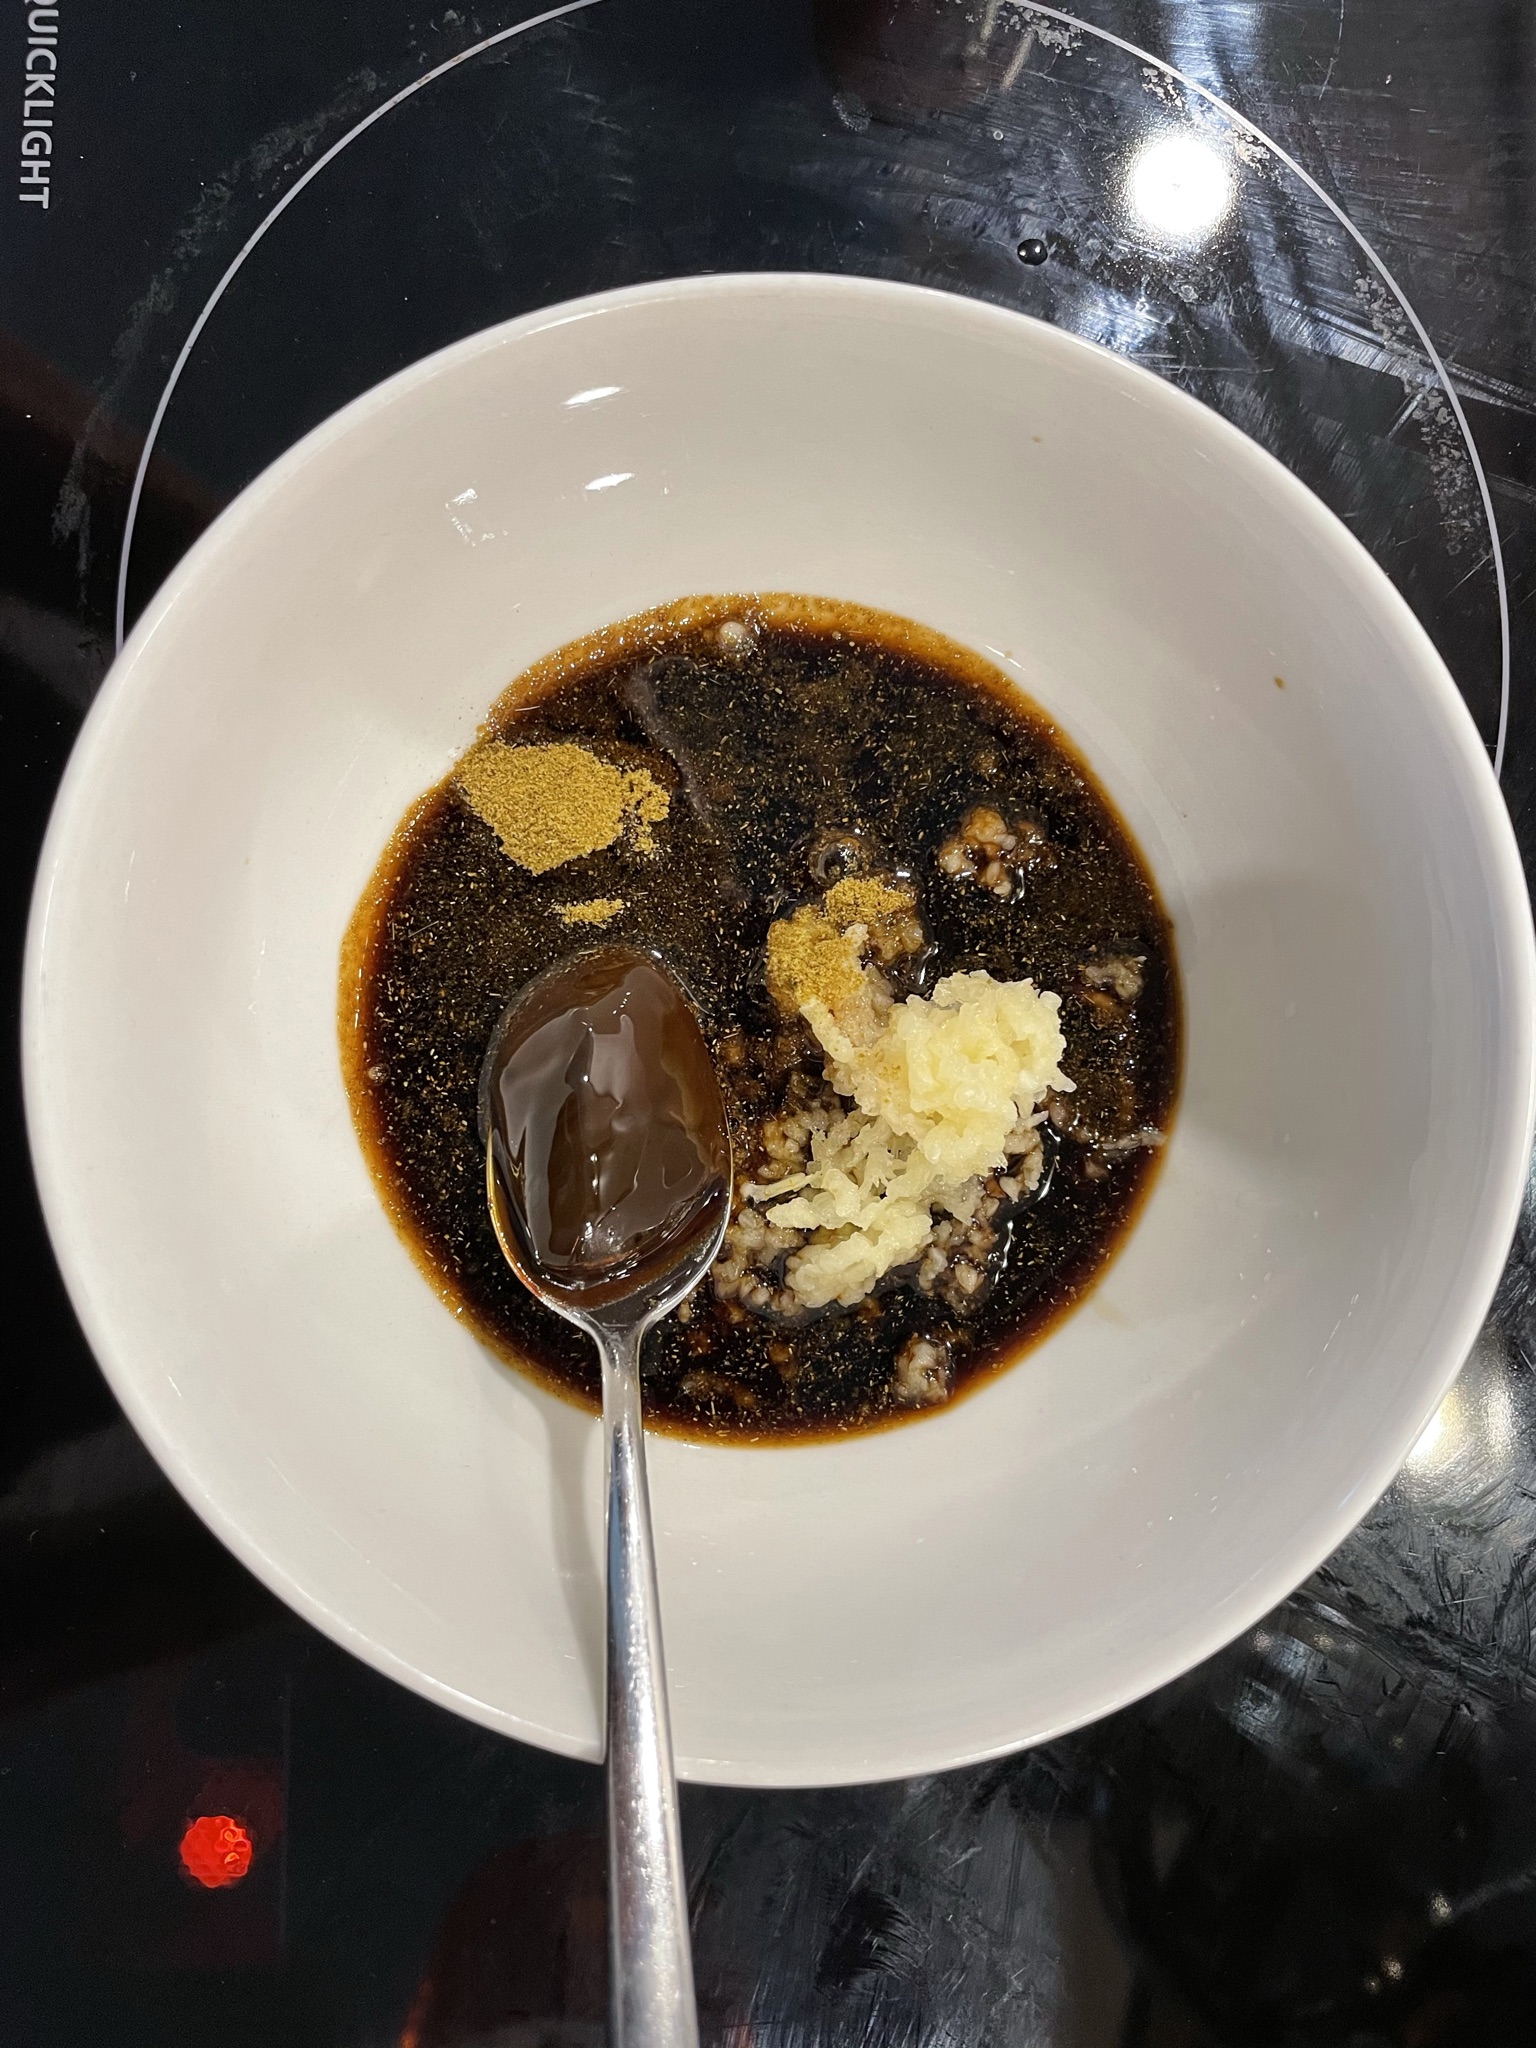
    <p>In a small bowl, combine</p>

    <ul>
      <li>3 garlic cloves,</li>
      <li>1.5 tbsp cumin,</li>
      <li>2 tsp oregano,</li>
      <li>1 tbsp soy sauce,</li>
      <li>1 tsp marmite.</li>
    </ul>

    <p><a href="/assets/cooking-kenji-vegan-chili/IMG_0305.JPEG"><picture><source srcset="/generated/cooking-kenji-vegan-chili/IMG_0305-300-2d2c72023.webp 300w, /generated/cooking-kenji-vegan-chili/IMG_0305-500-2d2c72023.webp 500w, /generated/cooking-kenji-vegan-chili/IMG_0305-720-2d2c72023.webp 720w" type="image/webp"><source srcset="/generated/cooking-kenji-vegan-chili/IMG_0305-300-b1d46ddbe.jpeg 300w, /generated/cooking-kenji-vegan-chili/IMG_0305-500-b1d46ddbe.jpeg 500w, /generated/cooking-kenji-vegan-chili/IMG_0305-720-b1d46ddbe.jpeg 720w" type="image/jpeg"><img src="/generated/cooking-kenji-vegan-chili/IMG_0305-800-b1d46ddbe.jpeg" width="1536" height="2048"></picture></a></p>
  </li>
  <li>
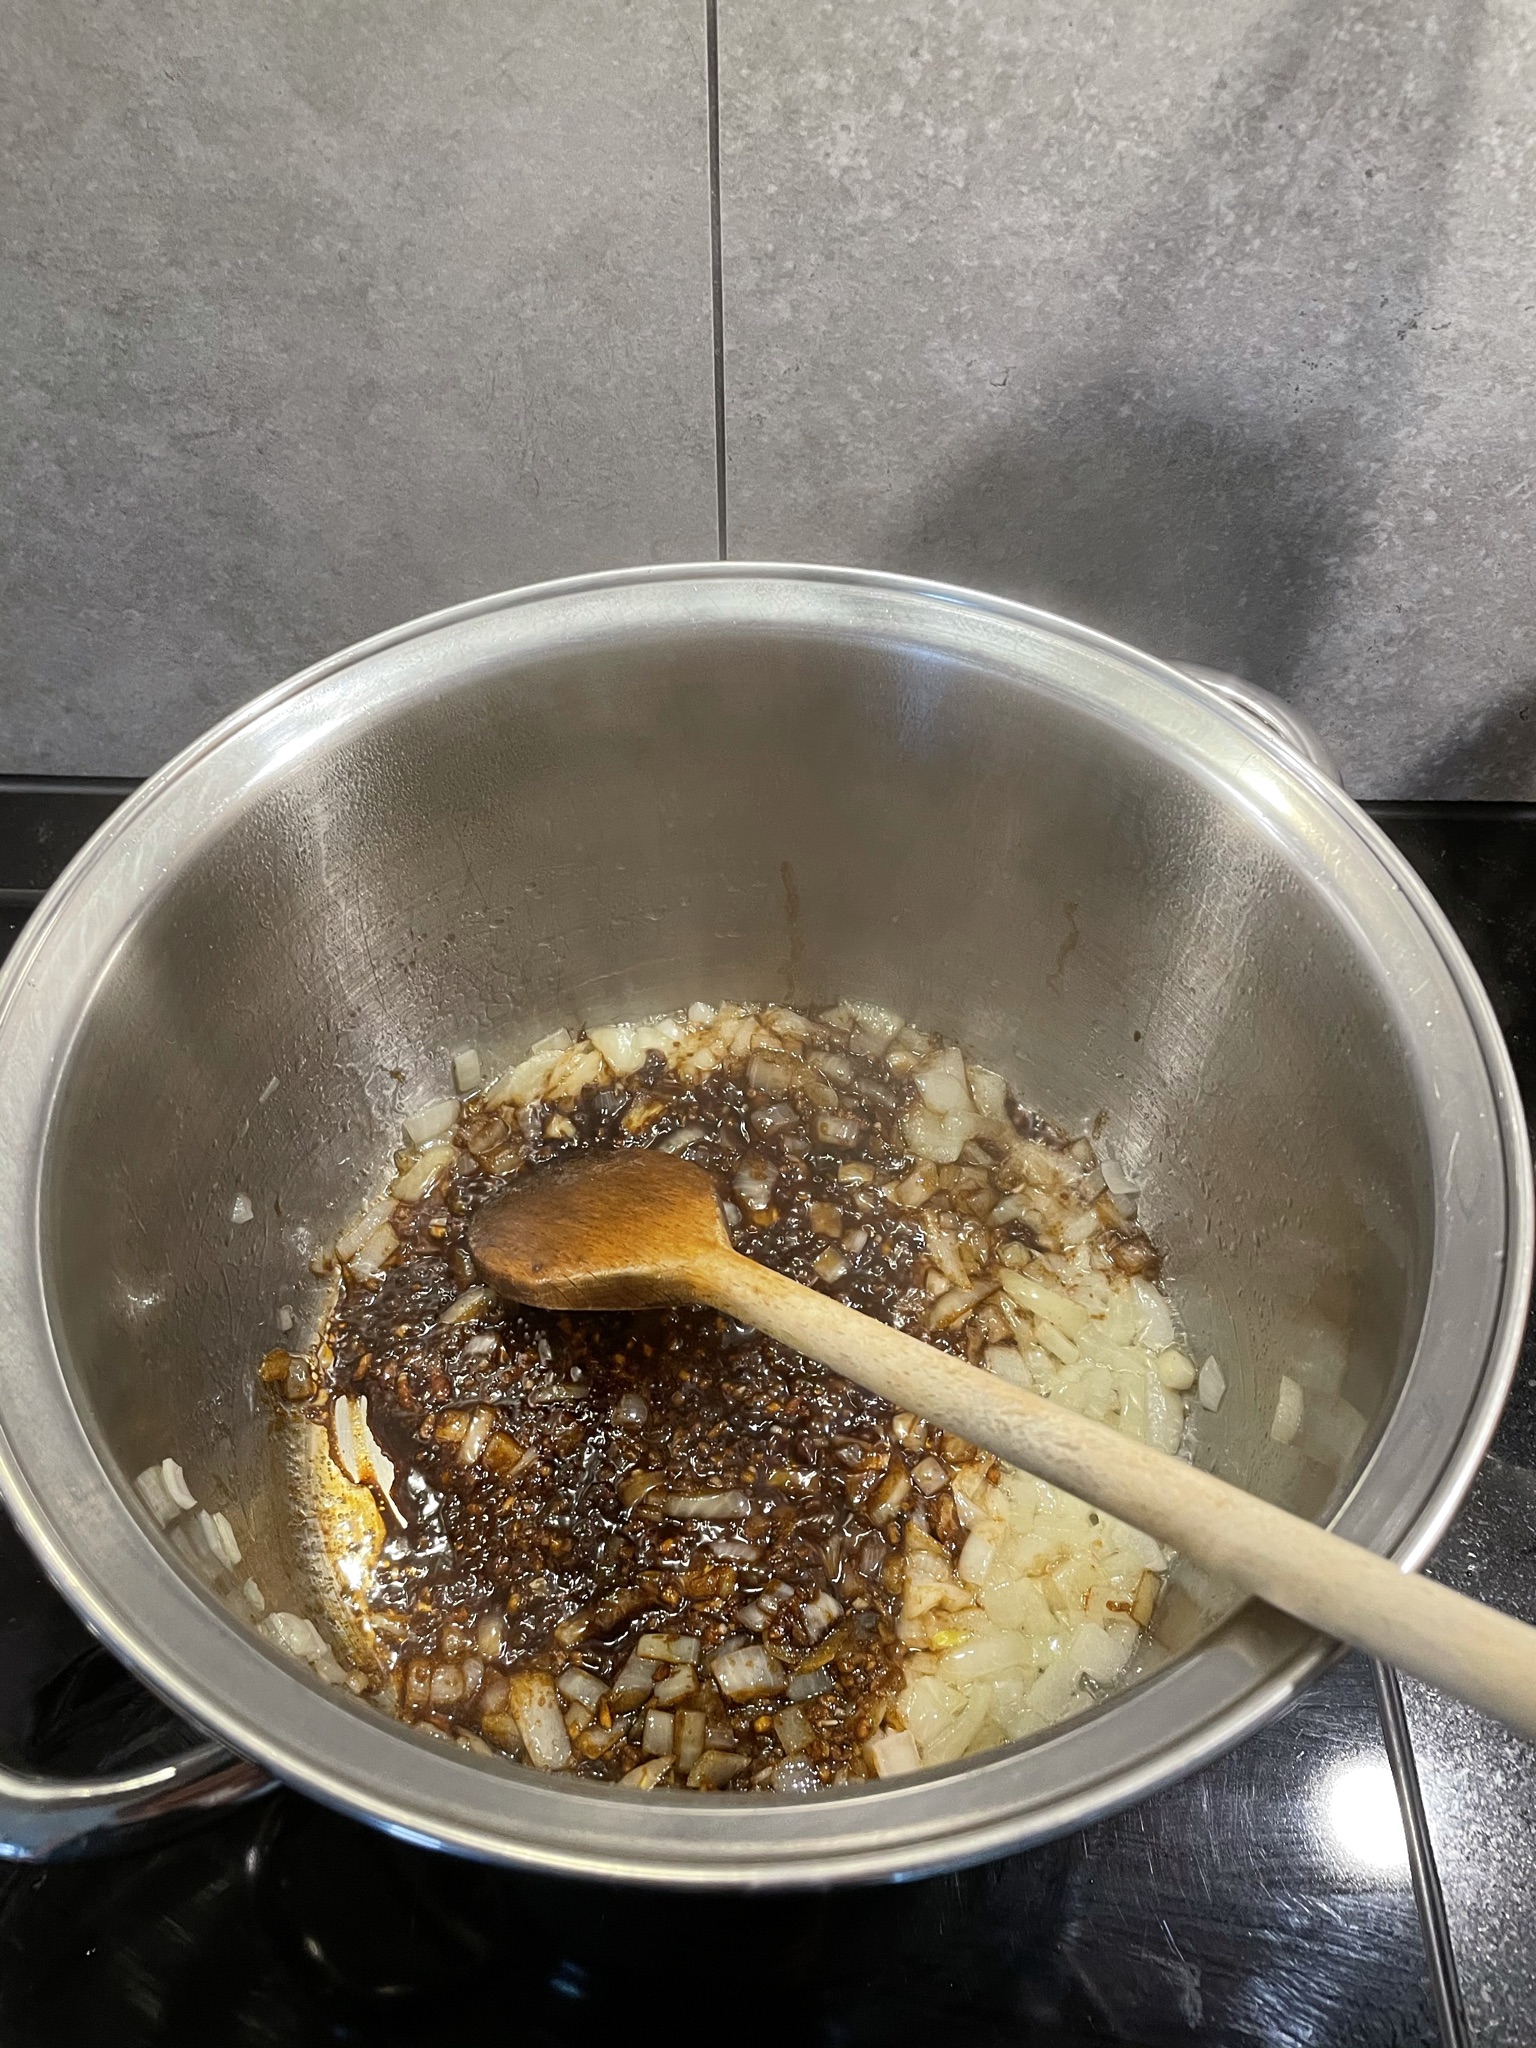
    <p>In a big pot, heat vegetable oil and cook the onion about 4 minutes, until softened but not brown. Add bowl with garlic and spices and cook stirringly until fragrant about 1 minute.</p>

    <p><a href="/assets/cooking-kenji-vegan-chili/IMG_0308.JPEG"><picture><source srcset="/generated/cooking-kenji-vegan-chili/IMG_0308-300-e27e83bbf.webp 300w, /generated/cooking-kenji-vegan-chili/IMG_0308-500-e27e83bbf.webp 500w, /generated/cooking-kenji-vegan-chili/IMG_0308-720-e27e83bbf.webp 720w" type="image/webp"><source srcset="/generated/cooking-kenji-vegan-chili/IMG_0308-300-3fbca12c4.jpeg 300w, /generated/cooking-kenji-vegan-chili/IMG_0308-500-3fbca12c4.jpeg 500w, /generated/cooking-kenji-vegan-chili/IMG_0308-720-3fbca12c4.jpeg 720w" type="image/jpeg"><img src="/generated/cooking-kenji-vegan-chili/IMG_0308-800-3fbca12c4.jpeg" width="1536" height="2048"></picture></a></p>
  </li>
  <li>
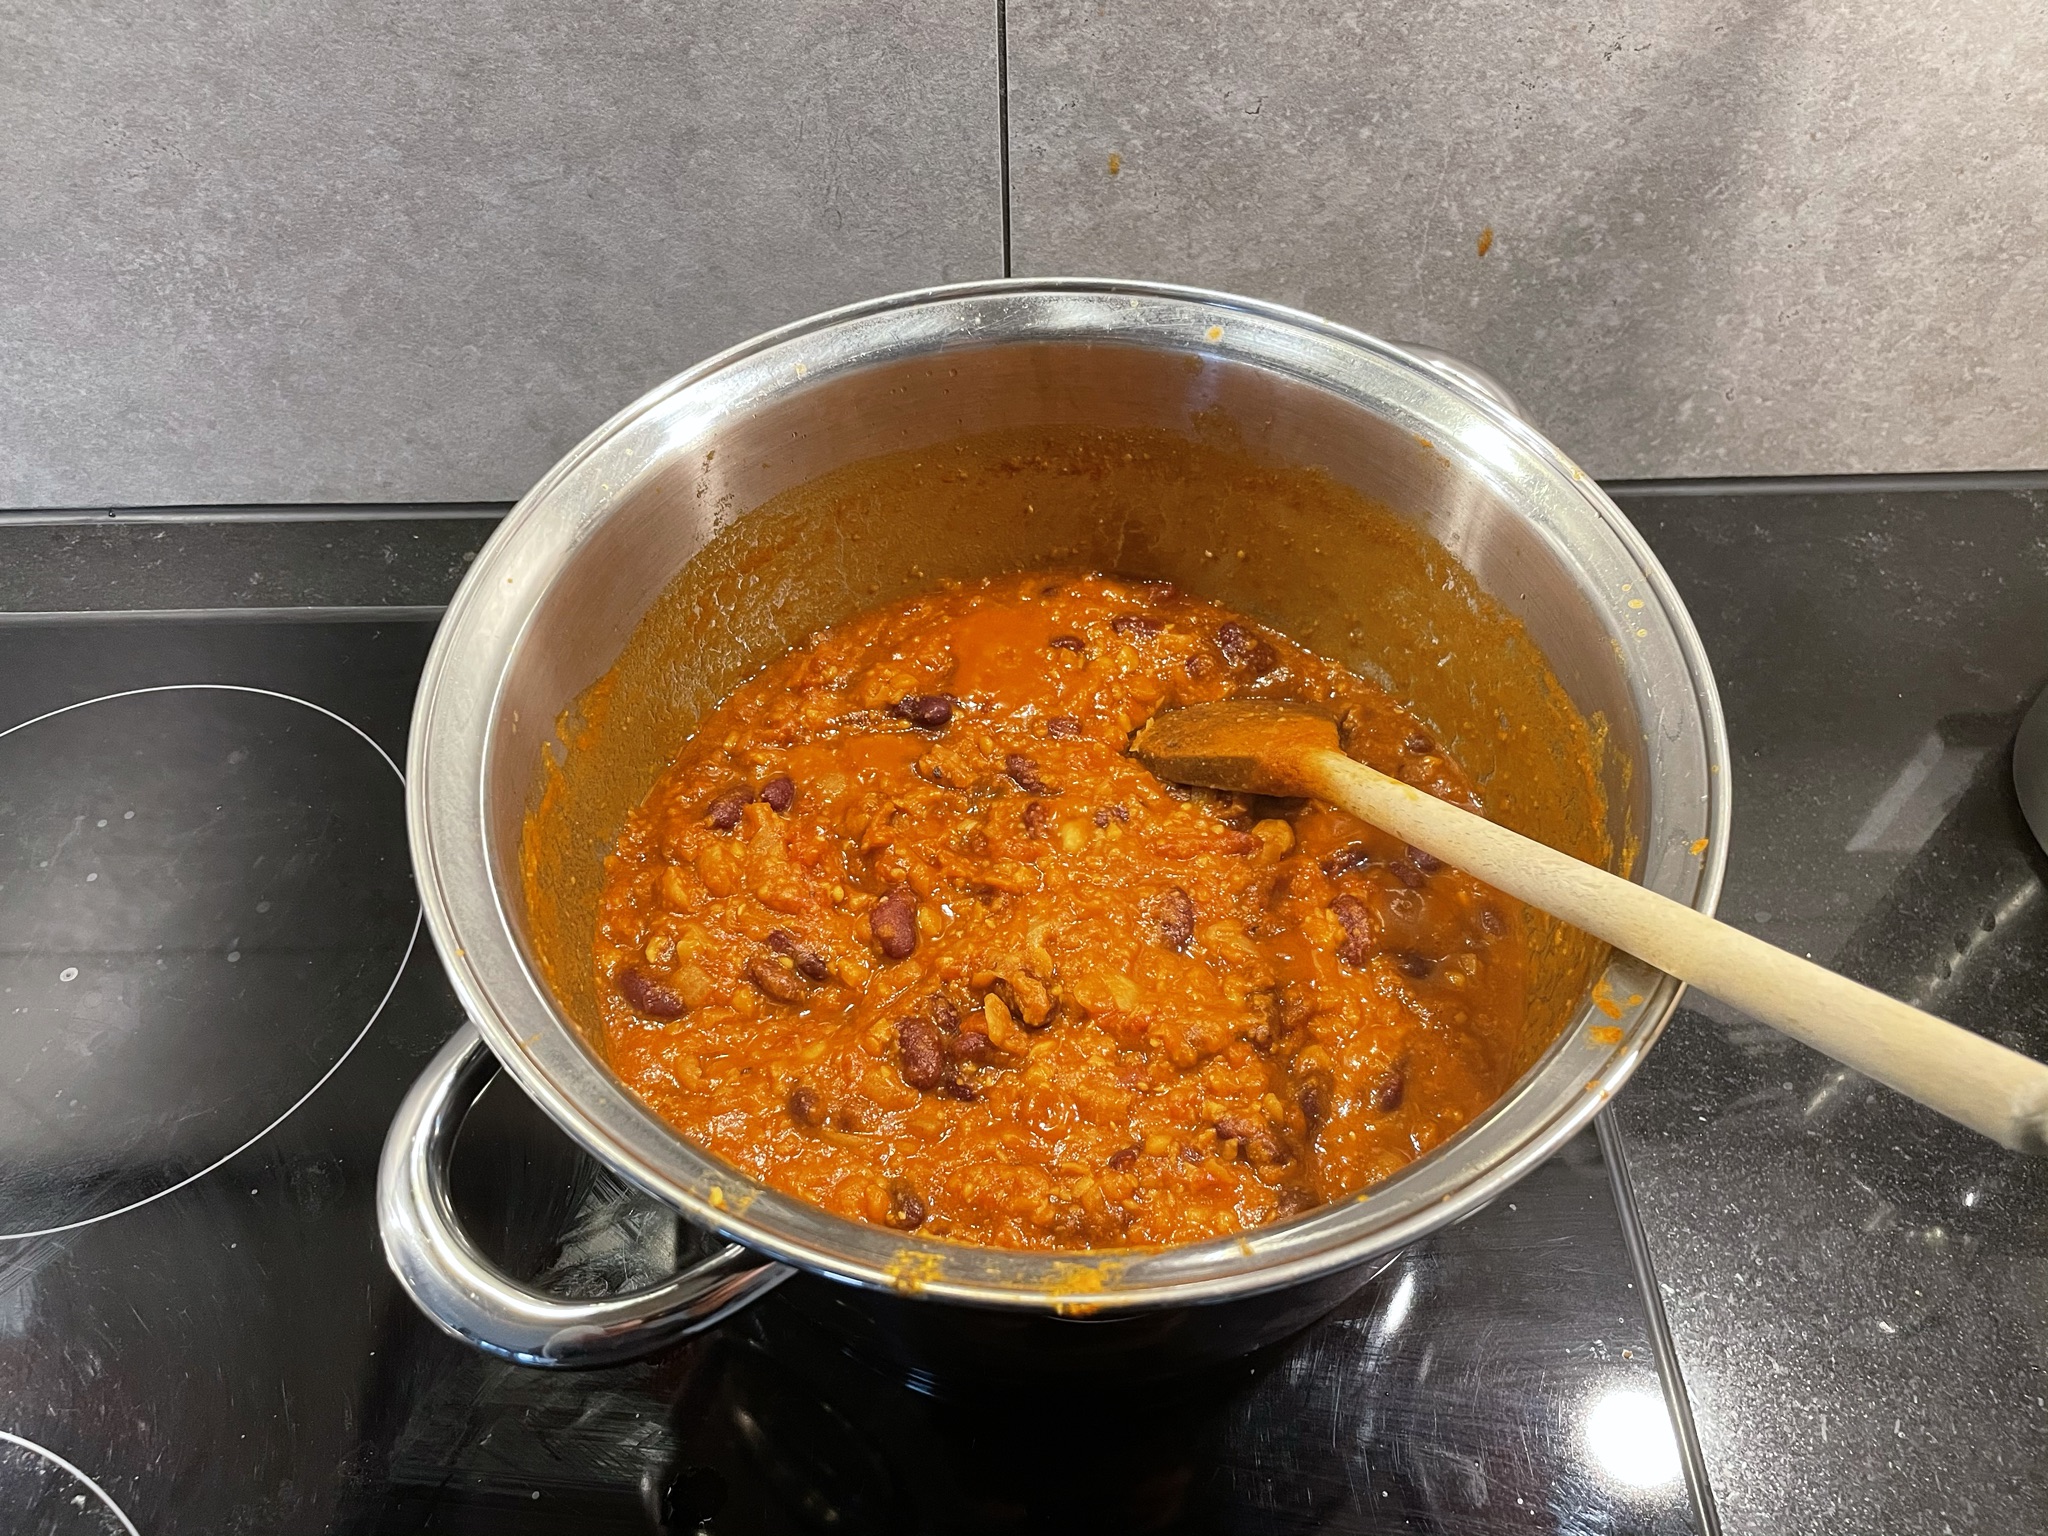
    <p>Add chickpea/tomato/bean mixture and add chickpea/bean liquid as required to get the right consistency. Simmer for at least 30 minutes, ideally 1.5 hrs, the longer the better! Stir every now and then so the bottom doesn’t burn. Season to taste with salt if needed.</p>

    <p><a href="/assets/cooking-kenji-vegan-chili/IMG_0312.JPEG"><picture><source srcset="/generated/cooking-kenji-vegan-chili/IMG_0312-300-24559907f.webp 300w, /generated/cooking-kenji-vegan-chili/IMG_0312-500-24559907f.webp 500w, /generated/cooking-kenji-vegan-chili/IMG_0312-720-24559907f.webp 720w" type="image/webp"><source srcset="/generated/cooking-kenji-vegan-chili/IMG_0312-300-ddacf95eb.jpeg 300w, /generated/cooking-kenji-vegan-chili/IMG_0312-500-ddacf95eb.jpeg 500w, /generated/cooking-kenji-vegan-chili/IMG_0312-720-ddacf95eb.jpeg 720w" type="image/jpeg"><img src="/generated/cooking-kenji-vegan-chili/IMG_0312-800-ddacf95eb.jpeg" width="2048" height="1536"></picture></a></p>
  </li>
  <li>
    <p>Serve with favorite base and toppings! Refrigerate for up to a week and reheat to serve (at least one night makes it taste even better).</p>

    <p><a href="/assets/cooking-kenji-vegan-chili/chili-at-softball-foodstand.png"><picture><source srcset="/generated/cooking-kenji-vegan-chili/chili-at-softball-foodstand-300-728b2900a.webp 300w, /generated/cooking-kenji-vegan-chili/chili-at-softball-foodstand-500-728b2900a.webp 500w, /generated/cooking-kenji-vegan-chili/chili-at-softball-foodstand-720-728b2900a.webp 720w" type="image/webp"><source srcset="/generated/cooking-kenji-vegan-chili/chili-at-softball-foodstand-300-94d68c7c6.png 300w, /generated/cooking-kenji-vegan-chili/chili-at-softball-foodstand-500-94d68c7c6.png 500w, /generated/cooking-kenji-vegan-chili/chili-at-softball-foodstand-720-94d68c7c6.png 720w" type="image/png"><img src="/generated/cooking-kenji-vegan-chili/chili-at-softball-foodstand-720-94d68c7c6.png" width="720" height="1278"></picture></a></p>
  </li>
</ol>]]></content><author><name></name></author><category term="cooking" /><summary type="html"><![CDATA[Easy, tasty, vegan, cheap, leftovers. A simplified and Europeanized version of The Best Vegetarian Chili from The Food Lab by J. Kenji López-Alt.]]></summary></entry><entry><title type="html">Caramelized eggplant and tomato tartare</title><link href="https://cookncode.com/cooking/2021/06/26/eggplant-tomato-tartare.html" rel="alternate" type="text/html" title="Caramelized eggplant and tomato tartare" /><published>2021-06-26T00:00:00+00:00</published><updated>2026-04-14T18:42:22+00:00</updated><id>https://cookncode.com/cooking/2021/06/26/eggplant-tomato-tartare</id><content type="html" xml:base="https://cookncode.com/cooking/2021/06/26/eggplant-tomato-tartare.html"><![CDATA[<p>A lukewarm semi-fresh, semi-fried summer starter dish.</p>

<h1 id="ingredients">Ingredients</h1>

<p><strong>Serves 4. 45 minutes.</strong></p>

<ul>
  <li>1 eggplant</li>
  <li>300 g of tomatoes at room temperature, see <a href="#notes">notes</a></li>
  <li>handful of chopped basil and a few whole basil leafs</li>
  <li>extra-virgin olive oil</li>
  <li>good (aged, slightly sweet) balsamic vinegar</li>
  <li>salt and black pepper</li>
</ul>

<h1 id="recipe">Recipe</h1>

<ol>
  <li>Heat a large frying pan over medium heat.</li>
  <li>
    <p>Cut the</p>

    <ul>
      <li>1 eggplant</li>
    </ul>

    <p>crosswise in 1-2 cm thick slices. No need to salt and drain. See <a href="#notes">note</a>.</p>
  </li>
  <li>
    <p>Put a</p>

    <ul>
      <li>few tablespoons of extra virgin olive oil</li>
    </ul>

    <p>into the hot pan and add the eggplant. Regularly shake the pan and turn the eggplants until they turn dark brown. If the pan becomes dry, add more olive oil 😁. This is a slow process. Be patient; it takes about 15 minutes. Adjust the heat if the browning goes much faster or slower.</p>
  </li>
  <li>
    <p>Meanwhile cut the</p>

    <ul>
      <li>300 g tomatoes</li>
    </ul>

    <p>in half, remove (and eat directly or discard) most of the watery seeds. This step is important to prevent the tartare from falling apart when served. Then cut the tomato into 1 cm cubes and add to a large bowl.</p>
  </li>
  <li>Once the eggplants have taken on a nice brown color, remove them from the pan and put them on some paper towels. The paper towels will extract some of the excess oil. Salt the eggplants.</li>
  <li>
    <p>Cut most of the</p>

    <ul>
      <li>handful of basil</li>
    </ul>

    <p>into small pieces and add it to the bowl with tomatoes.</p>
  </li>
  <li>
    <p>When the eggplant is cool enough to handle, cut into 1 cm cubes and add to the bowl with tomatoes.</p>
  </li>
  <li>
    <p>Add</p>

    <ul>
      <li>one/two teaspoons balsamic vinegar</li>
    </ul>

    <p>and season to taste with salt and pepper. The mixture should start to taste slightly sweeter.</p>
  </li>
  <li>
    <p>Use a cooking ring if you have one to place the tartare mixture onto a plate. Otherwise you can try to sculp it or use a flat bottomed bowl. Results may vary 😅.</p>
  </li>
  <li>
    <p>Drizzle with some</p>

    <ul>
      <li>balsamic vinegar</li>
      <li>extra-virgin olive oil</li>
    </ul>

    <p>and decorate with a few</p>

    <ul>
      <li>whole basil leaves.</li>
    </ul>
  </li>
  <li>Serve immediately to prevent the lukewarm tartare from cooling down.</li>
</ol>

<h1 id="notes">Notes</h1>

<ul>
  <li>I believe salting eggplants is not necessary anymore. After some testing I couldn’t taste the difference between a salted and an unsalted batch. Salting is a practice which probably was necessary in the past. However, in the mean time the bitterness has been reduced due to selective breeding. Very similar what happened to <a href="https://www.npr.org/sections/thesalt/2019/10/30/773457637/from-culinary-dud-to-stud-how-dutch-plant-breeders-built-our-brussels-sprouts-bo">Brussels sprouts</a>. So save yourselves the hassle and skip this step!</li>
  <li>This dish works best if made in summer when tomatoes are at their best.</li>
  <li>Make sure the tomatoes are at room temperature. Our tongue becomes less sensitive when things are cold, so the tomatoes can taste blander.</li>
</ul>]]></content><author><name></name></author><category term="cooking" /><summary type="html"><![CDATA[A lukewarm semi-fresh, semi-fried summer starter dish.]]></summary></entry><entry><title type="html">Easy wok sauce</title><link href="https://cookncode.com/cooking/2021/03/15/easy-wok-sauce.html" rel="alternate" type="text/html" title="Easy wok sauce" /><published>2021-03-15T00:00:00+00:00</published><updated>2026-04-14T18:42:22+00:00</updated><id>https://cookncode.com/cooking/2021/03/15/easy-wok-sauce</id><content type="html" xml:base="https://cookncode.com/cooking/2021/03/15/easy-wok-sauce.html"><![CDATA[<p>Use this easy wok sauce to make a quick (vegan) meal which tastes great!</p>

<h1 id="ingredients">Ingredients</h1>

<p><strong>Serves 2. 20 minutes.</strong></p>

<ul>
  <li>1/2 tsp corn starch (makes a nice thick sauce)</li>
  <li>1/2 tsp white sugar (gives the sauce a nice glaze)</li>
  <li>1/2 - 1 tsp sambal (or other chili paste)</li>
  <li>1 tbsp vegetable oil</li>
  <li>1-1.5 tbsp soy sauce</li>
  <li>3 minced/pressed garlic cloves</li>
  <li>1 tbsp lime juice (optional)</li>
  <li>400 g bag of pre-cut Asian vegetables</li>
</ul>

<h1 id="recipe">Recipe</h1>

<ol>
  <li>
    <p>Mix the following together in a bowl</p>

    <ul>
      <li>1/2 tsp corn starch</li>
      <li>1/2 tsp white sugar</li>
      <li>1/2 - 1 tsp sambal (or other chili paste)</li>
      <li>1 tbsp vegetable oil</li>
      <li>1-1.5 tbsp soy sauce</li>
      <li>3 minced/pressed garlic cloves</li>
      <li>1 tbsp lime juice (optional)</li>
    </ul>

    <p><img src="/assets/2021-03-15-easy-wok-sauce/finished_sauce.JPEG" alt="Look at the mess in that kitchen!" /></p>
  </li>
  <li>
    <p>Heat a wok, carbon steel or any pan without a non-stick coating over high heat until it is hot. Don’t use a pan with a non-stick coating since they can’t handle these high temperatures. You might want to open a window and put the ventilation on high 🔥.</p>
  </li>
  <li>
    <p>Add a few tablespoons of vegetable oil to the hot pan which should start to smoke a little. Then add the bag of</p>

    <ul>
      <li>400 g pre-cut Asian vegetables</li>
    </ul>
  </li>
  <li>
    <p>Keep stirring constantly, while the heat remains on high. If it starts to smoke heavily, lower the heat slightly.</p>
  </li>
  <li>
    <p>After a few minutes the vegetables will start to turn soft. Then add the wok sauce and lower the temperature to medium-high.</p>
  </li>
  <li>
    <p>Cook the mixture for another minute or so. If the veggies released little water and you do not see a sauce forming, add a few table spoons of water to create a sauce.</p>
  </li>
</ol>

<p>Eat with some rice, <a href="https://roald87.github.io/cooking/2021/01/30/awesome-tofu-chuncks.html">awesome tofu chunks</a> or roasted cashews.</p>]]></content><author><name></name></author><category term="cooking" /><summary type="html"><![CDATA[Use this easy wok sauce to make a quick (vegan) meal which tastes great!]]></summary></entry><entry><title type="html">Vegan ‘bolognese’ sauce</title><link href="https://cookncode.com/cooking/2021/02/16/vegan-bolognese.html" rel="alternate" type="text/html" title="Vegan ‘bolognese’ sauce" /><published>2021-02-16T00:00:00+00:00</published><updated>2026-04-14T18:42:22+00:00</updated><id>https://cookncode.com/cooking/2021/02/16/vegan-bolognese</id><content type="html" xml:base="https://cookncode.com/cooking/2021/02/16/vegan-bolognese.html"><![CDATA[<p>I don’t eat too much meat these days and one of the things I really miss is a good bolognese sauce. Since bolognese revolves so much around meat, it is not easy to veganize. However, I now found a really great alternative, mostly based on a recipe by J. Kenji López-Alt.</p>

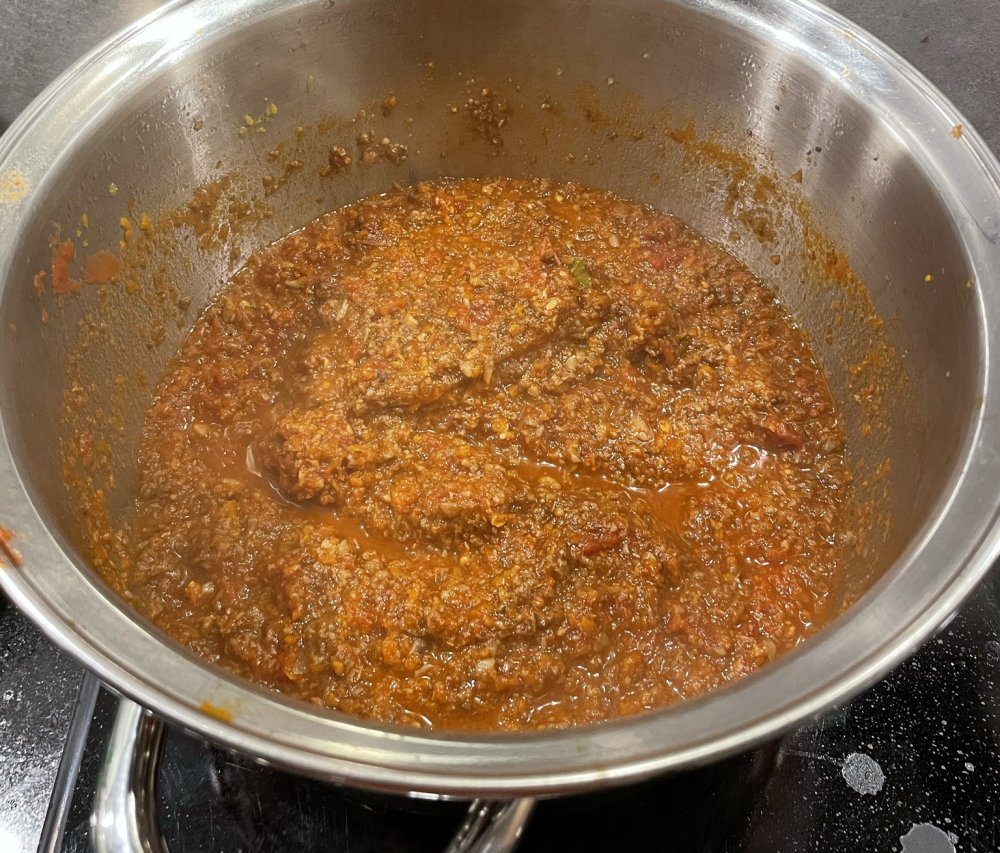
<p>This recipe is based on a <a href="https://www.seriouseats.com/2014/02/vegan-pasta-with-rich-and-hearty-mushroom-bol.html">Hearty Vegan Mushroom Bolognese</a> from Kenji. There are a few steps which I skipped or changed. My version is slightly less work and I also prefer it over his version 😁. First the final result.</p>

<p><a href="/assets/2021-02-16-vegan-bolognese/final_sauce.JPEG"><picture><source srcset="/generated/2021-02-16-vegan-bolognese/final_sauce-300-968d5fbab.webp 300w, /generated/2021-02-16-vegan-bolognese/final_sauce-500-968d5fbab.webp 500w, /generated/2021-02-16-vegan-bolognese/final_sauce-720-968d5fbab.webp 720w" type="image/webp"><source srcset="/generated/2021-02-16-vegan-bolognese/final_sauce-300-2fc191c92.jpeg 300w, /generated/2021-02-16-vegan-bolognese/final_sauce-500-2fc191c92.jpeg 500w, /generated/2021-02-16-vegan-bolognese/final_sauce-720-2fc191c92.jpeg 720w" type="image/jpeg"><img src="/generated/2021-02-16-vegan-bolognese/final_sauce-800-2fc191c92.jpeg" width="1000" height="853"></picture></a></p>

<h2 id="extended-step-by-step">Extended step-by-step</h2>

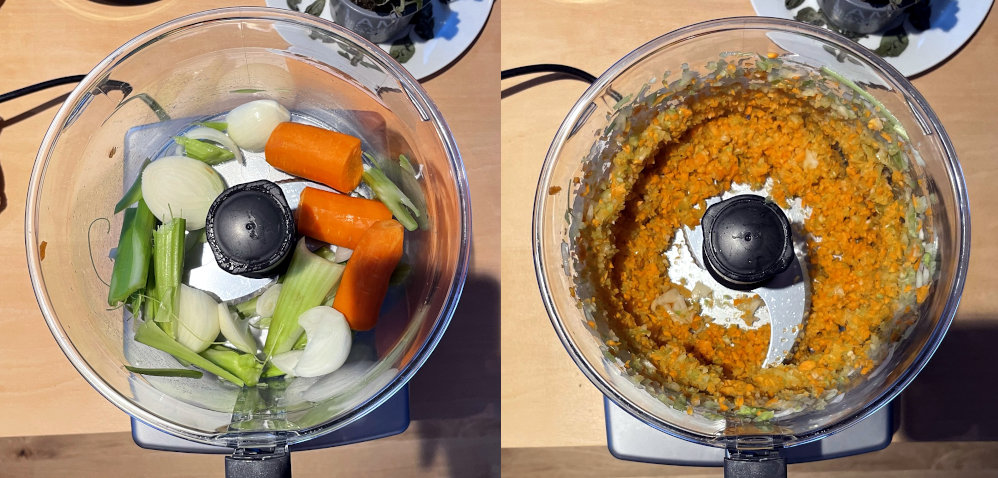
<p>Start by preparing the <a href="https://en.wikipedia.org/wiki/Mirepoix_(cuisine)">soffritto/mirepoix</a>. This is a mix of equal parts celery, onion and carrot. You can chop it by hand, but that can be quite tedious. I like to do it in a food processor, because it is easier to get the pieces nice and small. I think the size also helps with thickening the eventual sauce.</p>

<p><a href="/assets/2021-02-16-vegan-bolognese/mirepoix.jpeg"><picture><source srcset="/generated/2021-02-16-vegan-bolognese/mirepoix-300-81d09bc18.webp 300w, /generated/2021-02-16-vegan-bolognese/mirepoix-500-81d09bc18.webp 500w, /generated/2021-02-16-vegan-bolognese/mirepoix-720-81d09bc18.webp 720w" type="image/webp"><source srcset="/generated/2021-02-16-vegan-bolognese/mirepoix-300-7392a9899.jpeg 300w, /generated/2021-02-16-vegan-bolognese/mirepoix-500-7392a9899.jpeg 500w, /generated/2021-02-16-vegan-bolognese/mirepoix-720-7392a9899.jpeg 720w" type="image/jpeg"><img src="/generated/2021-02-16-vegan-bolognese/mirepoix-800-7392a9899.jpeg" width="998" height="478"></picture></a></p>

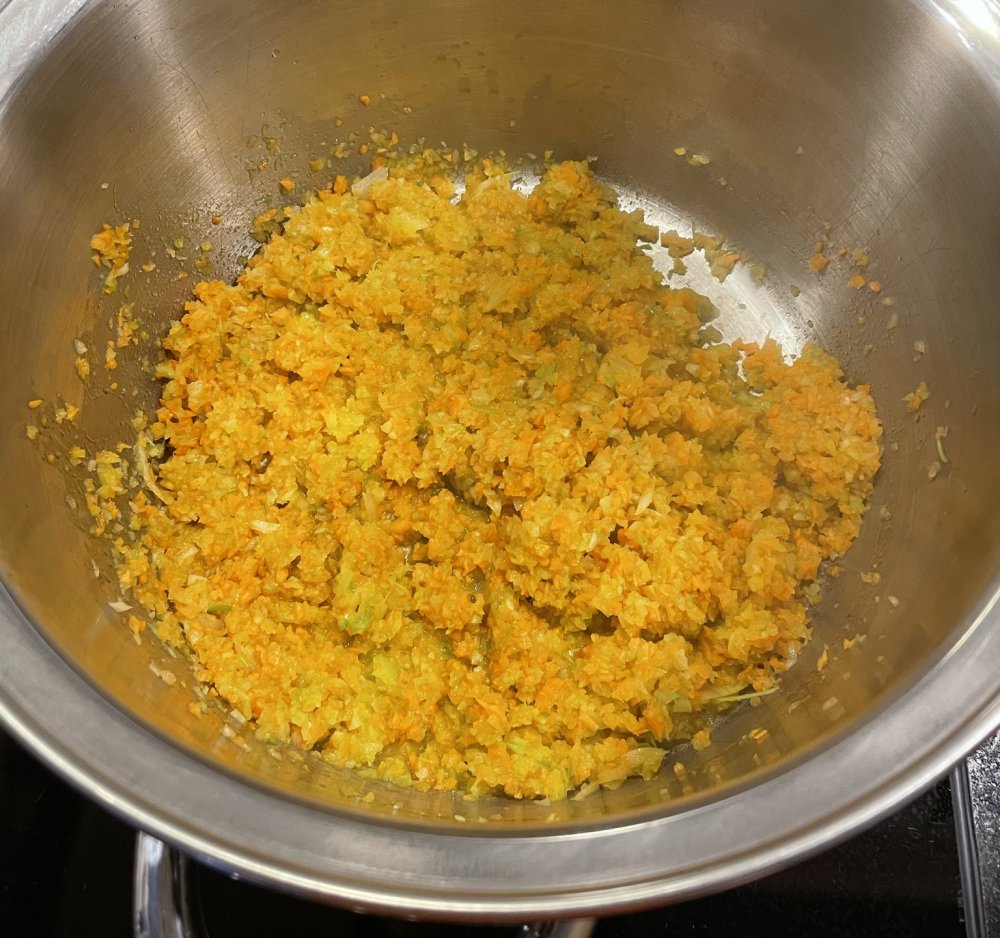
<p>Preheat a pan on medium heat. When it is hot add some olive oil and the mirepoix. Cook for about 10 minutes until is gets nice and soft.</p>

<p><a href="/assets/2021-02-16-vegan-bolognese/mirepoix_cooking.JPEG"><picture><source srcset="/generated/2021-02-16-vegan-bolognese/mirepoix_cooking-300-03f68d3d5.webp 300w, /generated/2021-02-16-vegan-bolognese/mirepoix_cooking-500-03f68d3d5.webp 500w, /generated/2021-02-16-vegan-bolognese/mirepoix_cooking-720-03f68d3d5.webp 720w" type="image/webp"><source srcset="/generated/2021-02-16-vegan-bolognese/mirepoix_cooking-300-4b3b96704.jpeg 300w, /generated/2021-02-16-vegan-bolognese/mirepoix_cooking-500-4b3b96704.jpeg 500w, /generated/2021-02-16-vegan-bolognese/mirepoix_cooking-720-4b3b96704.jpeg 720w" type="image/jpeg"><img src="/generated/2021-02-16-vegan-bolognese/mirepoix_cooking-800-4b3b96704.jpeg" width="1000" height="938"></picture></a></p>

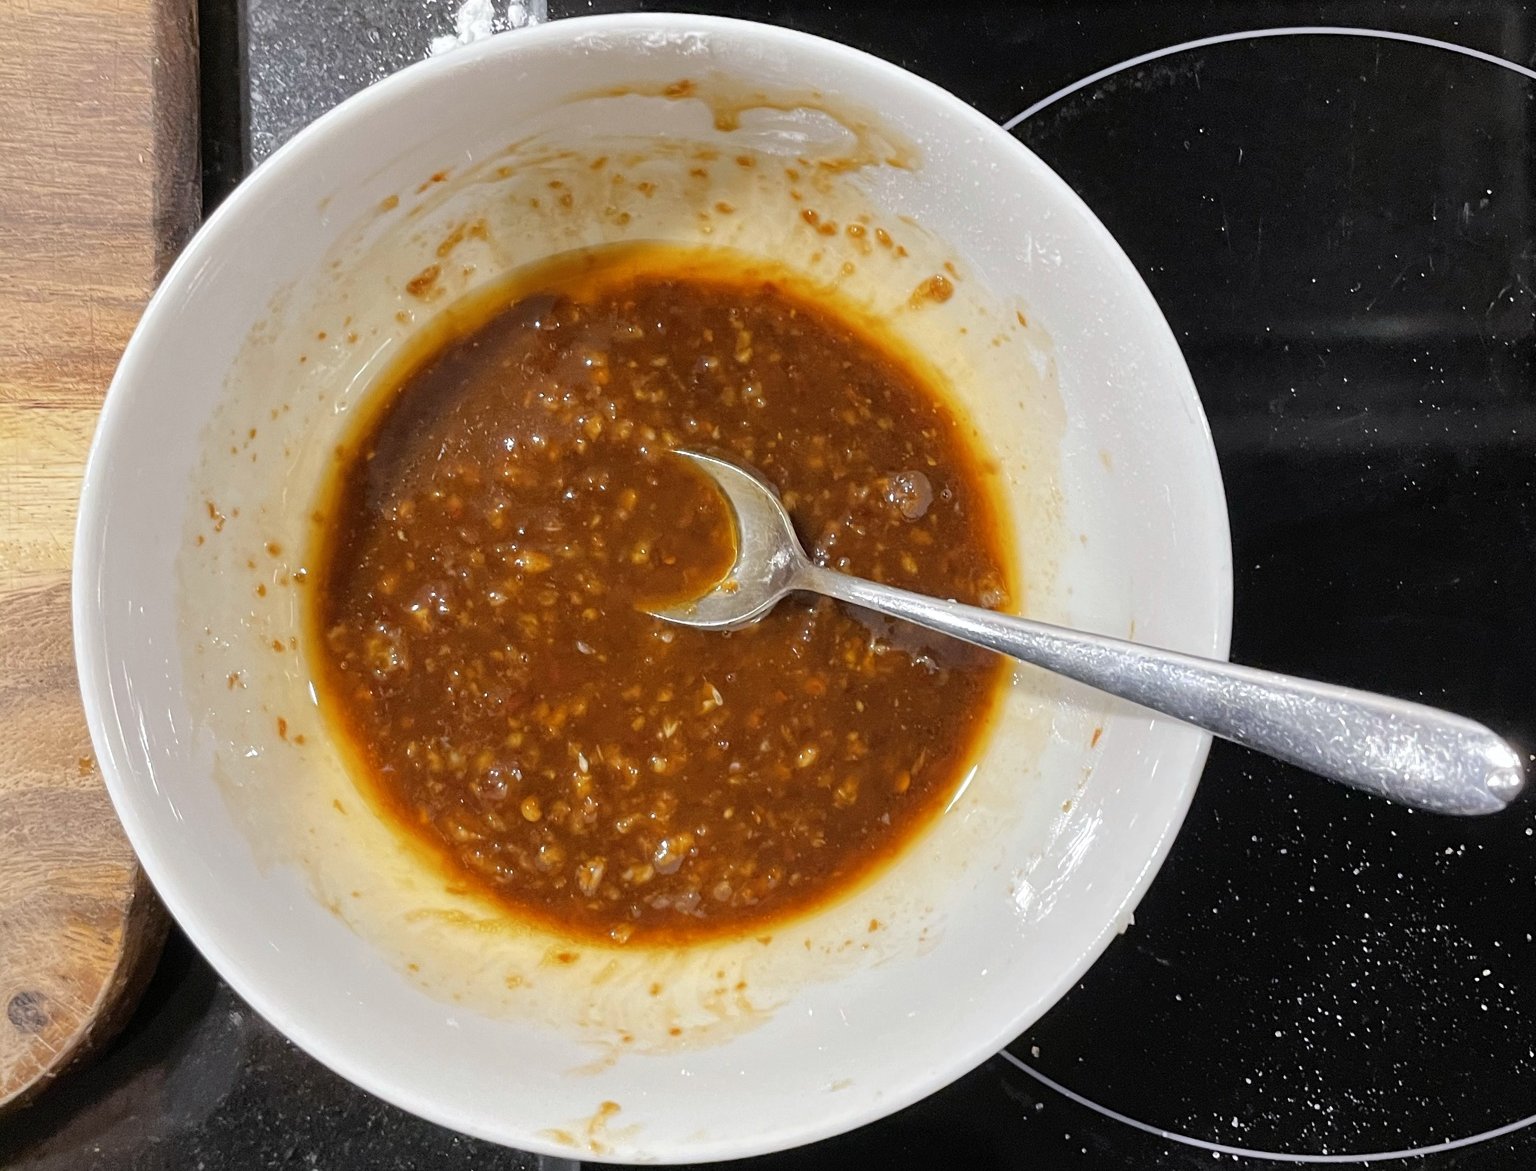
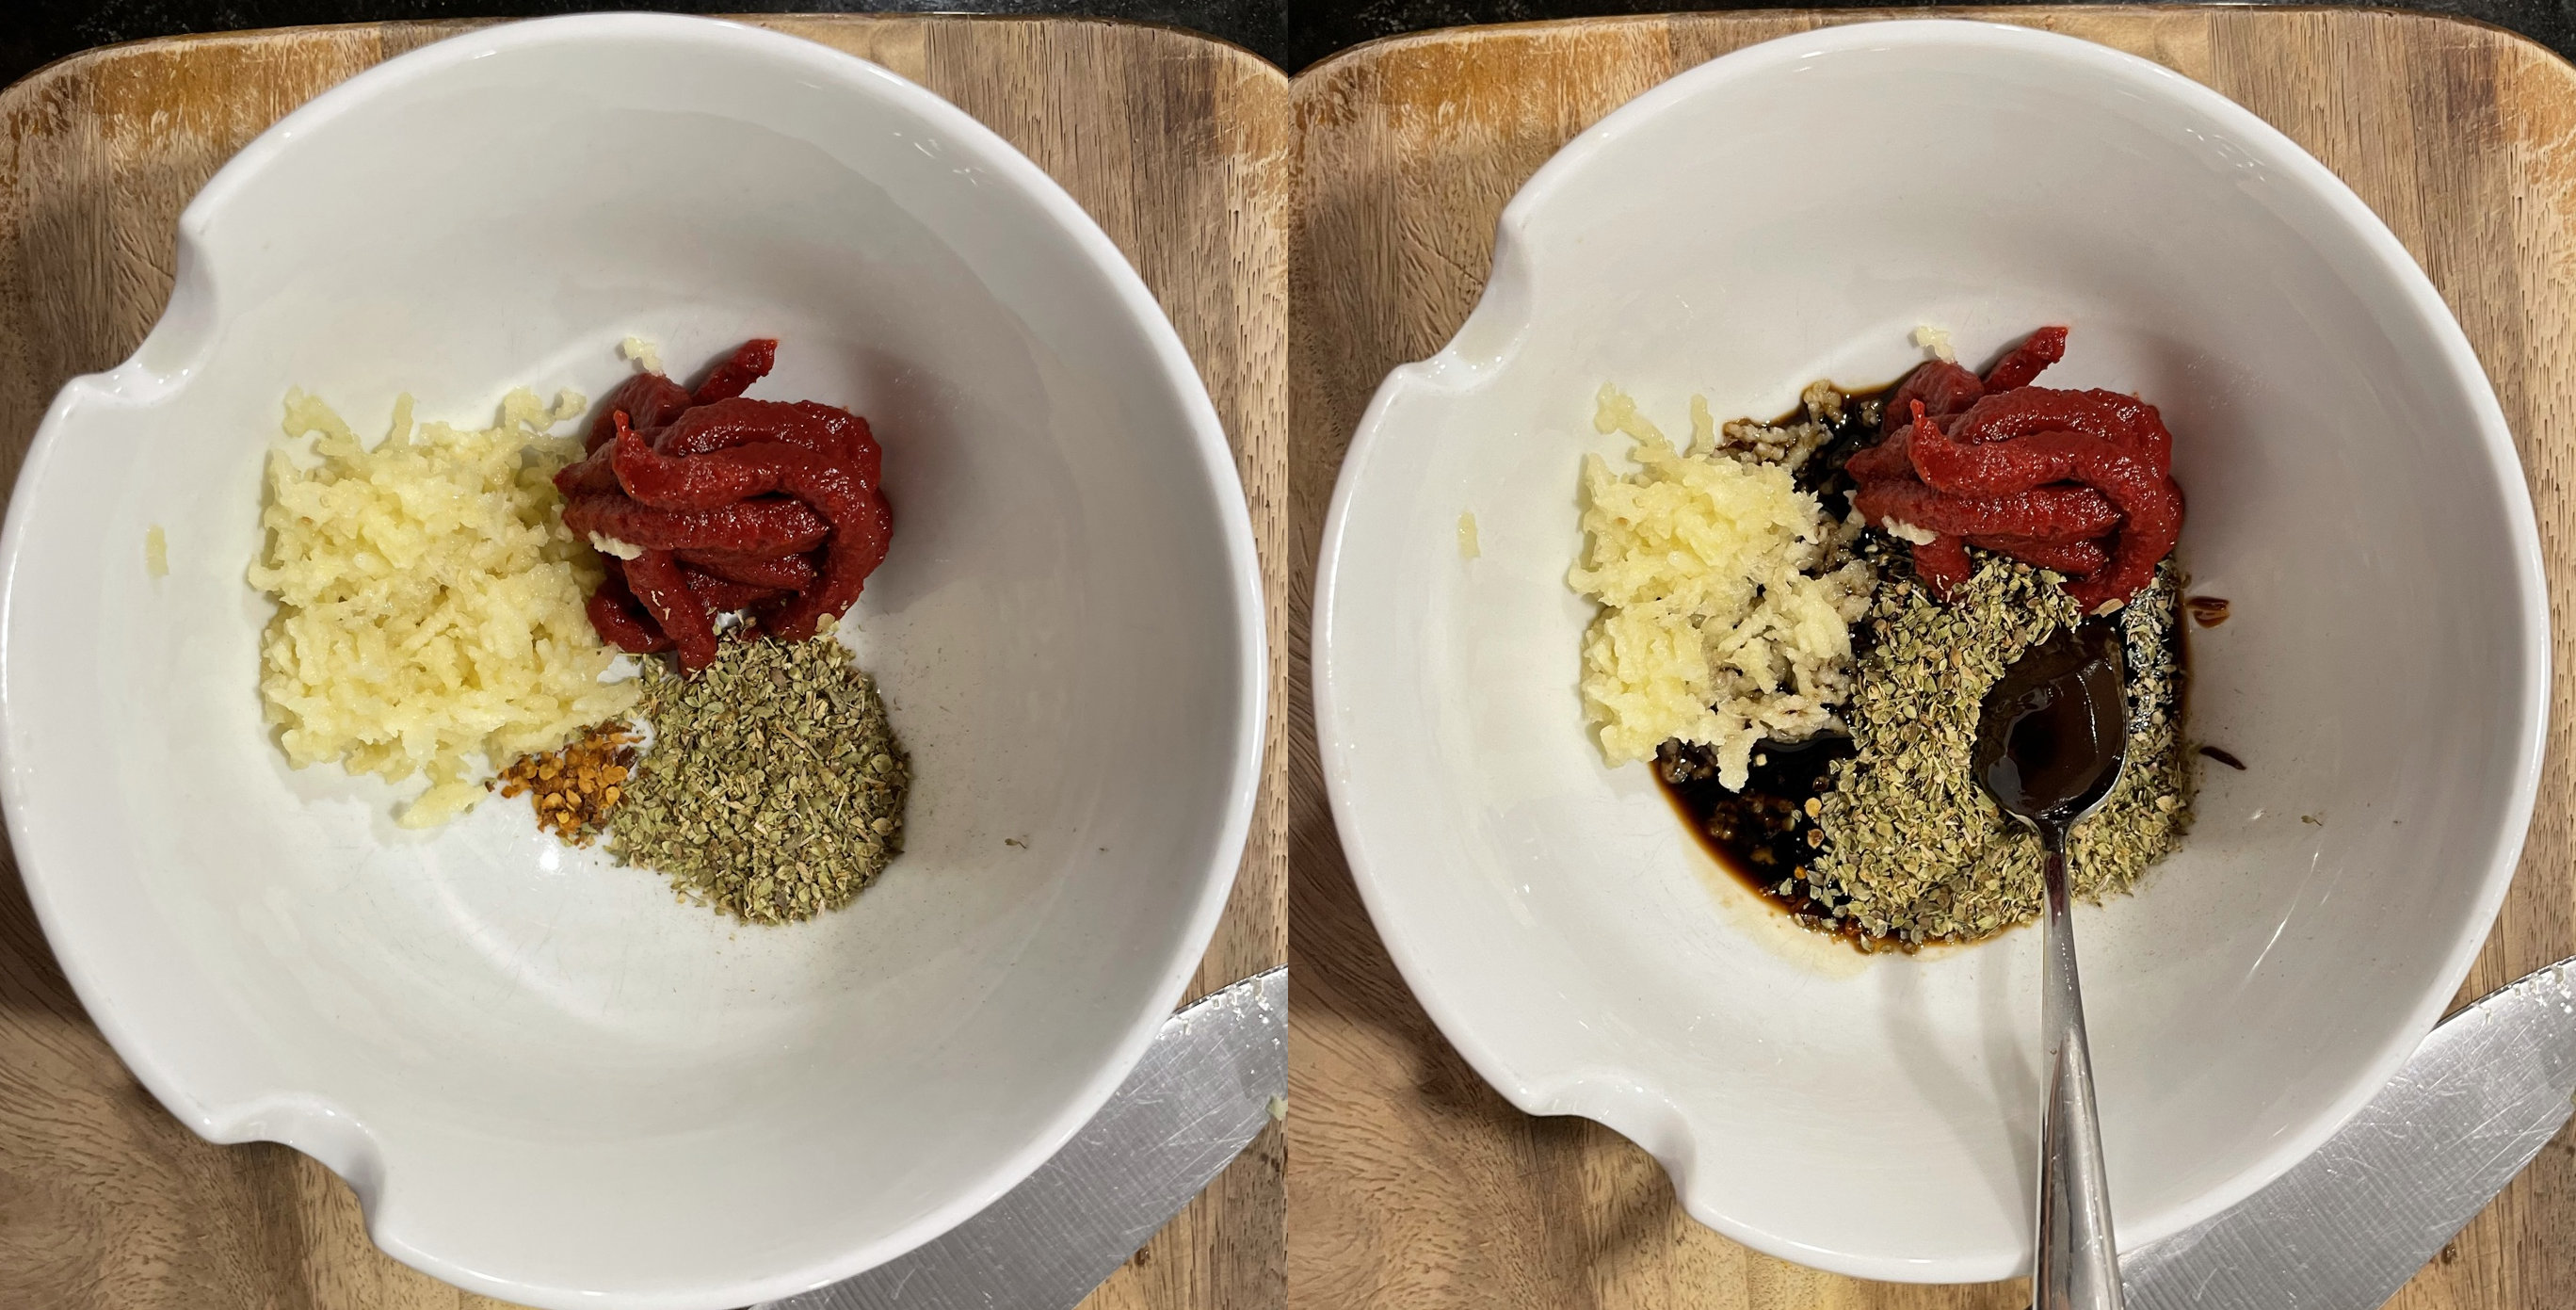
<p>In the mean time prepare a mix of the taste makers. I opted for a mix of garlic, tomato paste, oregano, chili flakes, soy sauce and marmite. Garlic, oregano and chili flakes are always a good base for a tomato sauce. The tomato paste adds some extra savoriness and thickness the sauce a little. Finally the soy sauce and marmite combo add some of the umami which is normally added by the meat. Kenji also uses these umami bombs for his excellent <a href="https://www.seriouseats.com/recipes/2012/01/best-vegetarian-bean-chile-recipe.html">vegan chili</a>.</p>

<p>By combining all the ingredients in a bowl you can add them simultaneously. This method prevents wildly varying cooking times and stress 👍.</p>

<p><a href="/assets/2021-02-16-vegan-bolognese/taste_makers.jpeg"><picture><source srcset="/generated/2021-02-16-vegan-bolognese/taste_makers-300-895ce6f2d.webp 300w, /generated/2021-02-16-vegan-bolognese/taste_makers-500-895ce6f2d.webp 500w, /generated/2021-02-16-vegan-bolognese/taste_makers-720-895ce6f2d.webp 720w" type="image/webp"><source srcset="/generated/2021-02-16-vegan-bolognese/taste_makers-300-6e9038977.jpeg 300w, /generated/2021-02-16-vegan-bolognese/taste_makers-500-6e9038977.jpeg 500w, /generated/2021-02-16-vegan-bolognese/taste_makers-720-6e9038977.jpeg 720w" type="image/jpeg"><img src="/generated/2021-02-16-vegan-bolognese/taste_makers-800-6e9038977.jpeg" width="2736" height="1391"></picture></a></p>

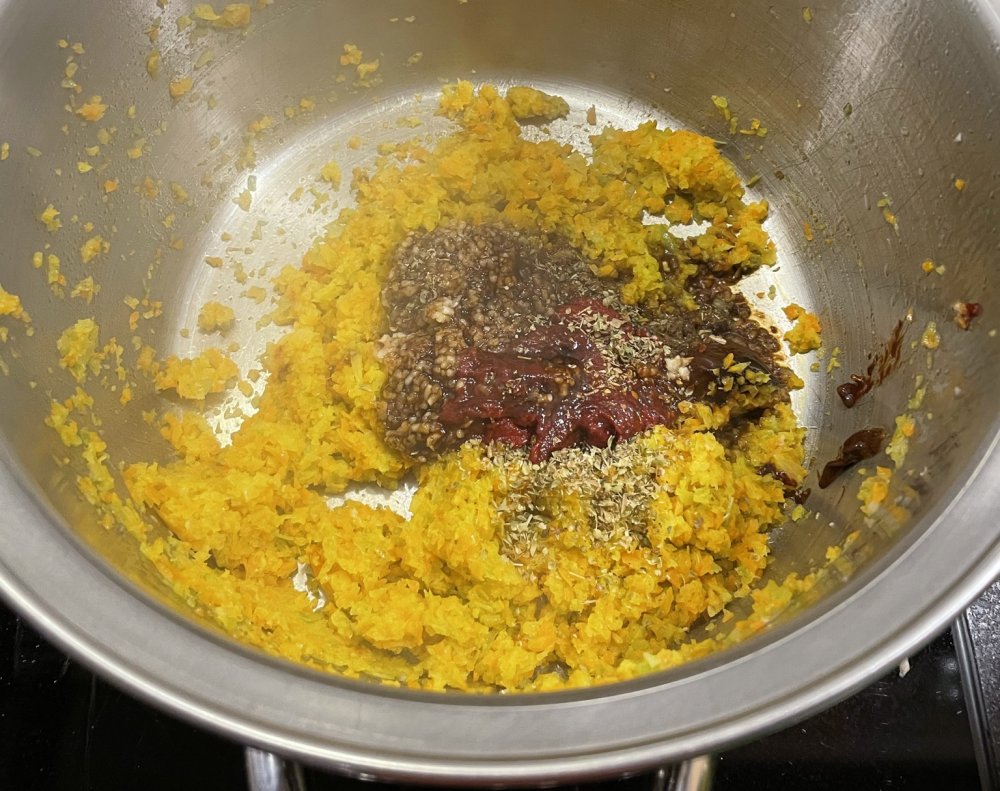
<p>Once the veggie mix is nice and soft, add the bowl of taste makers.</p>

<p><a href="/assets/2021-02-16-vegan-bolognese/taste_makers_added.JPEG"><picture><source srcset="/generated/2021-02-16-vegan-bolognese/taste_makers_added-300-9814a7884.webp 300w, /generated/2021-02-16-vegan-bolognese/taste_makers_added-500-9814a7884.webp 500w, /generated/2021-02-16-vegan-bolognese/taste_makers_added-720-9814a7884.webp 720w" type="image/webp"><source srcset="/generated/2021-02-16-vegan-bolognese/taste_makers_added-300-595e99315.jpeg 300w, /generated/2021-02-16-vegan-bolognese/taste_makers_added-500-595e99315.jpeg 500w, /generated/2021-02-16-vegan-bolognese/taste_makers_added-720-595e99315.jpeg 720w" type="image/jpeg"><img src="/generated/2021-02-16-vegan-bolognese/taste_makers_added-800-595e99315.jpeg" width="1000" height="791"></picture></a></p>

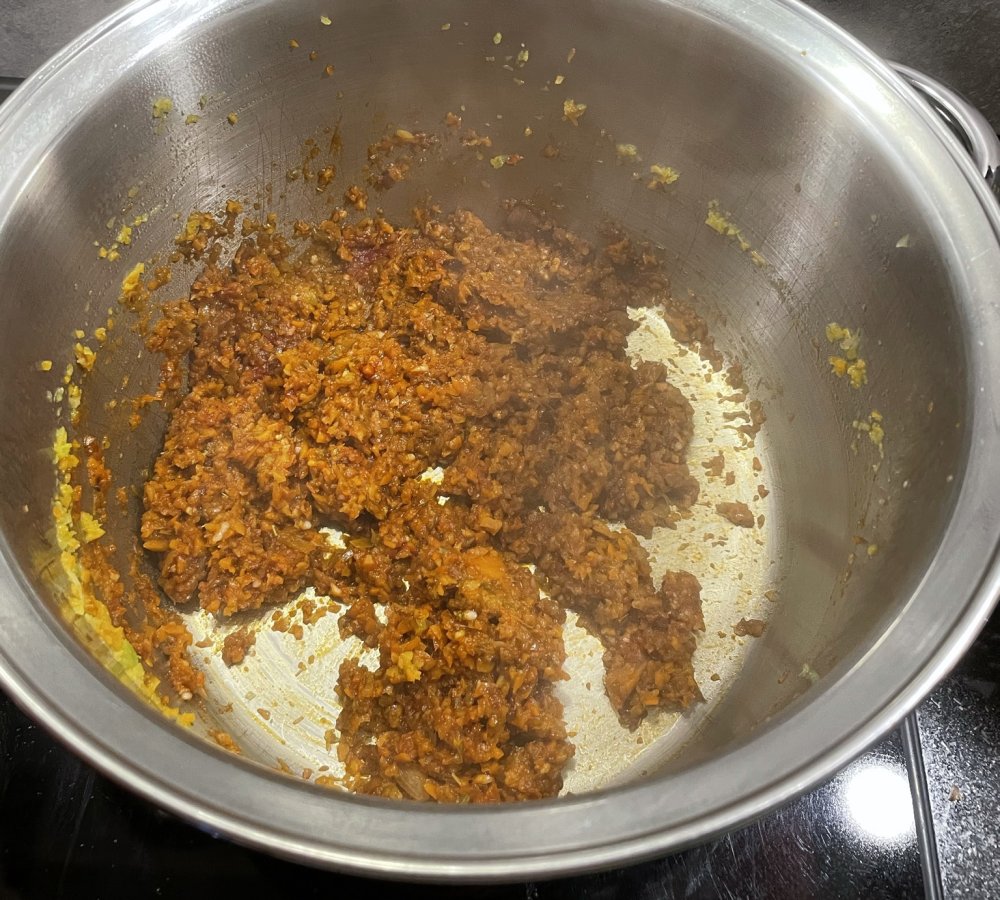
<p>Stir it into the mirepoix and let it cook for a minute.</p>

<p><a href="/assets/2021-02-16-vegan-bolognese/taste_makers_mixed.JPEG"><picture><source srcset="/generated/2021-02-16-vegan-bolognese/taste_makers_mixed-300-c17df4abd.webp 300w, /generated/2021-02-16-vegan-bolognese/taste_makers_mixed-500-c17df4abd.webp 500w, /generated/2021-02-16-vegan-bolognese/taste_makers_mixed-720-c17df4abd.webp 720w" type="image/webp"><source srcset="/generated/2021-02-16-vegan-bolognese/taste_makers_mixed-300-d4849c9ad.jpeg 300w, /generated/2021-02-16-vegan-bolognese/taste_makers_mixed-500-d4849c9ad.jpeg 500w, /generated/2021-02-16-vegan-bolognese/taste_makers_mixed-720-d4849c9ad.jpeg 720w" type="image/jpeg"><img src="/generated/2021-02-16-vegan-bolognese/taste_makers_mixed-800-d4849c9ad.jpeg" width="1000" height="900"></picture></a></p>

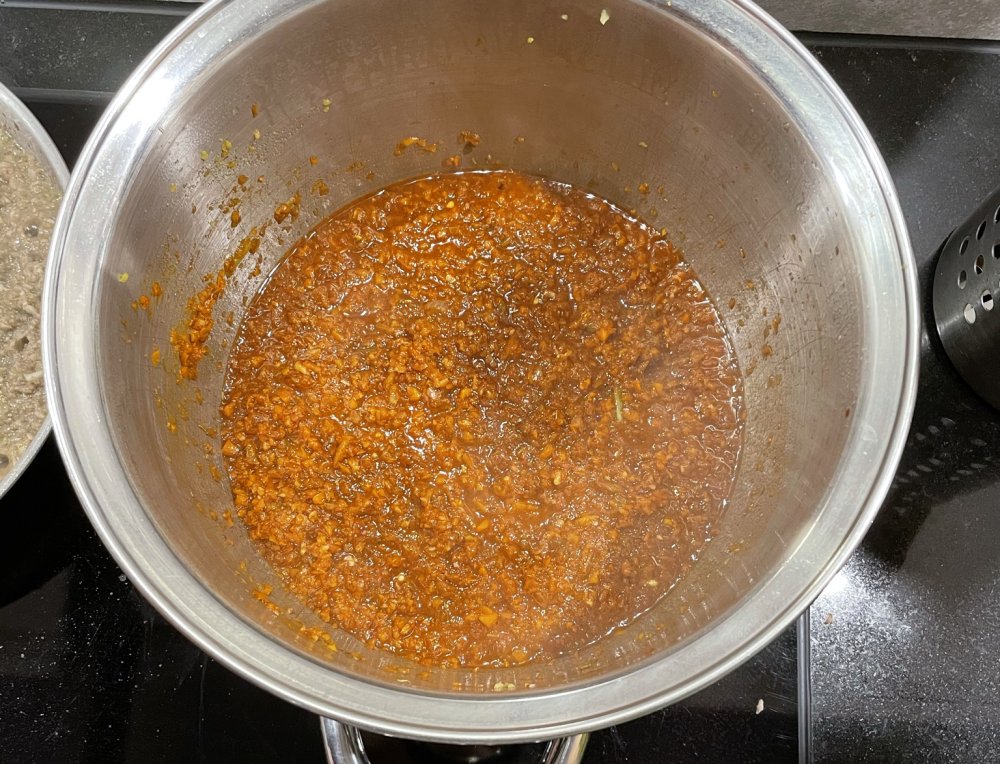
<p>Then add some red wine.</p>

<p><a href="/assets/2021-02-16-vegan-bolognese/wine_added.JPEG"><picture><source srcset="/generated/2021-02-16-vegan-bolognese/wine_added-300-80f3b190f.webp 300w, /generated/2021-02-16-vegan-bolognese/wine_added-500-80f3b190f.webp 500w, /generated/2021-02-16-vegan-bolognese/wine_added-720-80f3b190f.webp 720w" type="image/webp"><source srcset="/generated/2021-02-16-vegan-bolognese/wine_added-300-ce3dabebe.jpeg 300w, /generated/2021-02-16-vegan-bolognese/wine_added-500-ce3dabebe.jpeg 500w, /generated/2021-02-16-vegan-bolognese/wine_added-720-ce3dabebe.jpeg 720w" type="image/jpeg"><img src="/generated/2021-02-16-vegan-bolognese/wine_added-800-ce3dabebe.jpeg" width="1000" height="764"></picture></a></p>

<p>Let the wine reduce until a thick sauce remains. Thick means, if you scrape along the bottom, the sauce should slowly fill in the gap.</p>

<p><a href="/assets/2021-02-16-vegan-bolognese/wine_reduced.JPEG"><picture><source srcset="/generated/2021-02-16-vegan-bolognese/wine_reduced-300-4b6c6f0c2.webp 300w, /generated/2021-02-16-vegan-bolognese/wine_reduced-500-4b6c6f0c2.webp 500w, /generated/2021-02-16-vegan-bolognese/wine_reduced-720-4b6c6f0c2.webp 720w" type="image/webp"><source srcset="/generated/2021-02-16-vegan-bolognese/wine_reduced-300-404ebaf60.jpeg 300w, /generated/2021-02-16-vegan-bolognese/wine_reduced-500-404ebaf60.jpeg 500w, /generated/2021-02-16-vegan-bolognese/wine_reduced-720-404ebaf60.jpeg 720w" type="image/jpeg"><img src="/generated/2021-02-16-vegan-bolognese/wine_reduced-800-404ebaf60.jpeg" width="1000" height="774"></picture></a></p>

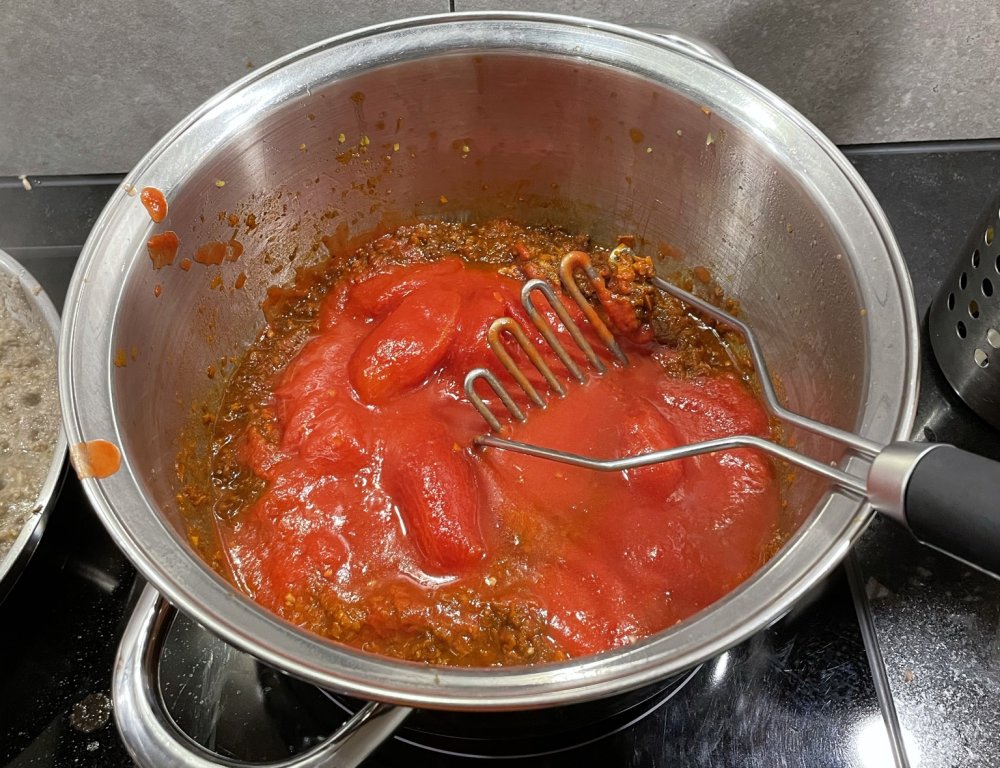
<p>Then it is time to add the tomatoes. I use a potato masher to crush the tomatoes and get them into small chucks.</p>

<p><a href="/assets/2021-02-16-vegan-bolognese/tomatoes.JPEG"><picture><source srcset="/generated/2021-02-16-vegan-bolognese/tomatoes-300-88c3ba32f.webp 300w, /generated/2021-02-16-vegan-bolognese/tomatoes-500-88c3ba32f.webp 500w, /generated/2021-02-16-vegan-bolognese/tomatoes-720-88c3ba32f.webp 720w" type="image/webp"><source srcset="/generated/2021-02-16-vegan-bolognese/tomatoes-300-a86afecae.jpeg 300w, /generated/2021-02-16-vegan-bolognese/tomatoes-500-a86afecae.jpeg 500w, /generated/2021-02-16-vegan-bolognese/tomatoes-720-a86afecae.jpeg 720w" type="image/jpeg"><img src="/generated/2021-02-16-vegan-bolognese/tomatoes-800-a86afecae.jpeg" width="1000" height="768"></picture></a></p>

<p>Add a few bay leafs and it is almost ready to simmer.</p>

<p><a href="/assets/2021-02-16-vegan-bolognese/bay_leafs.JPEG"><picture><source srcset="/generated/2021-02-16-vegan-bolognese/bay_leafs-300-41f3705e8.webp 300w, /generated/2021-02-16-vegan-bolognese/bay_leafs-500-41f3705e8.webp 500w, /generated/2021-02-16-vegan-bolognese/bay_leafs-720-41f3705e8.webp 720w" type="image/webp"><source srcset="/generated/2021-02-16-vegan-bolognese/bay_leafs-300-de505f46f.jpeg 300w, /generated/2021-02-16-vegan-bolognese/bay_leafs-500-de505f46f.jpeg 500w, /generated/2021-02-16-vegan-bolognese/bay_leafs-720-de505f46f.jpeg 720w" type="image/jpeg"><img src="/generated/2021-02-16-vegan-bolognese/bay_leafs-800-de505f46f.jpeg" width="1000" height="801"></picture></a></p>

<p>There is only one important ingredient missing: the mushrooms. The mushrooms provide some of the meaty texture and contribute to a slightly meaty taste.</p>

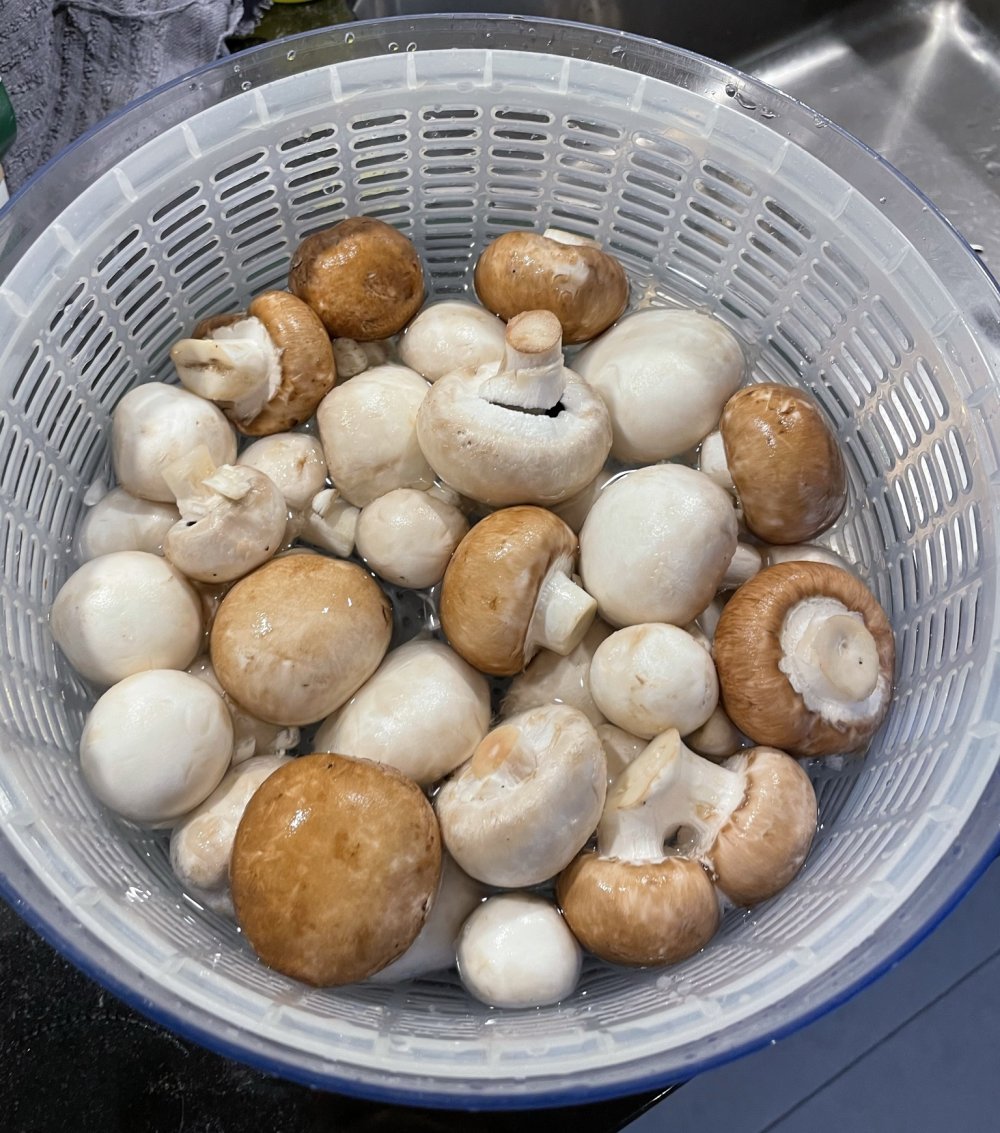
<p>When I have a lot of mushrooms to clean, I usually wash them in a salad spinner after a tip from Kenji. After cleaning, I use the salad spinner to drain most of the water from the mushrooms.</p>

<p><a href="/assets/2021-02-16-vegan-bolognese/mushrooms_cleaning.JPEG"><picture><source srcset="/generated/2021-02-16-vegan-bolognese/mushrooms_cleaning-300-ae72cf231.webp 300w, /generated/2021-02-16-vegan-bolognese/mushrooms_cleaning-500-ae72cf231.webp 500w, /generated/2021-02-16-vegan-bolognese/mushrooms_cleaning-720-ae72cf231.webp 720w" type="image/webp"><source srcset="/generated/2021-02-16-vegan-bolognese/mushrooms_cleaning-300-54e15af3b.jpeg 300w, /generated/2021-02-16-vegan-bolognese/mushrooms_cleaning-500-54e15af3b.jpeg 500w, /generated/2021-02-16-vegan-bolognese/mushrooms_cleaning-720-54e15af3b.jpeg 720w" type="image/jpeg"><img src="/generated/2021-02-16-vegan-bolognese/mushrooms_cleaning-800-54e15af3b.jpeg" width="1000" height="1133"></picture></a></p>

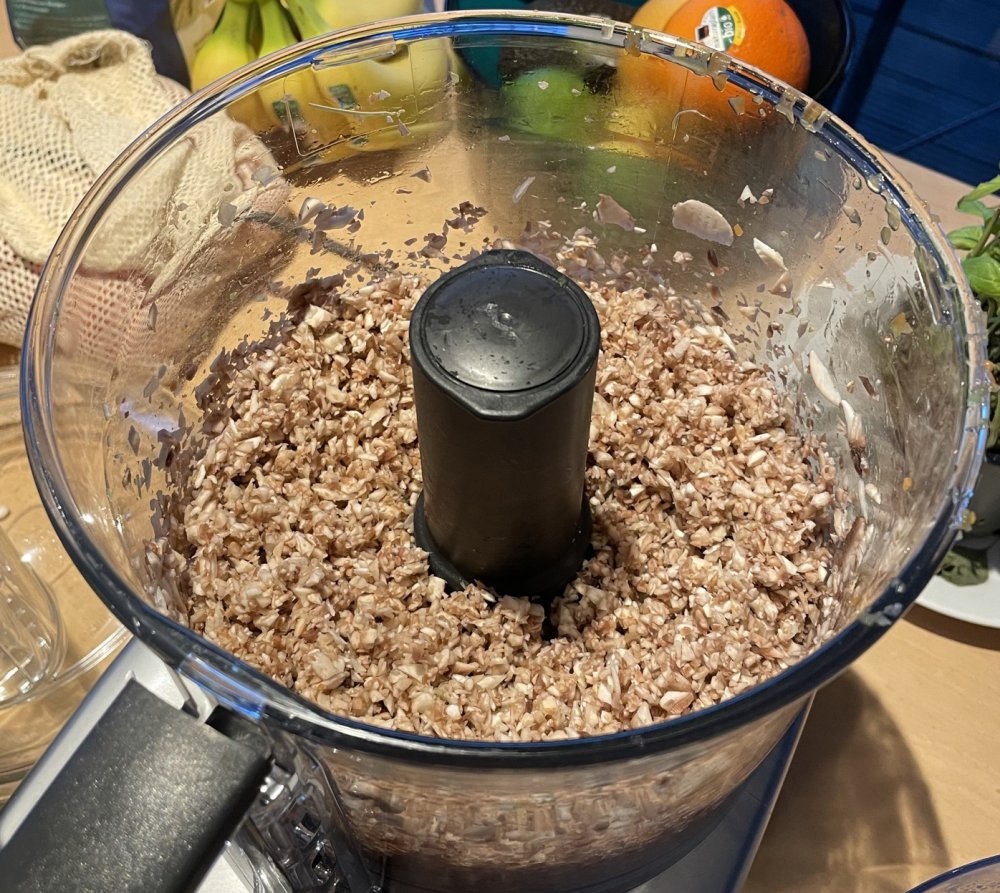
<p>Then use a food processor to cut the mushrooms, or cut them by hand. If your using a food processor make sure not to fill it to the brim, or else only the bottom mushrooms will get chopped. Pulse, or cut, until the largest pieces are just a few millimeter.</p>

<p><a href="/assets/2021-02-16-vegan-bolognese/mushrooms_cut.JPEG"><picture><source srcset="/generated/2021-02-16-vegan-bolognese/mushrooms_cut-300-617098142.webp 300w, /generated/2021-02-16-vegan-bolognese/mushrooms_cut-500-617098142.webp 500w, /generated/2021-02-16-vegan-bolognese/mushrooms_cut-720-617098142.webp 720w" type="image/webp"><source srcset="/generated/2021-02-16-vegan-bolognese/mushrooms_cut-300-3300f9e2f.jpeg 300w, /generated/2021-02-16-vegan-bolognese/mushrooms_cut-500-3300f9e2f.jpeg 500w, /generated/2021-02-16-vegan-bolognese/mushrooms_cut-720-3300f9e2f.jpeg 720w" type="image/jpeg"><img src="/generated/2021-02-16-vegan-bolognese/mushrooms_cut-800-3300f9e2f.jpeg" width="1000" height="893"></picture></a></p>

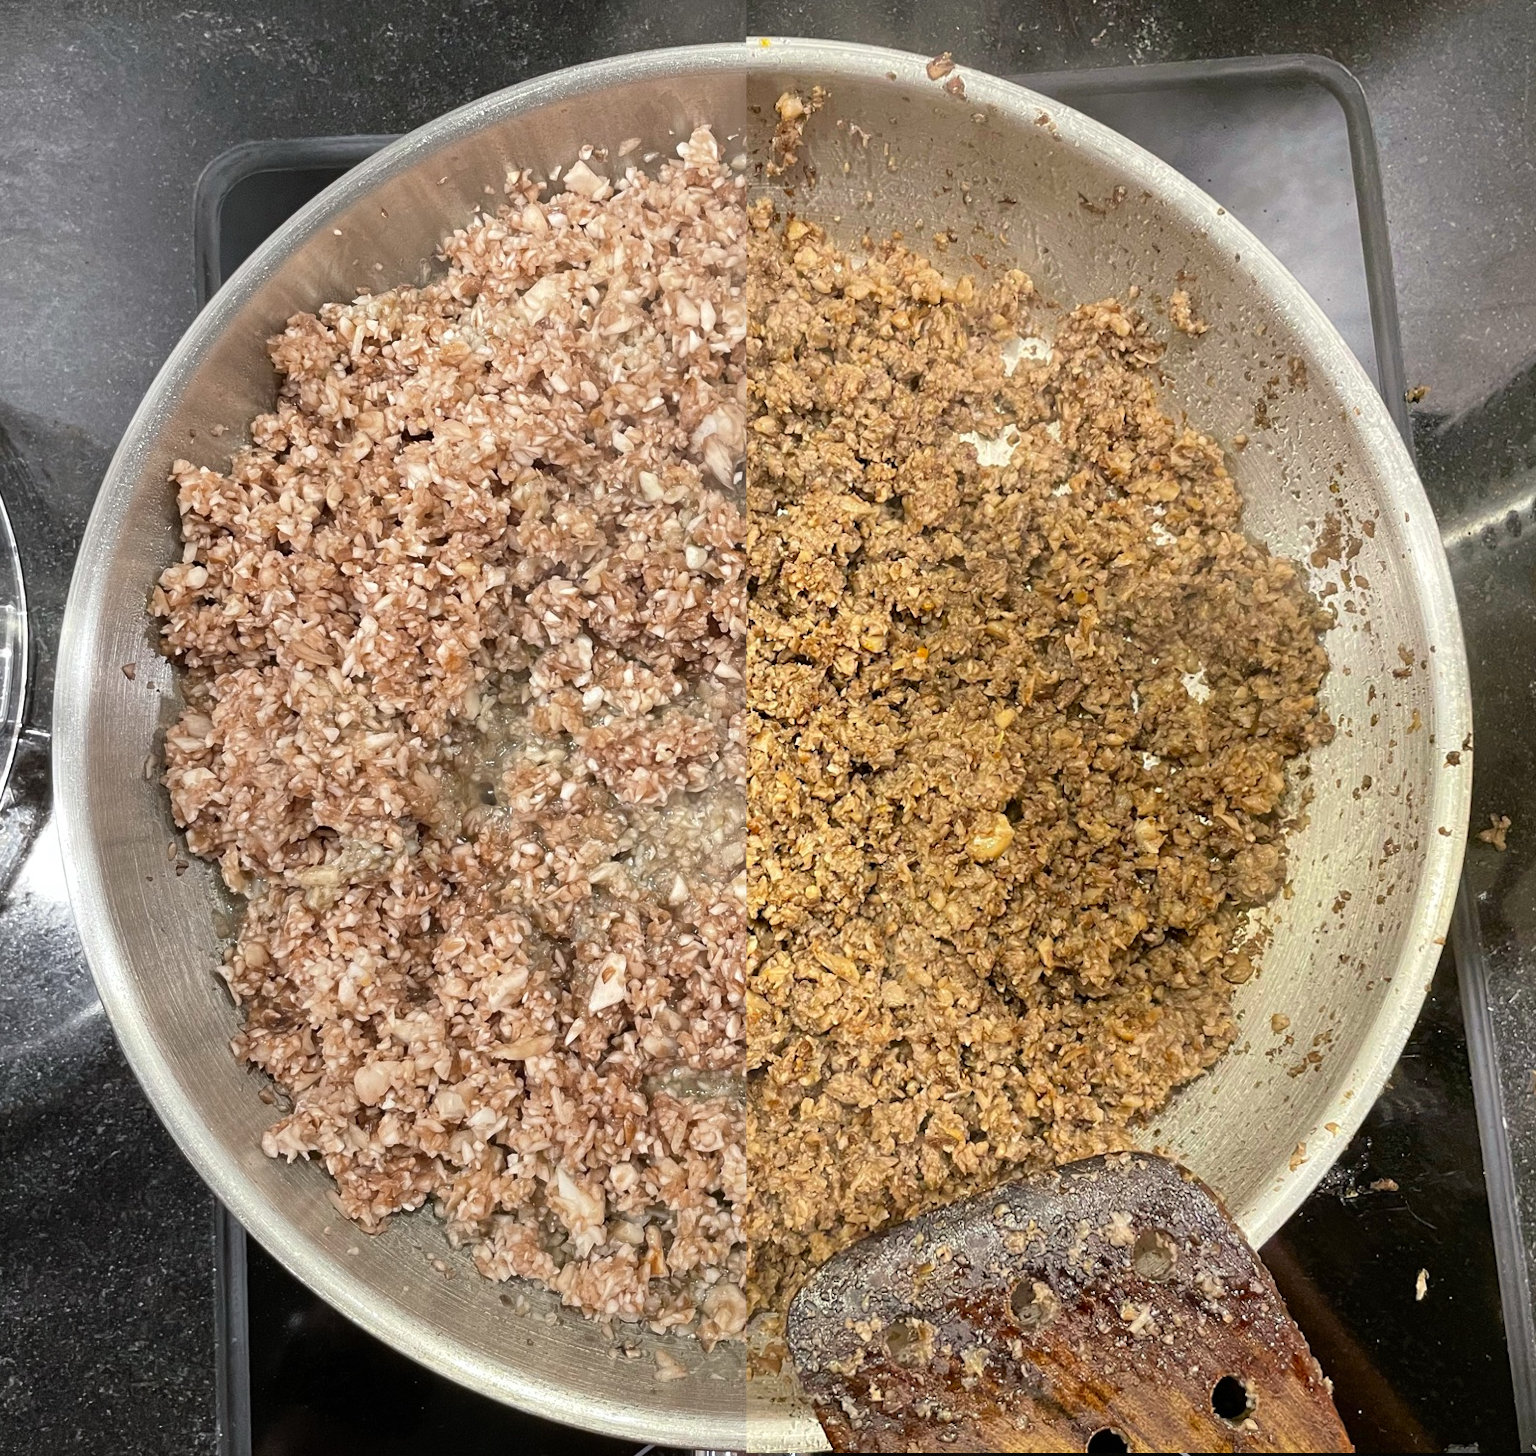
<p>Preheat a pan on medium-high. When it is hot, add some olive oil and the chopped mushrooms. Fry them until the moisture is gone and they are nice and brown.</p>

<p><a href="/assets/2021-02-16-vegan-bolognese/frying_mushrooms.jpeg"><picture><source srcset="/generated/2021-02-16-vegan-bolognese/frying_mushrooms-300-c40bfeadd.webp 300w, /generated/2021-02-16-vegan-bolognese/frying_mushrooms-500-c40bfeadd.webp 500w, /generated/2021-02-16-vegan-bolognese/frying_mushrooms-720-c40bfeadd.webp 720w" type="image/webp"><source srcset="/generated/2021-02-16-vegan-bolognese/frying_mushrooms-300-d32267cc3.jpeg 300w, /generated/2021-02-16-vegan-bolognese/frying_mushrooms-500-d32267cc3.jpeg 500w, /generated/2021-02-16-vegan-bolognese/frying_mushrooms-720-d32267cc3.jpeg 720w" type="image/jpeg"><img src="/generated/2021-02-16-vegan-bolognese/frying_mushrooms-800-d32267cc3.jpeg" width="1536" height="1456"></picture></a></p>

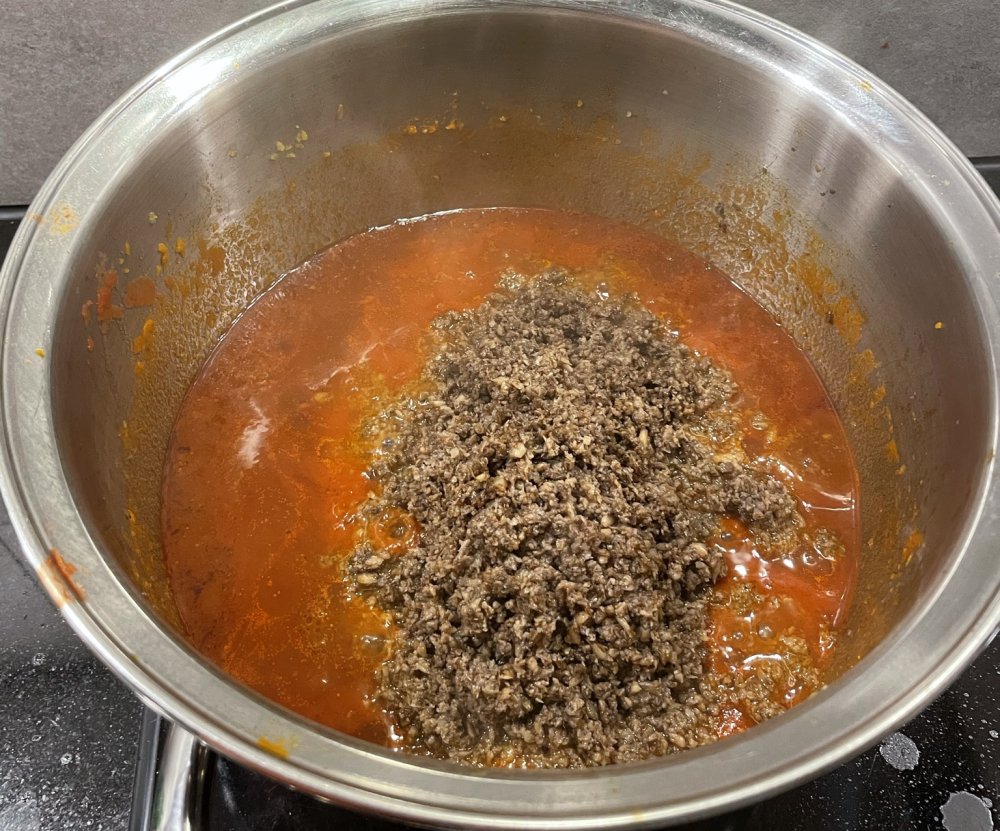
<p>Then add the mushrooms to the sauce, stir it and let it simmer for an hour or so.</p>

<p><a href="/assets/2021-02-16-vegan-bolognese/mushrooms_added_to_sauce.JPEG"><picture><source srcset="/generated/2021-02-16-vegan-bolognese/mushrooms_added_to_sauce-300-956abfb4b.webp 300w, /generated/2021-02-16-vegan-bolognese/mushrooms_added_to_sauce-500-956abfb4b.webp 500w, /generated/2021-02-16-vegan-bolognese/mushrooms_added_to_sauce-720-956abfb4b.webp 720w" type="image/webp"><source srcset="/generated/2021-02-16-vegan-bolognese/mushrooms_added_to_sauce-300-a71f0641e.jpeg 300w, /generated/2021-02-16-vegan-bolognese/mushrooms_added_to_sauce-500-a71f0641e.jpeg 500w, /generated/2021-02-16-vegan-bolognese/mushrooms_added_to_sauce-720-a71f0641e.jpeg 720w" type="image/jpeg"><img src="/generated/2021-02-16-vegan-bolognese/mushrooms_added_to_sauce-800-a71f0641e.jpeg" width="1000" height="831"></picture></a></p>

<p>Finally you should end up with a delicious sauce. Kenji also uses eggplant to thicken his sauce a little. For this recipe I didn’t find it necessary. On the contrary, it was actually quite dry and I added a bit of water when I used it for a lasagna.</p>

<p><a href="/assets/2021-02-16-vegan-bolognese/final_sauce.JPEG"><picture><source srcset="/generated/2021-02-16-vegan-bolognese/final_sauce-300-968d5fbab.webp 300w, /generated/2021-02-16-vegan-bolognese/final_sauce-500-968d5fbab.webp 500w, /generated/2021-02-16-vegan-bolognese/final_sauce-720-968d5fbab.webp 720w" type="image/webp"><source srcset="/generated/2021-02-16-vegan-bolognese/final_sauce-300-2fc191c92.jpeg 300w, /generated/2021-02-16-vegan-bolognese/final_sauce-500-2fc191c92.jpeg 500w, /generated/2021-02-16-vegan-bolognese/final_sauce-720-2fc191c92.jpeg 720w" type="image/jpeg"><img src="/generated/2021-02-16-vegan-bolognese/final_sauce-800-2fc191c92.jpeg" width="1000" height="853"></picture></a></p>

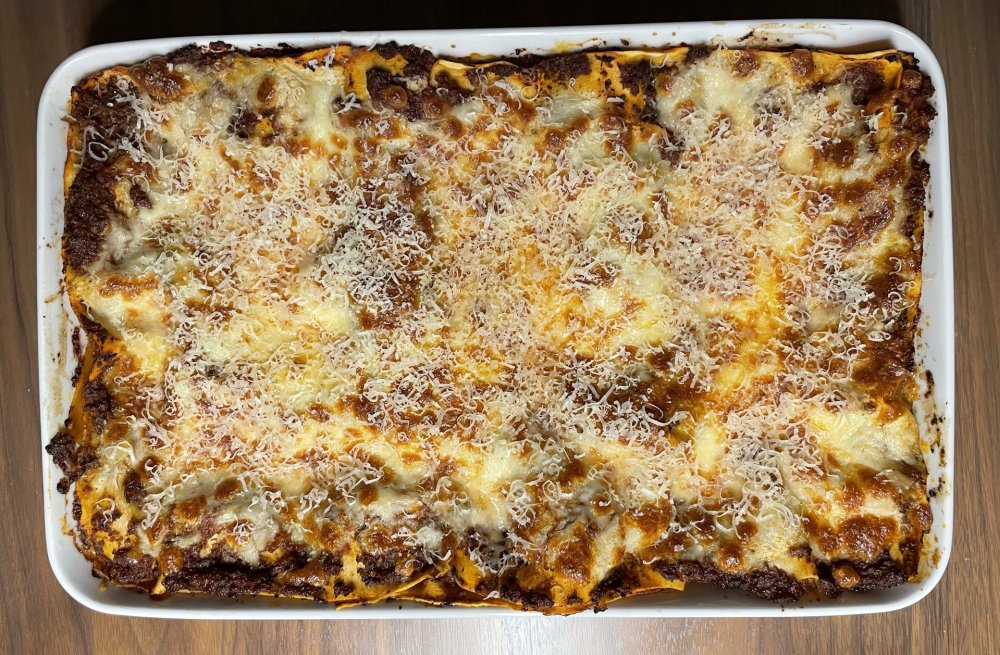
<p>You could eat the sauce with some pappardelle or use it in a (not so vegan) lasagna as I did. You can also make the sauce in advance and store it in the refrigerator for up to a few days. It will only get better with time!</p>

<p><a href="/assets/2021-02-16-vegan-bolognese/lasagna.JPEG"><picture><source srcset="/generated/2021-02-16-vegan-bolognese/lasagna-300-56764fb60.webp 300w, /generated/2021-02-16-vegan-bolognese/lasagna-500-56764fb60.webp 500w, /generated/2021-02-16-vegan-bolognese/lasagna-720-56764fb60.webp 720w" type="image/webp"><source srcset="/generated/2021-02-16-vegan-bolognese/lasagna-300-c4271aad5.jpeg 300w, /generated/2021-02-16-vegan-bolognese/lasagna-500-c4271aad5.jpeg 500w, /generated/2021-02-16-vegan-bolognese/lasagna-720-c4271aad5.jpeg 720w" type="image/jpeg"><img src="/generated/2021-02-16-vegan-bolognese/lasagna-800-c4271aad5.jpeg" width="1000" height="655"></picture></a></p>

<h2 id="ingredients">Ingredients</h2>

<ul>
  <li>5 tablespoons of olive oil</li>
  <li>2 large stalks of celery (about 50 gram, 1 cup)</li>
  <li>1 medium carrot (about 50 gram, 1 cup)</li>
  <li>1 medium onion (about 50 gram, 1 cup)</li>
  <li>5 garlic cloves</li>
  <li>1 tablespoon tomato paste</li>
  <li>1 teaspoon oregano</li>
  <li>pinch of chili flakes</li>
  <li>1 tablespoon soy sauce</li>
  <li>1.5 teaspoon marmite</li>
  <li>250 ml (1 cup) red wine</li>
  <li>800 g (28-ounce) whole peeled tomatoes packed in juice</li>
  <li>700 g (25-ounces) mix of button and cremini mushrooms</li>
  <li>3 bay leafs</li>
  <li>salt and pepper for seasoning</li>
</ul>

<h2 id="recipe">Recipe</h2>

<p><strong>Serves 4. 1 hour active time, 2 hours in total.</strong></p>

<ol>
  <li>For the mirepoix, add the</li>
</ol>

<ul>
  <li>2 large stalks of celery (about 50 gram, 1 cup)</li>
  <li>1 medium carrot (about 50 gram, 1 cup)</li>
  <li>
    <p>1 medium union (about 50 gram, 1 cup)</p>

    <p>to the food processor and pulse until the pieces are just a few millimeter in size.</p>
  </li>
</ul>

<ol>
  <li>
    <p>Heat up a large pan or dutch oven on medium heat. When hot, add 3 tablespoons of olive oil and add the mirepoix. Stir every few minutes.</p>
  </li>
  <li>
    <p>Prepare the taste maker bowl with</p>
  </li>
</ol>

<ul>
  <li>5 garlic cloves from a garlic press</li>
  <li>1 tablespoon tomato paste</li>
  <li>1 teaspoon oregano</li>
  <li>pinch of chili flakes</li>
  <li>1 tablespoon soy sauce</li>
  <li>1.5 teaspoon marmite</li>
</ul>

<ol>
  <li>Wash the</li>
</ol>

<ul>
  <li>
    <p>700 g (25-ounces) mix of button and cremini mushrooms</p>

    <p>and put them into the food processor. Pulse until the largest pieces are a few millimeter in size.</p>
  </li>
</ul>

<ol>
  <li>
    <p>When the vegetables are soft, add the taste makers and stir.</p>
  </li>
  <li>
    <p>After about a minute, add the</p>
  </li>
</ol>

<ul>
  <li>250 ml (1 cup) of red wine.</li>
</ul>

<ol>
  <li>
    <p>Let the wine reduce until a thick sauce remains. Thick means, if you scrape along the bottom, the sauce shouldn’t immediately fill the gap.</p>
  </li>
  <li>
    <p>Heat up a frying pan over medium high heat. When hot, add 2 tablespoons of olive oil and add the cut mushrooms.</p>
  </li>
  <li>
    <p>It will take a while (~20 minutes) before all the moisture has evaporated. Once the moisture has disappeared, stir every few minutes until the pieces are starting to turn brown.</p>
  </li>
  <li>
    <p>Add the</p>
  </li>
</ol>

<ul>
  <li>
    <p>800 g (28-ounce) whole peeled tomatoes packed in juice</p>

    <p>to the wine/mirepoix mixture and mash them with a potato masher until a smooth mixture remains.</p>
  </li>
</ul>

<ol>
  <li>Add the</li>
</ol>

<ul>
  <li>3 bay leafs</li>
  <li>
    <p>browned mushroom bits</p>

    <p>and stir the whole mixture.</p>
  </li>
</ul>

<ol>
  <li>
    <p>Let it simmer over low heat for about an hour.</p>
  </li>
  <li>
    <p>Season to taste using salt an pepper. It probably doesn’t need much salt, since there is already some in the soy sauce and marmite.</p>
  </li>
  <li>
    <p>Serve with pappardelle or use in a lasagna. Enjoy!</p>
  </li>
</ol>

<p>Discuss <a href="https://www.reddit.com/r/seriouseats/comments/ll23js/improved_kenjis_hearty_vegan_mushroom_bolognese/">Reddit/SeriousEats</a>.</p>]]></content><author><name></name></author><category term="cooking" /><summary type="html"><![CDATA[I don’t eat too much meat these days and one of the things I really miss is a good bolognese sauce. Since bolognese revolves so much around meat, it is not easy to veganize. However, I now found a really great alternative, mostly based on a recipe by J. Kenji López-Alt.]]></summary></entry><entry><title type="html">Awesome tofu chunks</title><link href="https://cookncode.com/cooking/2021/01/30/awesome-tofu-chuncks.html" rel="alternate" type="text/html" title="Awesome tofu chunks" /><published>2021-01-30T00:00:00+00:00</published><updated>2026-04-14T18:42:22+00:00</updated><id>https://cookncode.com/cooking/2021/01/30/awesome-tofu-chuncks</id><content type="html" xml:base="https://cookncode.com/cooking/2021/01/30/awesome-tofu-chuncks.html"><![CDATA[<p>Let’s be real, tofu on its own is the not most exciting thing. Recently however, we made a recipe where the tofu was really good! Let me share it with you.</p>

<p>The recipe we made was a <a href="https://www.pickuplimes.com/single-post/sweet-and-sour-tofu-stir-fry">Sweet and Sour Tofu Stir Fry</a>. I wasn’t a big fan of the recipe itself. Partially because I’m not a big fan of sweet dishes and partially because we might have made it a bit too sour.</p>

<p>But. The tofu chunks on their own were delicious. It was actually quite a shame that you had to mix them into the sweet and sour sauce which completely overwhelmed them. If you would use these chunks in a stir fry, or on the side of some Asian style dishes, it would work like a charm.</p>

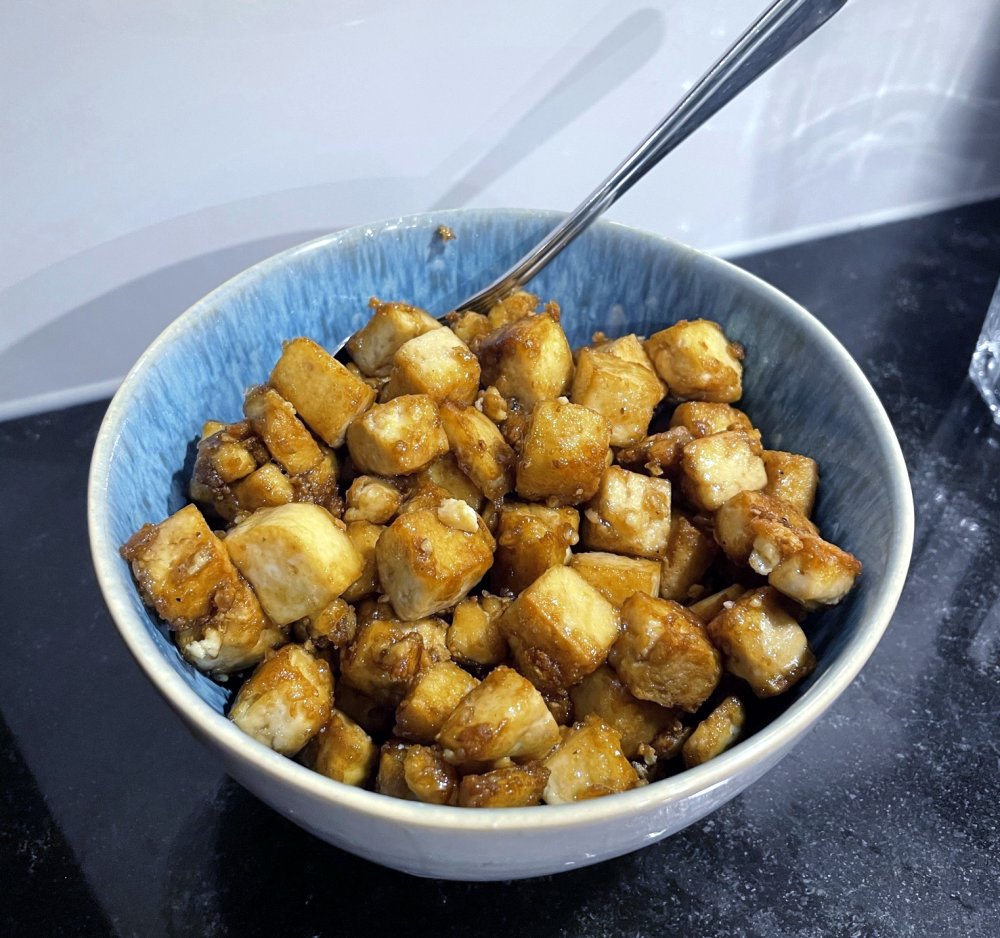
<p>The result.</p>

<p><a href="/assets/2021-01-30-awesome-tofu-chunks/chunks_finished.jpeg"><picture><source srcset="/generated/2021-01-30-awesome-tofu-chunks/chunks_finished-300-66a45d3e1.webp 300w, /generated/2021-01-30-awesome-tofu-chunks/chunks_finished-500-66a45d3e1.webp 500w, /generated/2021-01-30-awesome-tofu-chunks/chunks_finished-720-66a45d3e1.webp 720w" type="image/webp"><source srcset="/generated/2021-01-30-awesome-tofu-chunks/chunks_finished-300-b883f7cc2.jpeg 300w, /generated/2021-01-30-awesome-tofu-chunks/chunks_finished-500-b883f7cc2.jpeg 500w, /generated/2021-01-30-awesome-tofu-chunks/chunks_finished-720-b883f7cc2.jpeg 720w" type="image/jpeg"><img src="/generated/2021-01-30-awesome-tofu-chunks/chunks_finished-800-b883f7cc2.jpeg" width="1000" height="938"></picture></a></p>

<h2 id="recipe">Recipe</h2>

<p>Based on the instructions of <a href="https://www.pickuplimes.com/single-post/sweet-and-sour-tofu-stir-fry">Sadia Badiei</a>:</p>

<ol>
  <li>Cut the tofu in 1 cm cubes and press as much moisture out of them as possible using paper towels or a clean kitchen towel. Reducing the moisture will help speed up the browning process, since there is less moisture to evaporate before the <a href="https://en.wikipedia.org/wiki/Maillard_reaction">Maillard</a> reaction can take place. Also it will prevent sticking while cooking.</li>
  <li>
    <p>To a large shallow bowl, add the:</p>

    <ul>
      <li>450 g, 1 cm cubed tofu</li>
      <li>30 ml (2 tbsp) sodium reduced soy sauce</li>
    </ul>

    <p>and gently toss to coat. Then add the:</p>

    <ul>
      <li>30 g (1/4 cup) cornstarch,</li>
      <li>1/2 tsp salt,</li>
      <li>1/4 tsp pepper.</li>
    </ul>

    <p>Gently stir until all the pieces are well coated.</p>
  </li>
  <li>Heat a large pan over medium-high heat. When hot, add the oil and the tofu. Cook the tofu until it’s crispy and golden on all sides (~10 minutes). Don’t disturb the tofu too much while it’s cooking, otherwise, it might crumble. Only stir it every couple of minutes.</li>
</ol>

<p><a href="/assets/2021-01-30-awesome-tofu-chunks/chunks_cooking.jpeg"><picture><source srcset="/generated/2021-01-30-awesome-tofu-chunks/chunks_cooking-300-beb51ae8a.webp 300w, /generated/2021-01-30-awesome-tofu-chunks/chunks_cooking-500-beb51ae8a.webp 500w, /generated/2021-01-30-awesome-tofu-chunks/chunks_cooking-720-beb51ae8a.webp 720w" type="image/webp"><source srcset="/generated/2021-01-30-awesome-tofu-chunks/chunks_cooking-300-7499acc00.jpeg 300w, /generated/2021-01-30-awesome-tofu-chunks/chunks_cooking-500-7499acc00.jpeg 500w, /generated/2021-01-30-awesome-tofu-chunks/chunks_cooking-720-7499acc00.jpeg 720w" type="image/jpeg"><img src="/generated/2021-01-30-awesome-tofu-chunks/chunks_cooking-800-7499acc00.jpeg" width="1000" height="732"></picture></a></p>]]></content><author><name></name></author><category term="cooking" /><summary type="html"><![CDATA[Let’s be real, tofu on its own is the not most exciting thing. Recently however, we made a recipe where the tofu was really good! Let me share it with you.]]></summary></entry><entry><title type="html">Bringing stale bread back from the dead</title><link href="https://cookncode.com/cooking/2021/01/26/bringing-stale-bread-back-from-the-dead.html" rel="alternate" type="text/html" title="Bringing stale bread back from the dead" /><published>2021-01-26T00:00:00+00:00</published><updated>2026-04-14T18:42:22+00:00</updated><id>https://cookncode.com/cooking/2021/01/26/bringing-stale-bread-back-from-the-dead</id><content type="html" xml:base="https://cookncode.com/cooking/2021/01/26/bringing-stale-bread-back-from-the-dead.html"><![CDATA[<p>Not many things can beat the taste and smell of a freshly baked bread. Unfortunately this fresh-bake taste quickly disappears and the texture becomes worse with time. After day two, the bread is nothing like it was when you bought it. Luckily you can bring it back to (almost) its new state with a simple trick!</p>

<h2 id="intro">Intro</h2>

<p>Recently it happened to me that a loaf of bread was laying around for 5 days and it became quite stale. Then I remembered this great life hack on how to revive bread. Just make it wet and pop it in the oven. The results are quite amazing. Plus your kitchen smells pretty good afterwards!</p>

<p>Top tip: you can also use this trick to impress your guests with a seemingly freshly baked bread in the morning. 👍</p>

<h2 id="recipe">Recipe</h2>

<ol>
  <li>Preheat the oven to 200 °C (390 °F). In case you have a fancy steam oven, you can also use that setting and skip the next step. Although for very stale breads it would probably be beneficial to moisturize it.</li>
  <li>Wet the bread while holding it underneath the water tap. The staler it is, the more water you should let it soak up.</li>
  <li>Put it in the oven for 5-15 minutes, depending on how wet you made it. Once the crust is crispy again you can take it out.</li>
  <li>Let is cool down if you have the patience. If you don’t, like most of us in the real world, start feasting on your awesome revitalized bread!</li>
</ol>]]></content><author><name></name></author><category term="cooking" /><summary type="html"><![CDATA[Not many things can beat the taste and smell of a freshly baked bread. Unfortunately this fresh-bake taste quickly disappears and the texture becomes worse with time. After day two, the bread is nothing like it was when you bought it. Luckily you can bring it back to (almost) its new state with a simple trick!]]></summary></entry></feed>