- What is TwinCAT/BSD?
- Virtual machines ❤️ Hyper-V
- Installing Tc/BSD on VirtualBox
- Installing Tc/BSD on VMware
- Device manager
- Web console
- Installing packages
- Running PLC code
TwinCAT/BSD is a new operating system for the TwinCAT runtime. It has a small footprint and it’s free. Furthermore, TwinCAT/BSD allows you to run TwinCAT code locally when you have Hyper-V enabled if you install it on a virtual machine. In this tutorial, I go over the installation of TwinCAT/BSD on VMware and Virtual Box and show some basic usages of Tc/BSD.
What is TwinCAT/BSD?
TwinCAT/BSD, or Tc/BSD for short, is an alternative operating system for TwinCAT. It’s based on the open source operating system FreeBSD. Beckhoff took FreeBSD and integrated the TwinCAT runtime into it. It serves as an alternative operating system for the TwinCAT runtime to Windows CE/7/10.
Note that TwinCAT/BSD is only for the TwinCAT runtime. Thus the place where your code gets executed. Nothing changes on the code development side: you still write your code on Windows in either Visual Studio or the TwinCAT XAE Shell.
Tc/BSD is a little different from Windows and it might take you some time to get used to it. For example, Tc/BSD doesn’t come with a desktop environment: there is no desktop with icons, wallpaper, and a start menu. If you start Tc/BSD, you see a black screen with white text on it: a terminal.
Make no mistake, working from a terminal can be quite powerful, but it can take some time to get familiar with. At the end of the tutorial, I show some examples of what you can do with it. You can also find some commands in the official manual or in this cheat sheet.
Some other advantages of using Tc/BSD are that it’s free and requires less space. Moreover, because Beckhoff has access to the code of the operating system, they do not rely on Microsoft for support. The reliance is causing issues for Windows CE because its end of life is planned for late 2023.
If you would like to get more details on Tc/BSD, watch the official Beckhoff video or read the manual for in-depth information.
Virtual machines ❤️ Hyper-V
I started to look into TwinCAT/BSD, because I wanted to run some TwinCAT code locally. Earlier this was possible, but at a certain point, I installed Docker which requires Hyper-V. Unfortunately, once you enable this and you try to run your TwinCAT code locally, you get an error:
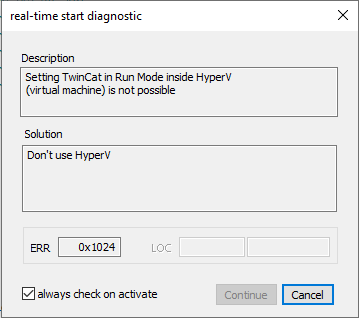
While researching how to circumvent this restriction, I came across a Reddit post which mentioned VMware works with TwinCAT 3 and Hyper-V. This provided me with a nice opportunity to test Tc/BSD because I didn’t want to create a big Windows VM. Also it allowed me to answer a StackOverflow question 🥳. Furthermore, I found out that it also works with Virtual Box.
Installing Tc/BSD on VirtualBox
Installing Tc/BSD on Virtual Box is quite straightforward, thanks to an install script from the community. Furthermore, there is also a video by Coding Bytes describing installation.
To install Tc/BSD:
- Download and install Virtual Box.
- Download or clone the install script.
-
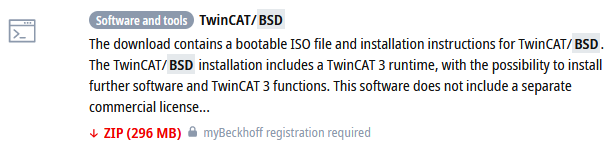
Go to the Beckhoff website and download the TwinCAT/BSD ISO.
- Extract the contents of the installer script and the Tc/BSD ISO. Copy the contents of both to a single folder.
- Copy the exact filename of the Tc/BSD ISO image and open
Create-TcBsdVM.ps1orTwinCAT BSD VM creator.batwith a text editor, depending on which you want to use. - Change the ISO filename in one of the installer scripts to the one which matches your downloaded ISO file. Here
"TCBSD-x64-13-55702.iso"is the name of the ISO file I downloaded.-
Create-TcBsdVM.ps1at line 7:$tcbsdimagefile="TCBSD-x64-13-55702.iso", -
TwinCAT BSD VM creator.batat line 2:SET sourcefilename="TCBSD-x64-13-55702.iso"
-
- Save and close the installer script.
- Then either double click
TwinCAT BSD VM creator.batto execute, or from powershell runCreate-TcBsdVM.ps1 TcBSD-VM. Here the first argument,TcBSD-VM, is the name of the virtual machine. -
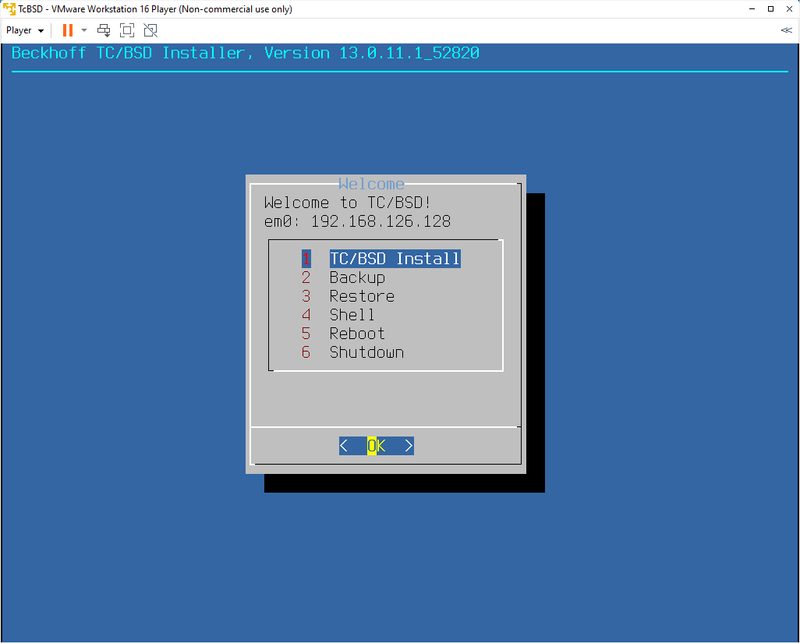
You should see a Virtual Box window open and then you wait for the installer to start. This can take a minute. After that, you should see the following screen. Select TC/BSD Install and hit enter.
- Then select the 4G hard drive which was automatically created by the script and hit enter.
-
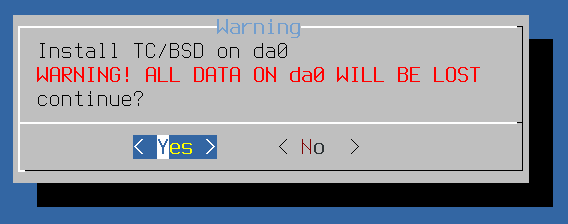
Hit enter again to acknowledge the warning.
- Then it asks for you to generate a password. Type in a password and repeat it to make sure it’s correct.
-
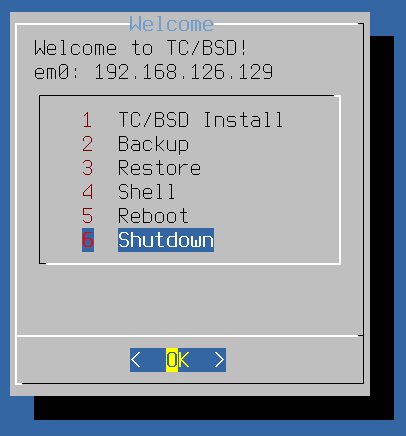
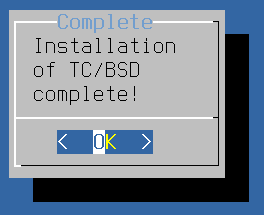
After several minutes the installation is complete and you see the following screen. Select OK.

-
In the new menu select Shutdown.
-
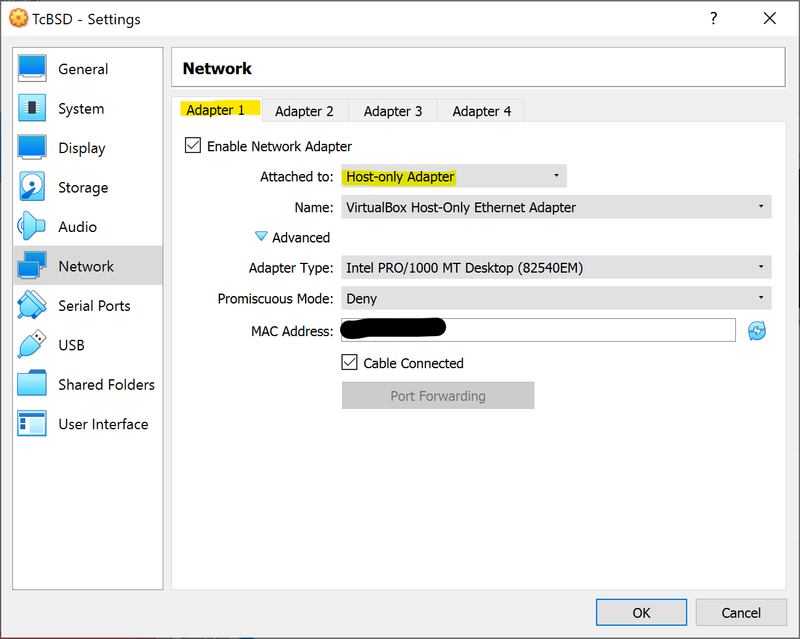
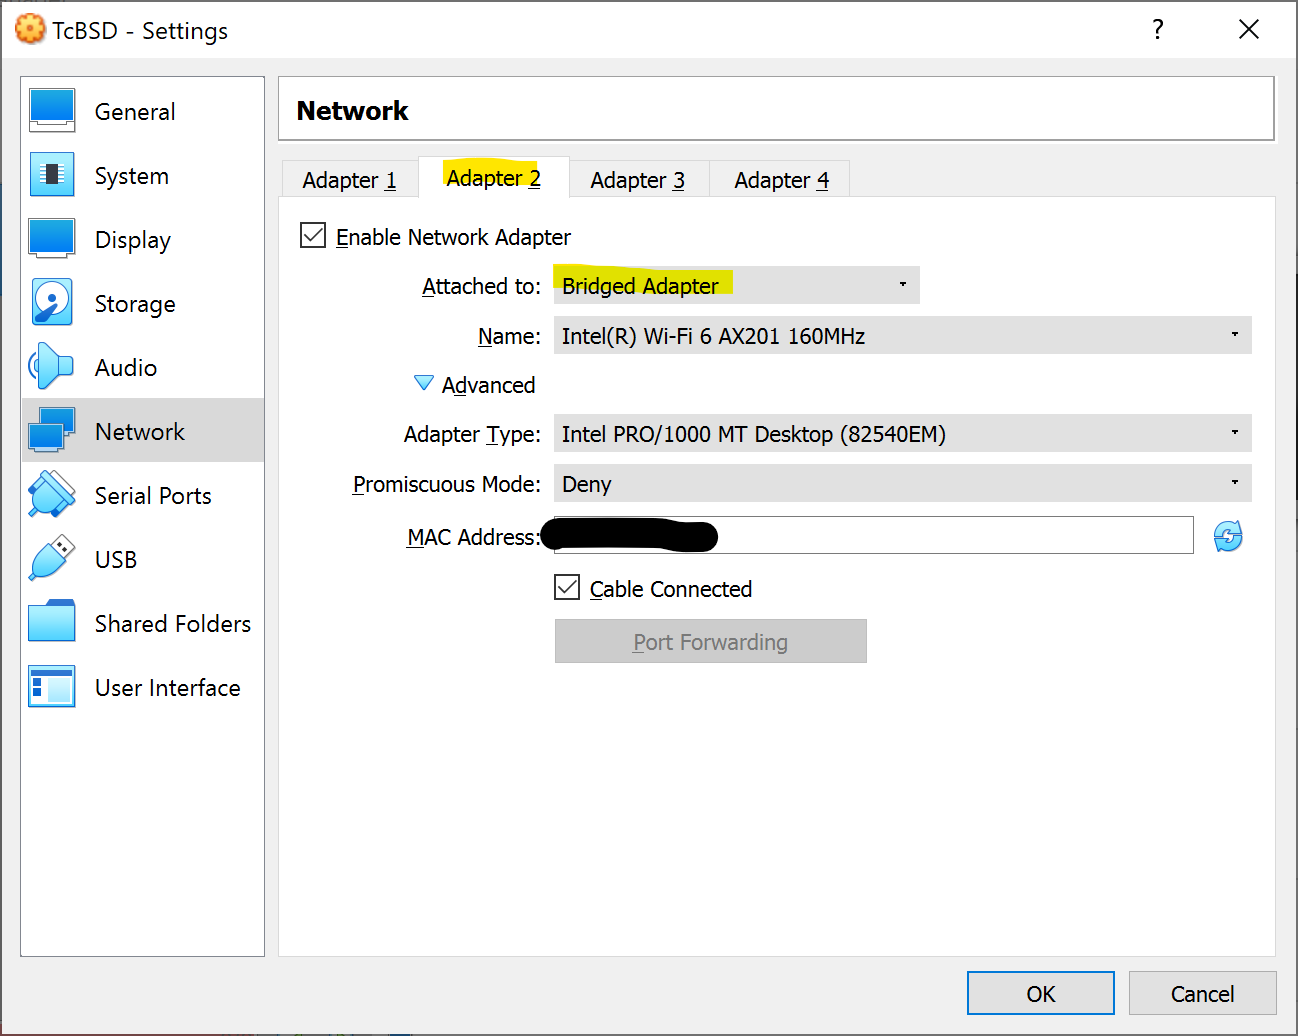
Open the Settings > Network of the virtual machine you created. Now there are different options for different use cases:
-
If you just use the runtime locally, enable a Network adapter 1 and set it as a Host only adapter
-
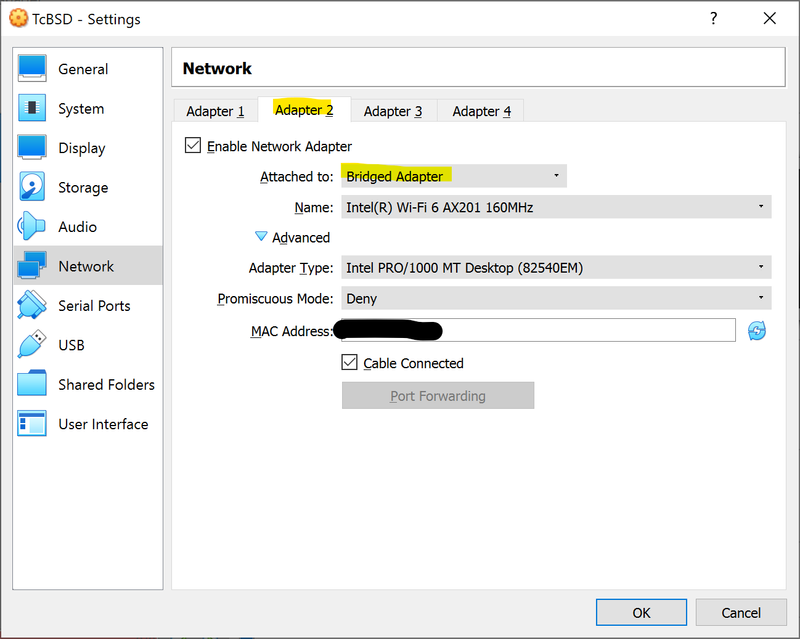
If you want to set up a physical connection to an outside network select Bridged adapter
-
If you want the Tc/BSD package manager to work, you need to enable both. For adapter 1, select Host only adapter and enable a second adapter where you select Bridged adapter.
-
-
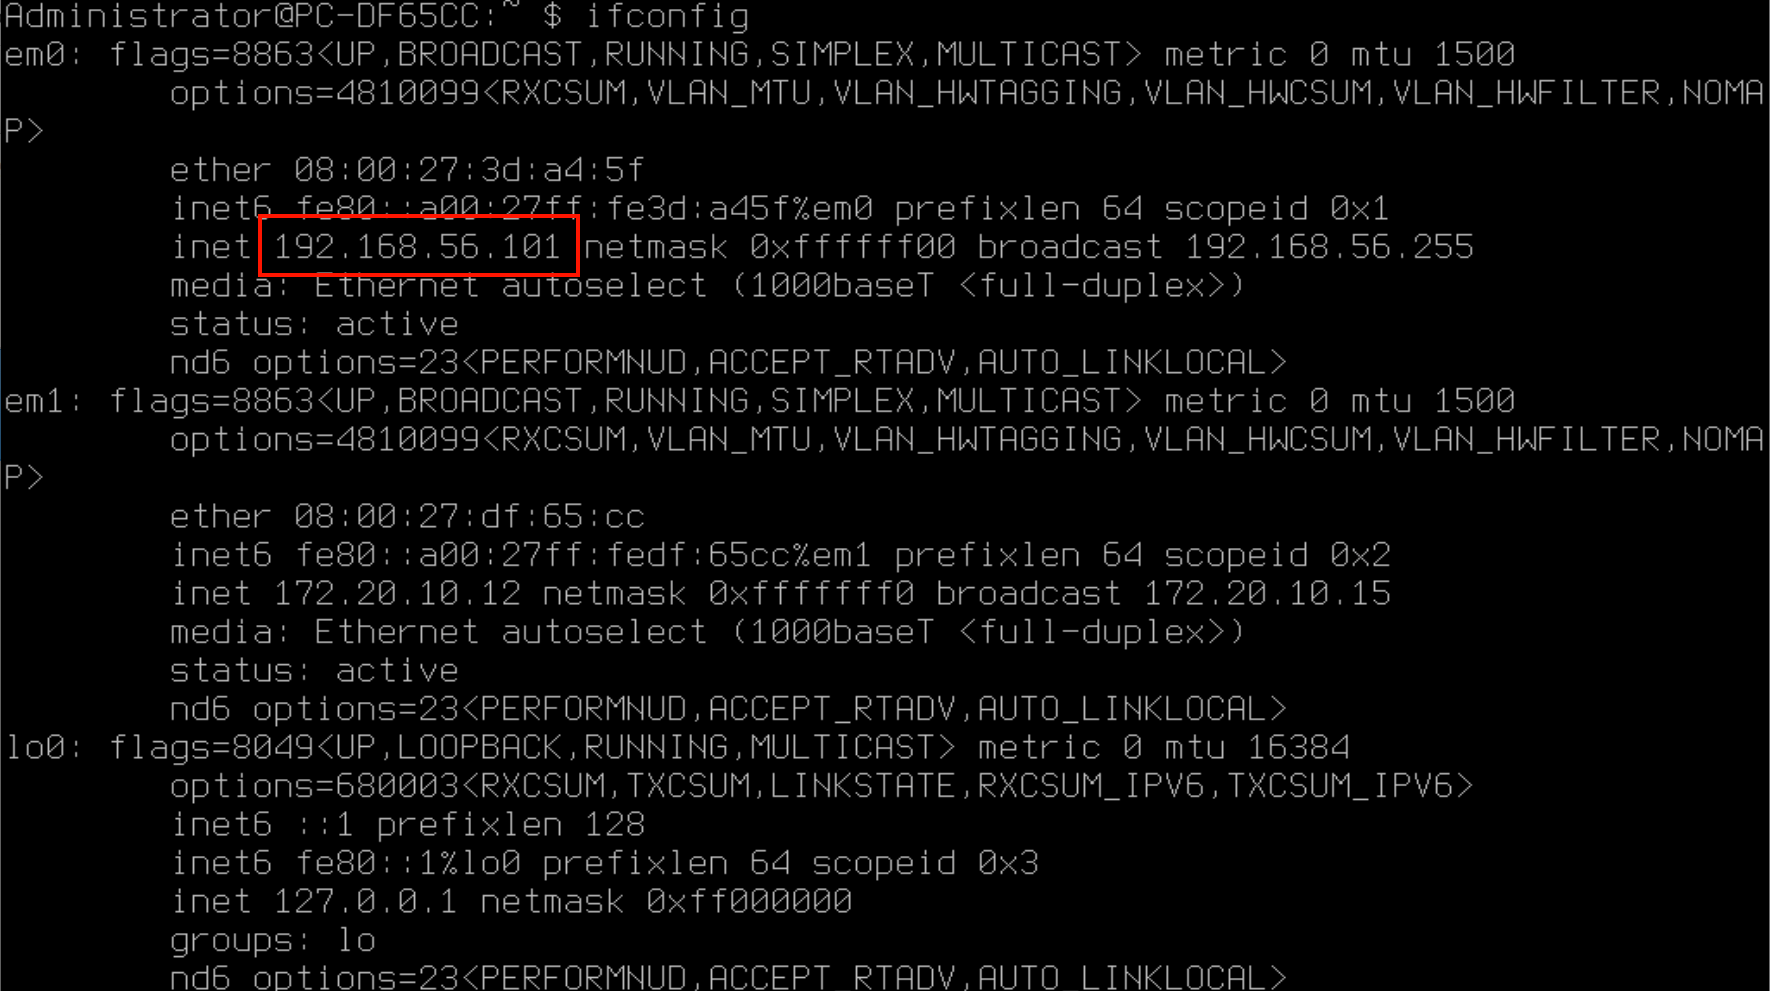
Verify that the network connections work by starting the virtual machine, logging in and:
-
Run
ifconfig. You should see aninetstarting with192.168..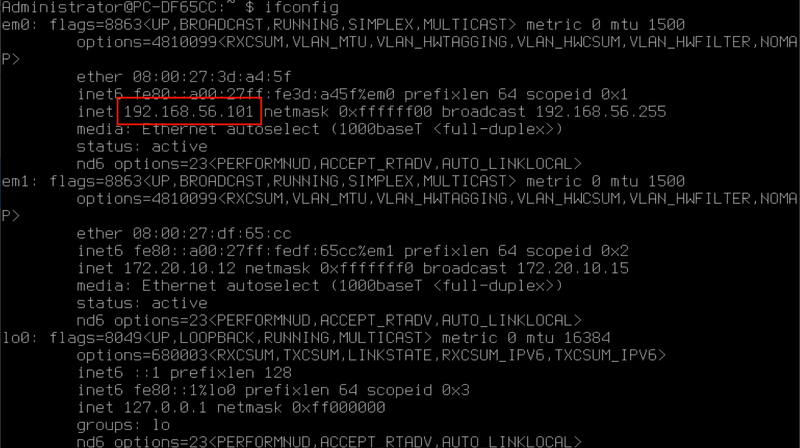
-
You can also try to
ping www.beckhoff.comand see if you get a reply. For me, it took a minute before the network connection started to work.
-


	$ ping www.beckhoff.com
	PING d2la171hyf8xwx.cloudfront.net (52.222.139.54): 56 data bytes
	64 bytes from 52.222.139.54: icmp_seq=0 ttl=128 time=9.673 ms
	64 bytes from 52.222.139.54: icmp_seq=1 ttl=128 time=8.739 ms
	64 bytes from 52.222.139.54: icmp_seq=2 ttl=128 time=9.783 ms
	^C
	--- d2la171hyf8xwx.cloudfront.net ping statistics ---
	3 packets transmitted, 3 packets received, 0.0% packet loss
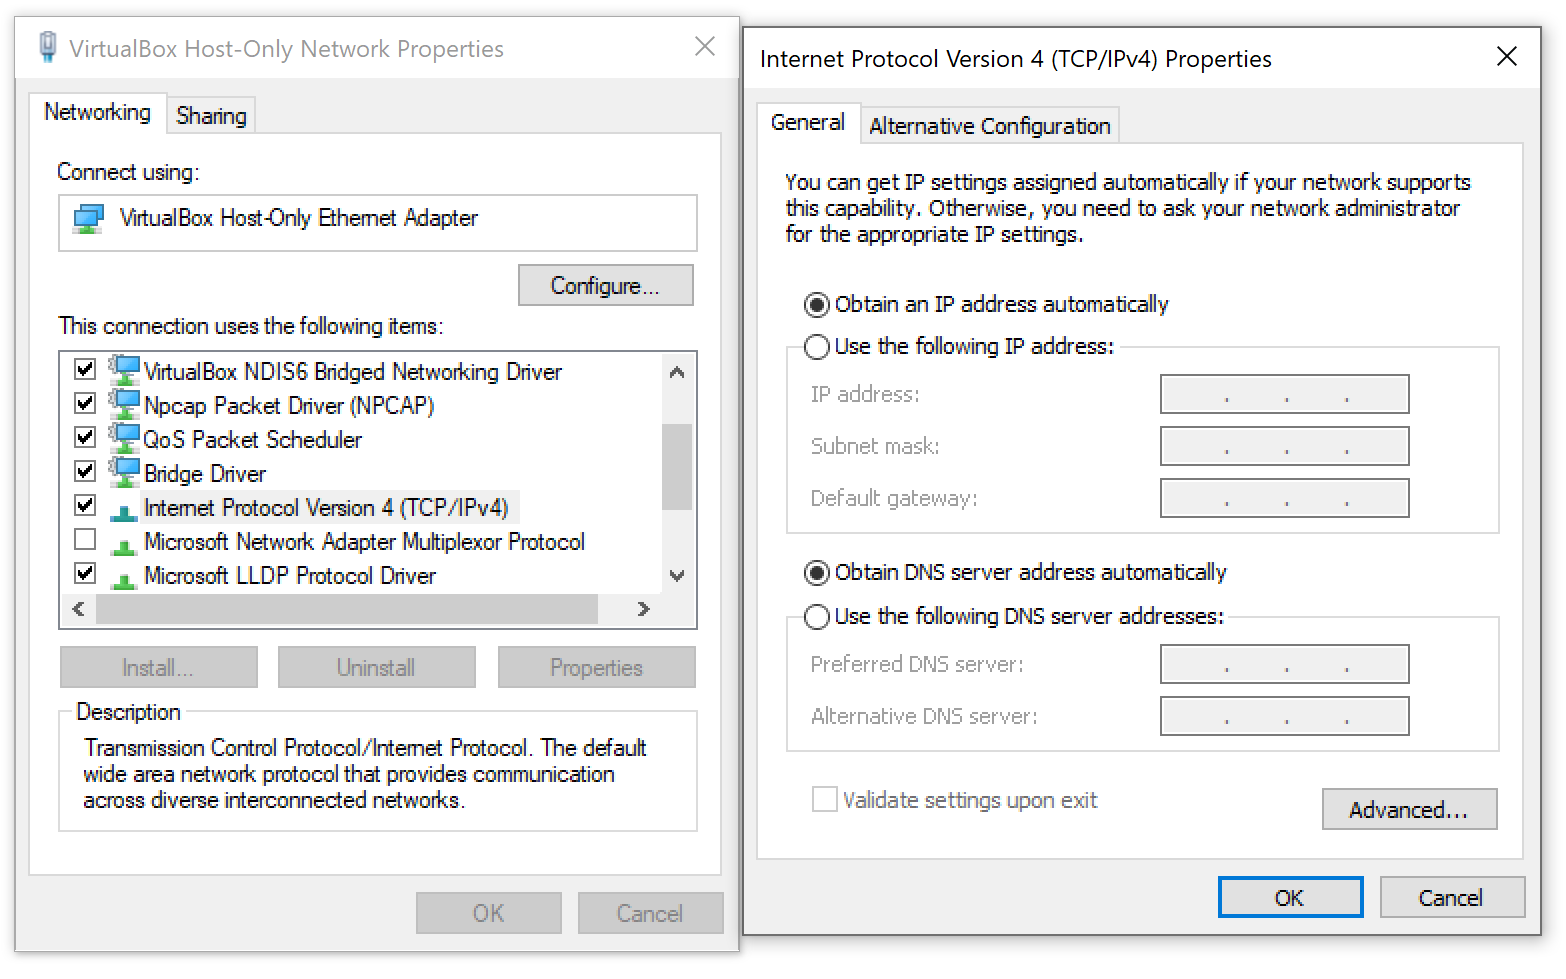
- In case it is not working, check your network adapter settings. Type Ethernet settings into the start menu and open it. Select Change adapter options and right-click VirtualBox Host-Only Network and select Properties. Make sure they are set to automatic.

Installing Tc/BSD on VMware
Installing TwinCAT/BSD on VMware is a bit more complicated. The steps below are based on a YouTube tutorial from Jakob Sagatowski. Before you head over there, I did notice that I had to do several things differently for it to work.
Create a bootable USB
-
Install Rufus to create a bootable USB drive.
- Install via the terminal
winget install -e --id Rufus.Rufus. - Or download manually and install. You can also use the portable version, which doesn’t require any installation.
- Install via the terminal
-
Go to the Beckhoff website and download the TwinCAT/BSD ISO.
-
Unzip the file you just downloaded. You’ll probably find three files in there. The ISO one is the one you need.
-
Get yourself a USB drive which doesn’t contain important information, since it’s formatted in the process. I used an old 1 GB USB drive that I bought for €30 a long time ago 😱.
-
Open Rufus, click SELECT and select the ISO file you just unpacked.
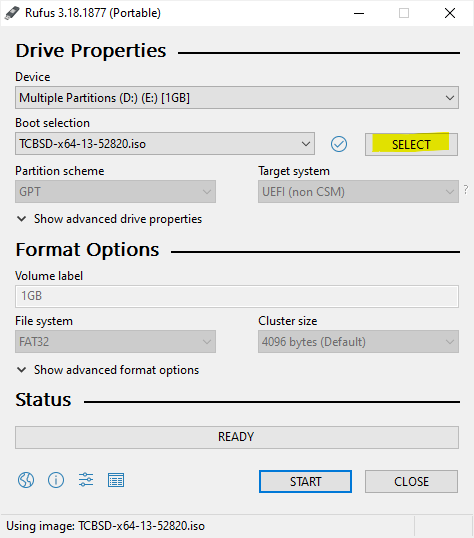
-
Then select START. It then formats the USB drive and makes it a bootable USB drive with Tc/BSD on it.

Installing TwinCAT/BSD
-
Download and install VMware Workstation Player. It’s free for non-commercial use.
- Install from the terminal with
winget install -e --id VMware.WorkstationPlayer - Or manually download and install.
- Install from the terminal with
-
Select the free license or enter a license number
-
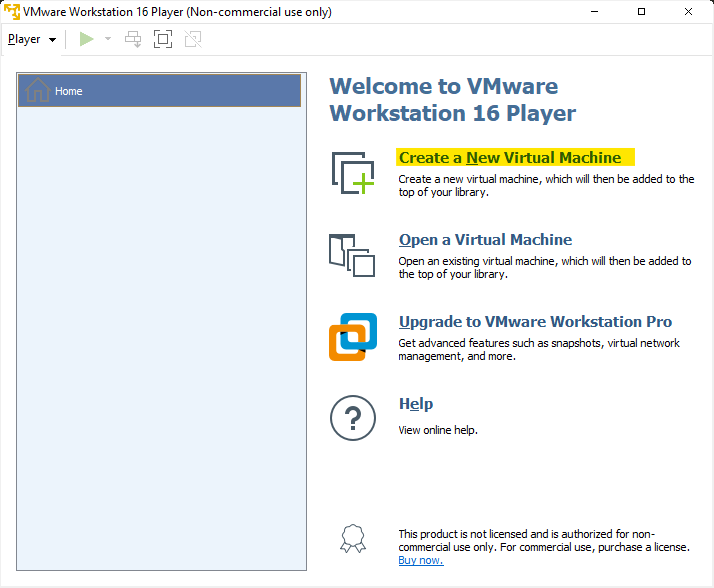
Start VMware Workstation Player with Administrator rights and select create a New Virtual Machine. You need administrator rights later to access the USB drive.
-
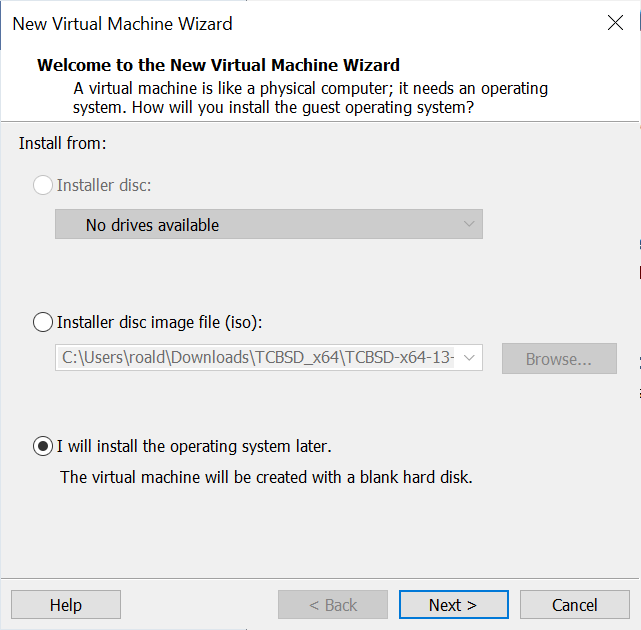
Select I will install the operating system later.

-
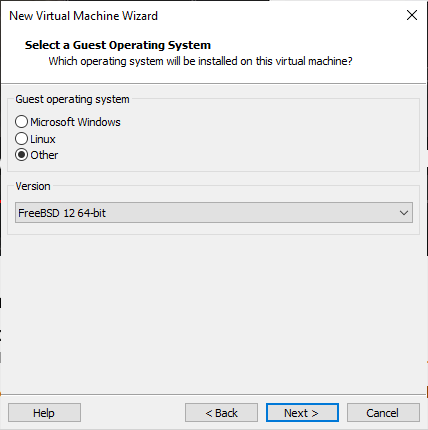
Select “Other” and “FreeBSD 12 64-bit”
-
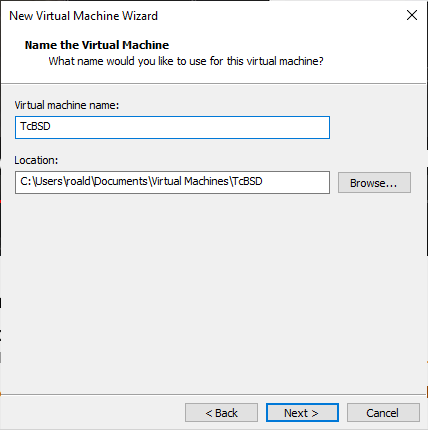
Give your virtual machine a descriptive name and change the save location if you would like to.

-
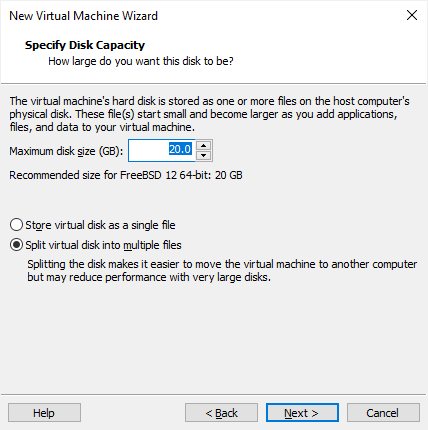
Specify the disk capacity. I left it at the default 20 GB. Note: Jakob removes this hard drive and adds the USB drive first and then adds a new hard drive. But, I found that if I do this, I get an error1 once I remove the USB drive.
-
You see a screen summarizing the results. Click Finish.
-
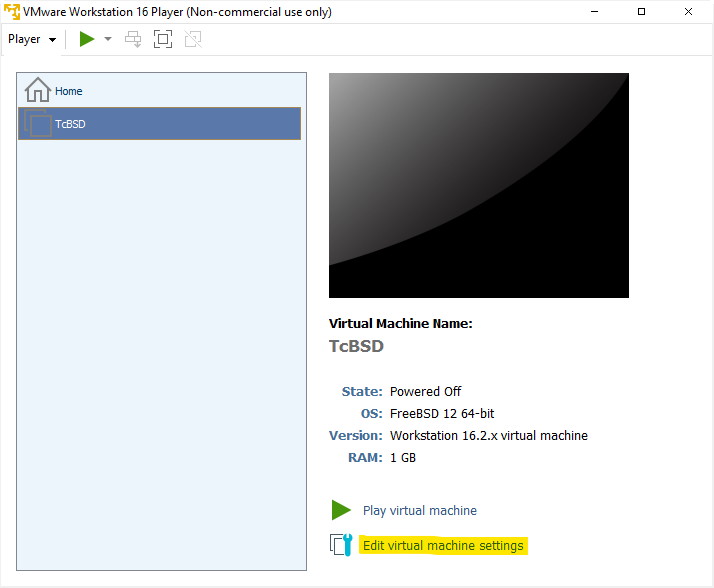
Select the virtual machine you just created and select Edit virtual Machine Settings.
-
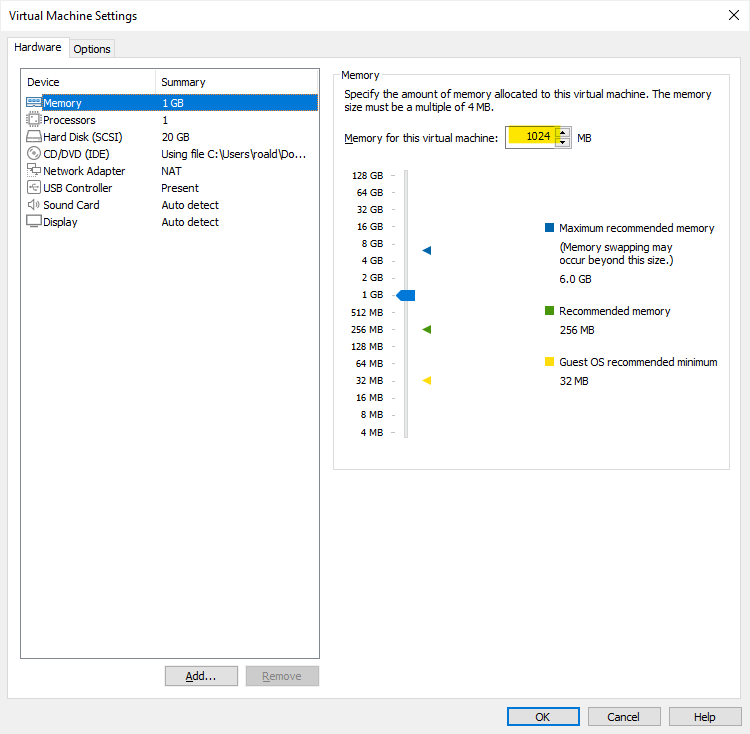
Increase the memory of the virtual machine. I set it to 1 GB. At 256 MB the virtual machine sometimes gets killed when it runs out of memory. If you notice that it crashes, you know what to do.
-
Add the USB drive as a hard disk by clicking on Add.
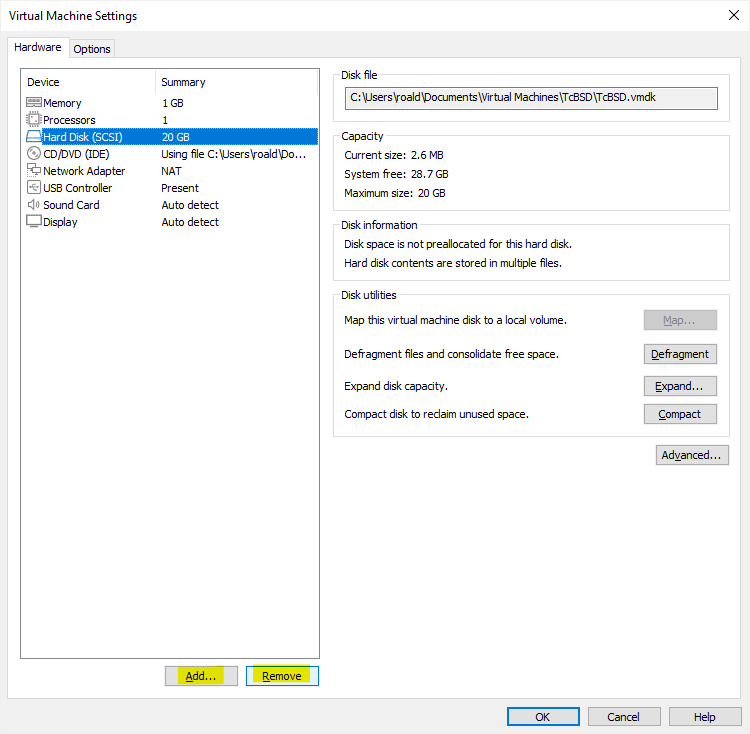
- Then in the new window, select Hard Disk and click Next.
- Select SATA and click Next.
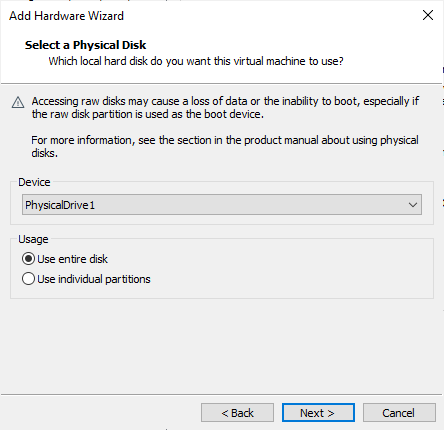
- Select Use a physical disk (for advanced users). Yes, that’s you :D. Click on Next.
-
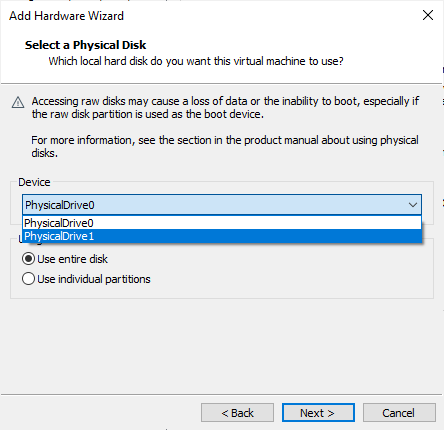
Now you get prompted to choose a disk. Here you want to select your USB drive, which should still be on your computer.

-
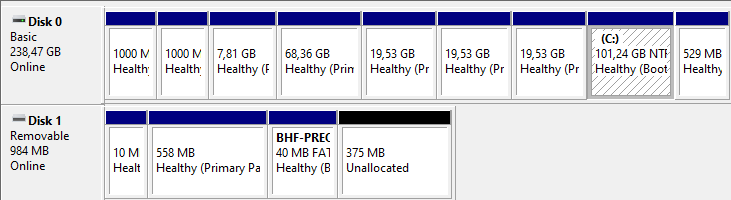
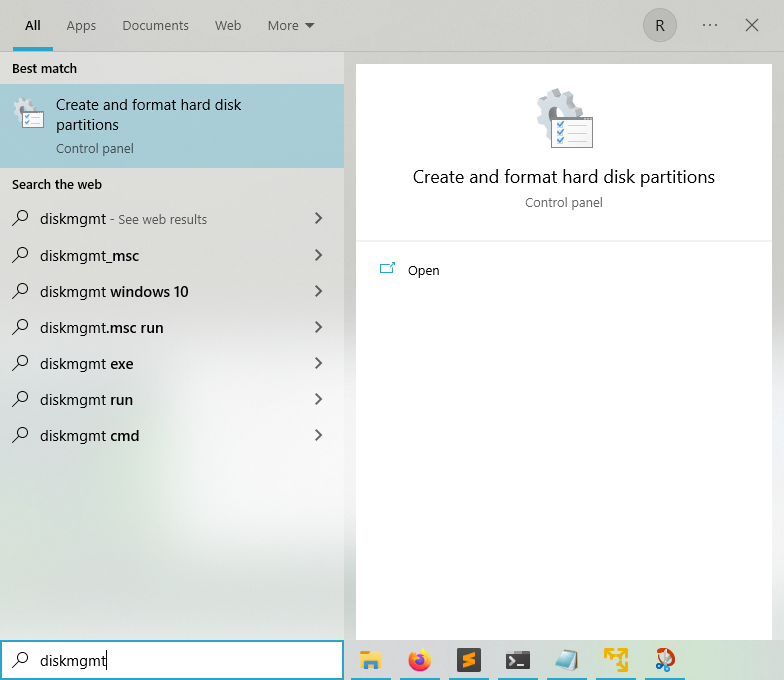
To find out if you need to select Disk 0 or Disk 1. Type in
diskmgmtin the start menu to open Create and format hard disk partitions.
-
You see several partitions. In my case, there are two. Disk 1 is the removable one, thus I want to use that as the hard drive.
-
Now go back to the virtual machine settings and select PhysicalDrive1, Next and Finish.
-
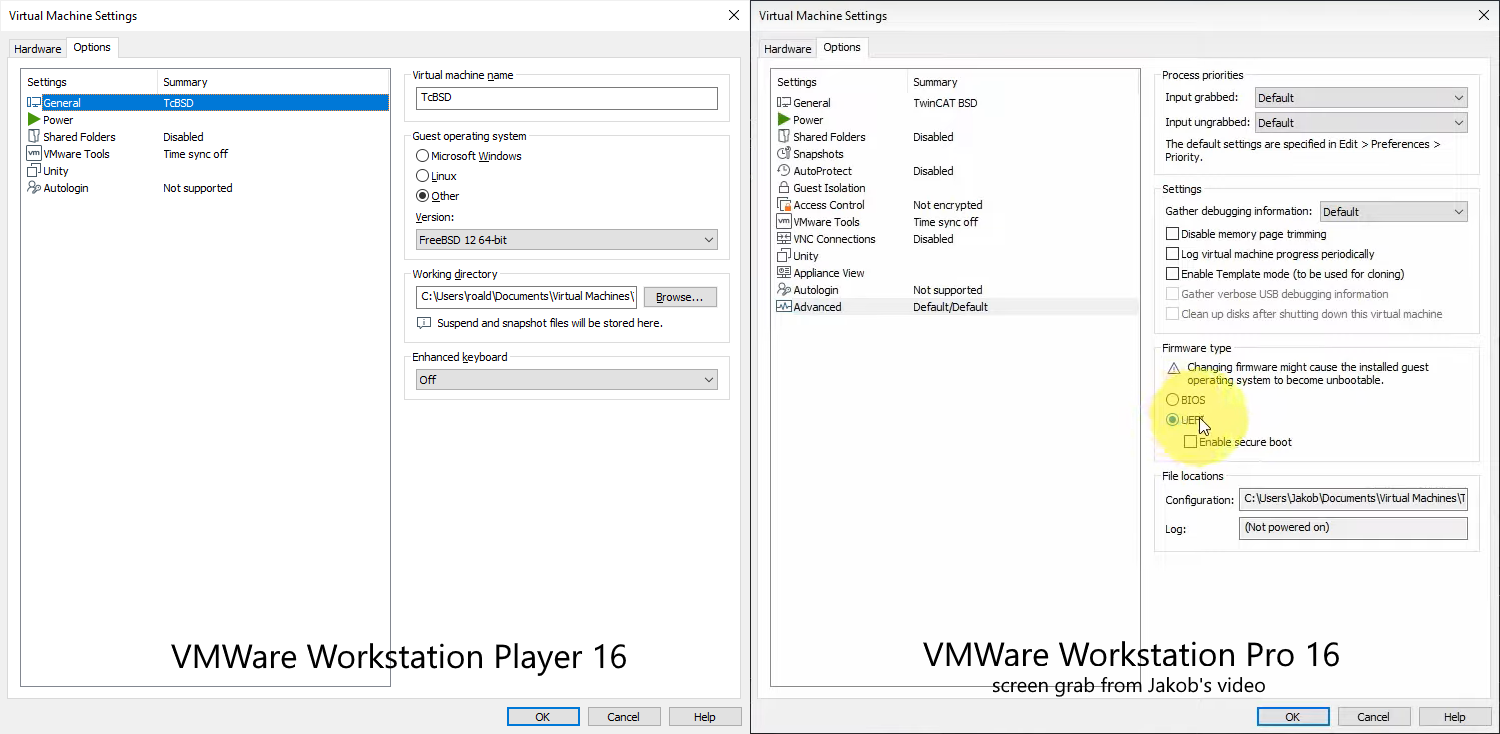
Finally, you set the firmware type of the USB drive to UEFI. If you have a Pro version of VMware, you can set the firmware type in the virtual machine settings under Options > Advanced > Firmware type and select UEFI. If you have the Player version, you:
-
Locate the directory of the virtual machine. You can find its location under Edit virtual machine settings > Hard Disk (SCSI)

- Open the VMX file in the virtual machine directory with a text editor.
- Find the line
firmware = "bios"and replace withfirmware = "efi"and save it. If this line doesn’t exist, add it somewhere.

-
-
Now start the virtual machine with Play virtual machine.
-
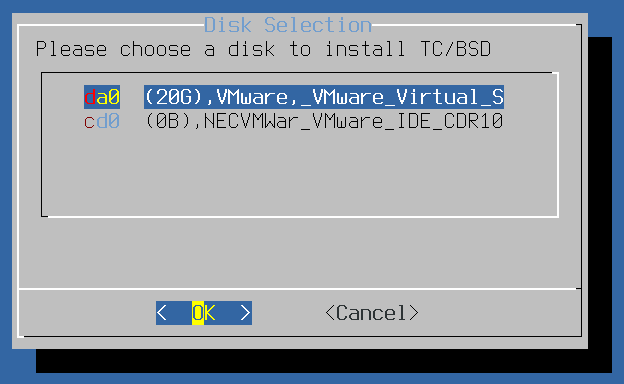
Wait for the installer to start up. This can take a minute. After that, you see the following screen. Select TC/BSD Install and hit enter.
-
Then select the 20G virtual hard drive you made and hit enter.
-
Hit enter again to acknowledge the warning.
- Then it asks for you to generate a password. Type in a password and repeat it to make sure it’s correct.
-
After several minutes the installation is complete and you see the following screen. Select OK.
-
In the new menu select Shutdown so that you can remove the USB drive.
- Remove USB drive under Edit virtual machine settings. Make sure you don’t select the 20 GB hard drive, on which you just installed Tc/BSD.
- Go back to the main menu and start the virtual machine.
-
After some time you see the login screen. Log in with your user name and password you made during the installation.
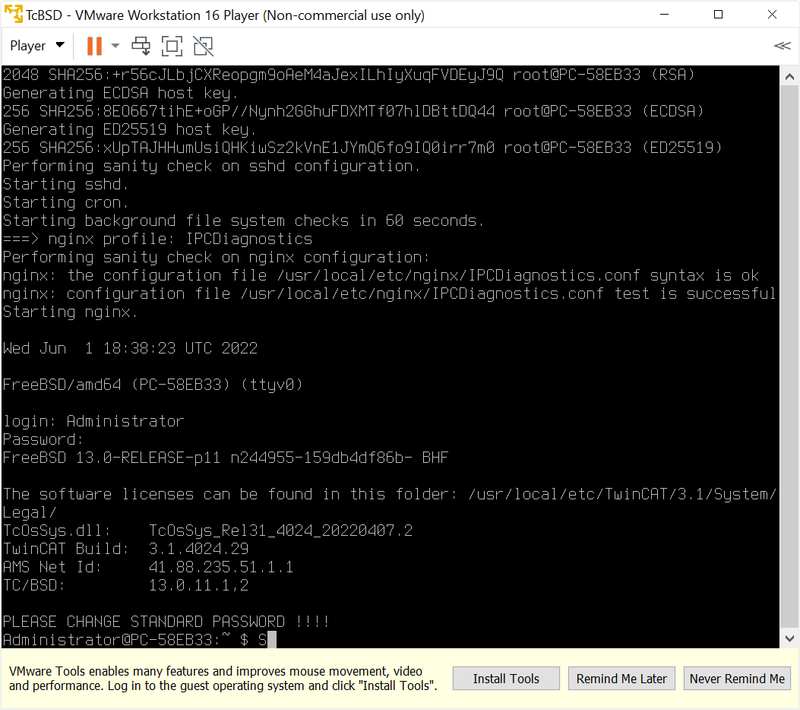
- Congrats. You now have a running version of TwinCAT/BSD.


Device manager
As I mentioned earlier, Tc/BSD doesn’t have a desktop environment. Most things are done from the terminal. However, the device manager has a GUI. To access it, you first need to find out the IP of the virtual machine. You find the IP by typing in ifconfig. The IP is right after inet.

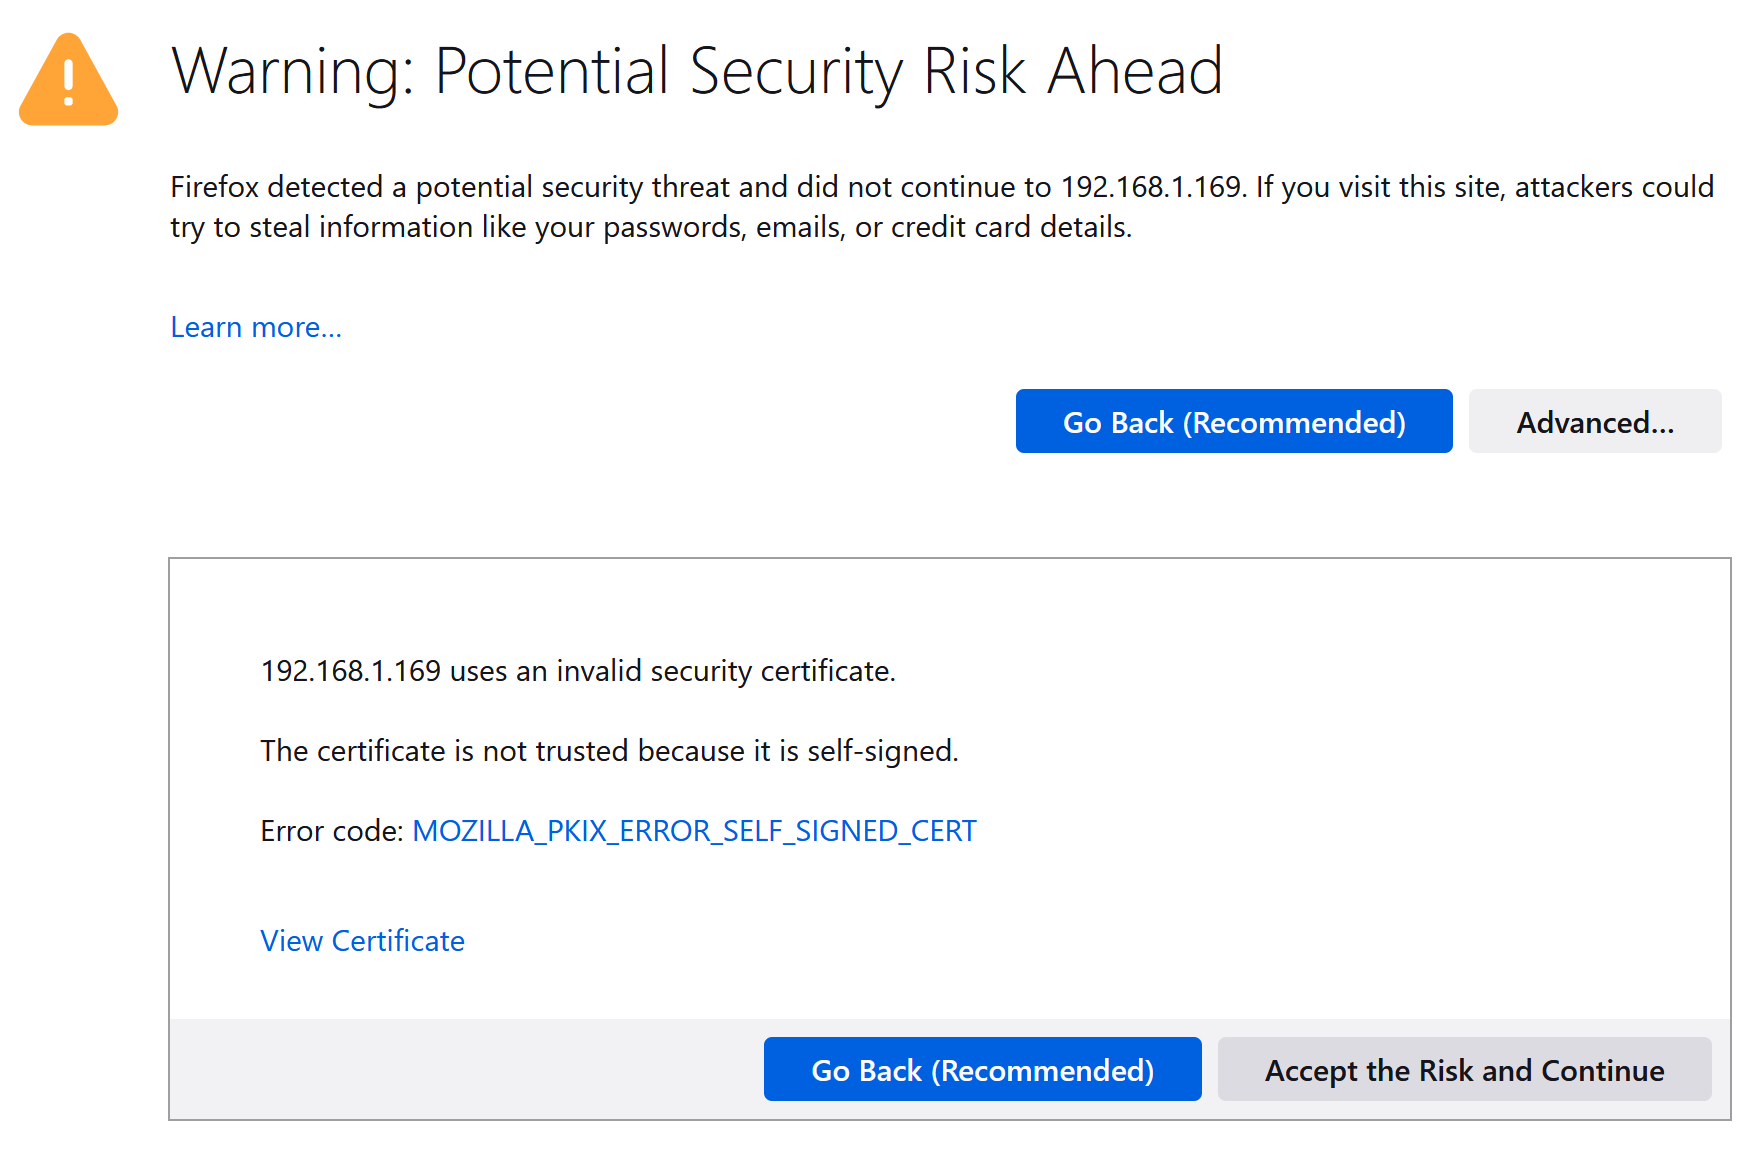
Then open your browser and type in the IP address you found. For me, it’s https://192.168.126.128. It’s possible that a warning shows up. Accept the risk and continue.
From here you can log into the device manager with the username Administrator and the password you set during the installation. The device manager shows all kinds of information about the state of the hardware and the software.

Web console
Next to a device manager, the https://192.168.126.128 page also has a link to a web console. The console shows the same as if you logged into the virtual machine directly, but the web version has a better interface. Mainly because it enables scrolling2 and copy-pasting commands is easier.
Installing packages
As I mentioned earlier, there is no GUI. You do most actions from the terminal. One of the things you can do is install packages, with a package manager. Package managers are a useful feature in UNIX-like operating systems. Although Windows is now also joining the party with winget.
Installing TwinCAT HMI server
Note: See also a video by Coding Bytes which describes this step.
A package which you likely need is the HMI server. I don’t exactly know what it is called, but I know that there is a search feature. If you type in pkg search hmi, you see two results.
$ pkg search hmi
TF1810-PLC-HMI-Web-3.1.4024.11_1 TF1810 | TC3 PLC HMI Web
TF2000-HMI-Server-1.12.754.4   TF2000-HMI-Server
The first one is the old HMI and the second one is the one I want. To install it, type doas pkg install TF2000-HMI-Server and hit enter. Confirm the start of the installation with y. Then a warning showed up. So I did doas service TcHmiSrv start to start it.
=====
Message from TF2000-HMI-Server-1.12.754.4:

--
============================== !!!! WARNING !!!! ==========================
FreeBSD package manager doesn't allow us to automatically start services
during package installation. To use the Beckhoff TwinCAT HMI Server either
restart your system or start 'TcHmiSrv' manually with:

doas service TcHmiSrv start

============================== !!!! WARNING !!!! ==========================
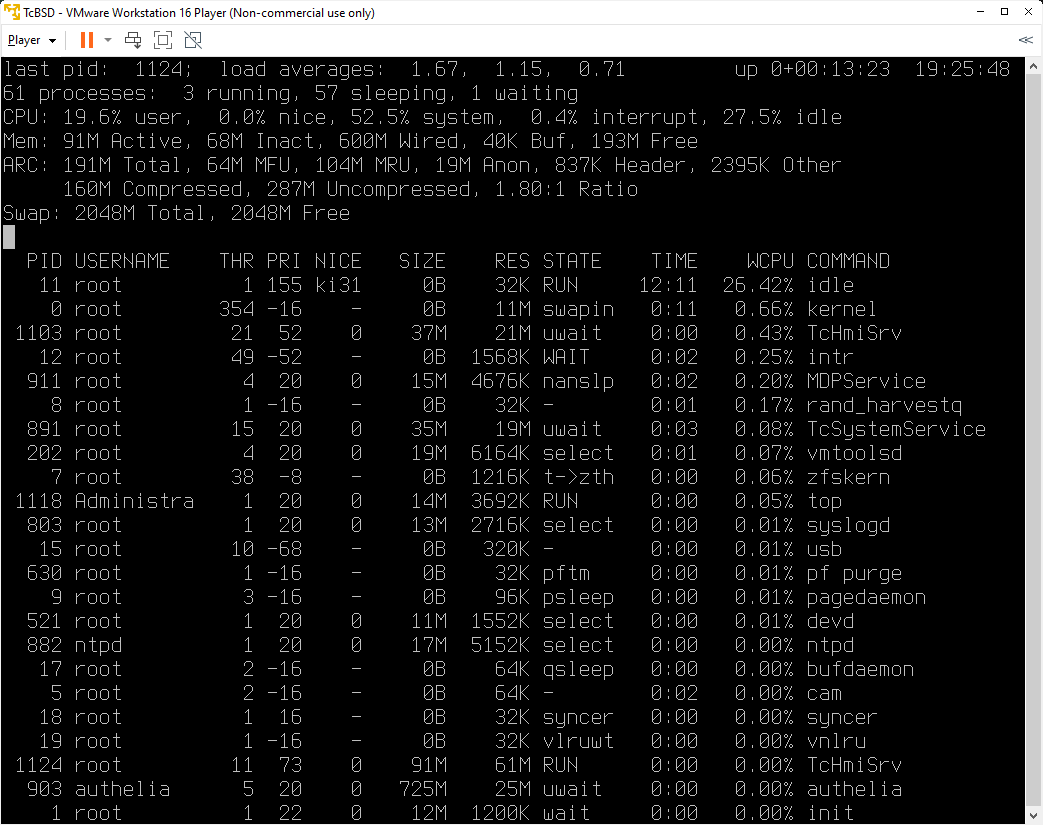
If you then type top and hit enter, you see TcHmiSrv is running. top is the task manager analogue of FreeBSD. It can be convenient to have it open to see if processes are running, or maybe if your virtual machine has crashed. To exit top, press q or Ctrl + C.
Running PLC code
Connecting to the virtual machine
Now you are ready to run some PLC and HMI code on Tc/BSD. You find the target machine the usual way. You go to Choose Target System > Search (Ethernet) > Broadcast search. Note that next to your regular Wi-Fi/Ethernet ports, also two ports from VMware or one from VirtualBox shows up. Make sure the ports of your virtual machine are selected and click OK to start the search.

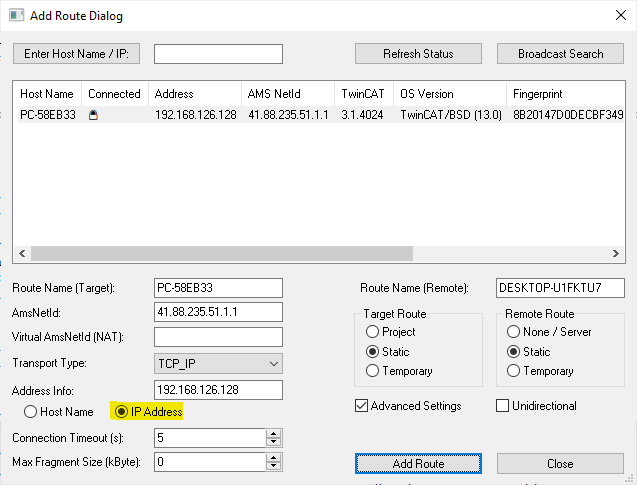
Click Add Route select Secure ADS and click OK. In case it can’t connect, click Advanced to show the options. Then select IP address instead of Host name. Then try to connect again.
After connecting to the PLC, you should be able to activate your configuration. Finally. You can develop TwinCAT code again while sitting in a beer garden like some developers do. Freedom!
Publishing the HMI
With your PLC code running, it’s now time to look at how to publish the HMI. I initially had some issues with publishing the HMI. In the end, I made it work by using TcBSD version 13, which has TcHmiSrv 1.12.756.1. I couldn’t make it work with TcBSD v12.2 which has TcHmiSrv v 1.12.746.0. Furthermore, you need to make sure that your HMI project has the same version as the server which is 1.12.756.1 for me.
Once you have that, you need to add an exception to the Tc/BSD firewall. By default a lot of ports are blocked, including the one needed for the HMI server. To add it, open the firewall configuration file with doas ee /etc/pf.conf from the console. Then add the following new line at the end of the file
# allow TcHmiSrv outgoing
pass in quick proto tcp to port 1010 keep state
Exit the ee editor with Esc, select a) leave editor, save your changes and restart the virtual machine.
Meanwhile, open the PLC project you want to publish on the virtual machine. Verify that the TF2000 HMI Server license is present in your system manager under SYSTEM > License. If it’s not present, add it manually via the Manage Licenses tab. Then activate your PLC project which serves as the back end for your HMI project. Open the HMI publishing settings, fill in the IP address of the virtual machine and press Validate connection. If the connection was successful, select Publish.

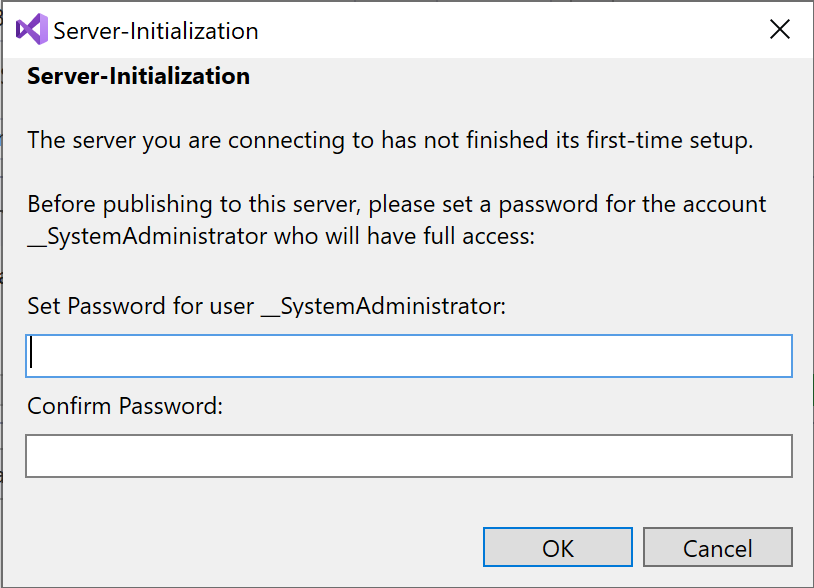
If you connect to the HMI server for the first time, it asks you to set a password for the HMI server. You need this password whenever you want to publish your HMI project or need to log into the HMI server.
Once the password is set you can publish your HMI which then should be reachable at the Browser URL as shown in the publishing settings.
-
The error message:
No suitable dump device was found. Setting hostuuid: 60e34d56-aa3b-ddb2-f508-cbe7cce89d64. Setting hostid: 0x0789008c. swapon: /dev/ada1p2: No such file or directory Starting file system checks: Can't open `/dev/ada1p1' /dev/ada1p1: UNEXPECTED INCONSISTENCY; RUN fsck_msdosfs MANUALLY. THE FOLLOWING FILE SYSTEM HAD AN UNEXPECTED INCONSISTENCY: msdosfs: /dev/ada1p1 (/boot/efi) Automatic file system check failed; help! ERROR: ABORTING BOOT (sending SIGTERM to parent)! 2022-06-04T08:26:05.670175+00:00 - init 1 - - /bin/sh on /etc/rc terminated abnormally, going to single user mode Enter full pathname of shell or RETURN for /bin/sh: root@:/ -
While playing with Tc/BSD in the virtual machine I ran into an annoying issue: I couldn’t scroll up. For example, when I do
TcHmiSrv --help, the help text is to long for the console screen. At first, I couldn’t figure out how to scroll back up, because there is no scroll bar, ↑ shows the previous command and Page Up just shows a~. After consulting Google, I found out that is where the Scroll Lock key is for. I always wondered what this button did. Note: If you’re on a laptop without a Scroll Lock key, you can remap one of the existing key combo’s. ↩
↩